Showing posts with label Tools. Show all posts

Sunday, 29 June 2025

TR7 Head removal tool


Last weekend I took part in Club Triumph’s Coast-2-Coast run (a full report including the aftermath later). I was actually invited by Howard to co-drive the course car. But when I arrived at his home before the start of the event, I was reminded of the fact that some years ago I sent him an AutoCAD DWG-file of the cylinder head removal tool for a TR7. And contrary to me, he had a go at having one made. Sadly since than he wrote of his TR7 in an accident, and got himself a TR7-V8 (the late Paul Darbyshire’s car). As a result of which he hadn’t any use for the tool. So he decided to donate it to me! Which of course is much appreciated!


Probably will do some detailing on it somewhere in the (near?) future. I also have to search for the correct fasteners. But that should be relatively straightforward, as these are mentioned in the previously mentioned file!

Sunday, 20 April 2025

Fitting ‘t Kreng’s water pump


Two weeks ago I removed the water pump with the idea of reconditioning it again. But on closer inspection I found the new (after market) seal hadn't seated properly. This matched my hunch pretty well. So after exchanging some ideas with various people who should have knowledge on the subject, I decided to bite the bullet and go for a brand new water pump. And as these have become fairly expensive, I decided to also renew the water pump’s spindle bush. And with the correct tool, removing this bush should have been easy.


Sadly though that didn’t work. The available rim at the bottom of the bush was to thin the get enough grip on the bush, as a result the puller slipped through the bush constantly. And because of that the bush got damaged. As there was no way back it was time for a rethink and some appropriate brute force. Using an old reshaped screw driver as a cold chisel between the engine block and bush. It looked fairly crude and messy but it did the job without any damage to the block or the jack shaft. The bush did suffer though!


The remains of the original bush (#145022)

Halfway through the cleaning of the orifice for the spindle bush

After the bush was successfully removed and everything cleaned thoroughly it was time to fit the new bush. And with the aid of a small tool made from a damaged water pump axle and some lubrication, the bush could be gently tapped into position. At least that went quickly and without drama!


This also applied for the next job, fitting the water pump. Again all contact surfaces in the block and on the gears were lubricated. After which the pump slipped in without drama. I only had to help a little with a ring spanner on the impeller bolt (turned counter clockwise) to get the pump seated correctly.


Final jobs before the time ran out on Easter Sunday were measuring the required gasket thickness for the water pump cover, fit the cover and fit the inlet manifold. When I fitted the inlet manifold last year it felt like the threads of one of the mounting holes in the head was damaged. That's why I had mentally prepared myself for this job, and had a thread repair kit on hand. But I needn’t have worried. This time all (stainless) bolts went in without any problems!

Remain the final jobs for later in the coming week;
• Connect all hoses;
• Fill the system with coolant;
• Check for leaks;
• Refit the carburettors.


Sunday, 16 June 2024

Fitting ‘t Kreng’s water pump

The title says it all. But sadly a fair amount of time yesterday and today was taken up watching the race of the year; Les 24 Heures du Mans. But I did manage to fit the reconditioned water pump. Where the old pump had put up something resembling a fight while removing it, the new one went in pretty smoothly. Probably helped by applying plenty of lubrication to all surfaces and the fact I paid some attention to meshing the water pumps gears with the gears from the idler shaft. After which the pump could be turned into position using a ring spanner on the impeller’s mounting bolt and turning it counter clock wise. As easy as that. Oh … and I didn’t change the bearing bush in the block as it was in good condition. And I do hope that within a few years I will be able to built a new engine for this car!


Next job was setting the clearance between the water pump’s impeller and the pump’s cover.. Rather straight forward though it took some time to get the base reading. According to the book you measure the gap between cover and the blocks contact surface (0,40 mm) and add 0,30 - 0,50 mm for the required gasket thickness. In the end I went for a gasket with a thickness of ± 0,80mm from my spares.


With the water pump back in place I could start with the less glamorous parts of the job, cleaning threads and removing old gaskets. Which did take much more time than expected.


So by the time everything was cleaned my mobile phone’s battery was running low, and the Le Mans race was entering its final stages. But it left me with enough time to fit the inlet manifold (paying extra attention to the infamous connecting tube (UKC2538, between the thermostat cover and the water pump cover) and clear away the tools. All in time to watch the final hour of the race on the telly. Refitting the carburettors etcetera hopefully in the coming week or so ... At least full circle with noon yesterday!


Saturday, 15 June 2024

Removing ‘t Kreng’s water pump

With the replacement water pump for ‘t Kreng ready, I started on the final job. Fitting it to the engine. But before I could do that I first had to remove the old pump. Starting with the always rather messy job of draining the coolant fluid. But I am getting good at it as I only spilled about half a pint on the drive!


With the coolant drained from the engine I could begin with the removal of all the parts that are covering the water pump’s cover Starting with the coolant hoses, followed by the fuel lines, the throttle and choke .cables, the carburettors and the inlet manifold.


And this left me with the final parts. The water pump cover and the water pump itself. I did have some worries about the water pump’s cover, as they have a tendency to corrode solid into the engine. This being caused by galvanic corrosion between the alloy cover and the cast iron block. I needn’t have worried. The anti-seize paste I used 17 years ago did its job. The cover came out without any problems. The pump itself put up something resembling a fight but lost against my proven extraction tools.


With the pump out it was time to inspect all parts that had come off. To start with the infamous connecting tube (UKC2538) between the thermostat housing and the water pump cover. Those who follow this blog might remember that this tube had been leaking on and of for a few years. And there sure was a reason for that. The two rubber O-rings on the tube had completely dried out and hardened. And as such no longer effective in sealing.


Next item to check was the pump itself. And that too was rather obvious. The water seal underneath the impeller was completely worn. Actually so worn that the spring inside the seal had reached its maximum travel. Leaving the seal free from the underside of the impeller. With the brass bearing cage fitted the bottom of the water seal should be sitting just free of the water thrower disc. In this case there was enough room to move the seal up and down. And air gaps are pretty poor at sealing!


Final item to check was the water pump cover. I have seen a few over the years that were badly damaged by cavitation. Probably caused by incorrect coolant (plain water) in combination with an incorrect set gap between the impeller and the pump cover. But as can be seen in the picture above, this one turned out to be in pretty good condition. Cleaning and reassembly next.

Saturday, 1 June 2024

Water pump reconditioning part 1


It’s been a while since the last update on the coolant leak from ‘t Kreng’s water pump. Well the leak is still there, and still big enough not to ignore. Though it looks like it has lessened slightly. Maybe that is just wishful thinking! So I thought it might be a good idea to start reconditioning a water pump from my spares stock. Main reason being to keep the car more or less mobile as long as possible, and to shorten the time it is immobile.
A short search through my spares came up with two good candidates for reconditioning. Though from one I first had to remove the brass cage from the engine from which it originated. Glad I knew were I had stored my home made “cage-puller”, as it makes this job so much easier!


And this pump turned out to be the best candidate. So next job was a trip to a friend’s work shop as he has a hydraulic press and a lathe. And these are necessary tools for removing the impeller from the pump’s axle, and cleaning the mating face for the seal.


Currently the machined impeller is in an oil bath to aid removal of any remaining corrosion. And the axle is positioned vertically in a support with some penetrating oil on top of the water thrower disc. Hopefully this will come off undamaged, as these are no longer available.
And to end a day well spent on things TR7 I spent a few more hours on the interior for the ’76 car. More on that later.

Sunday, 7 May 2023

DHC repairs #4: Tank removal


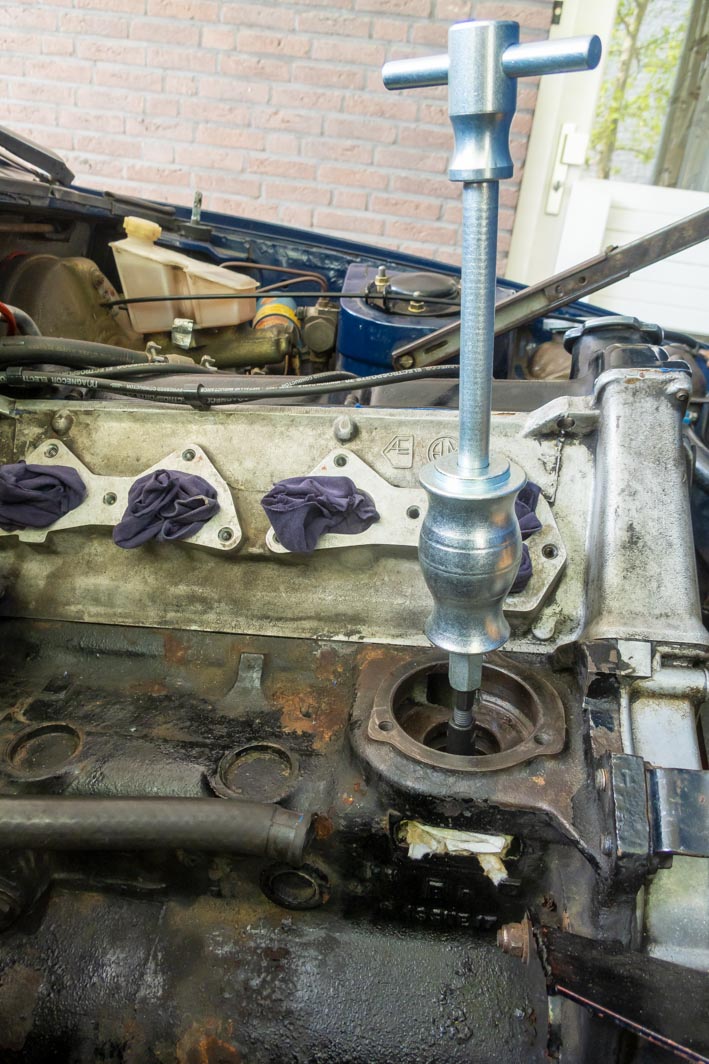
As the title suggests it was time for some spannering fun. And as can be judged from the interval with the previous post the tank straps decided to put up a fight!
My first line of attack was a traditional approach, using a deep 17mm socket and wrench to undo the four nuts. But it turned out that all nuts were rusted solid to the tank's support straps. Which resulted in the straps trying to wind themselves around the socket. Trying to keep the straps in position with an adjustable spanner didn’t work either as I only have two hands. The first round was for the tank straps, time for a change of plans.
After discussing this with a few friends we agreed that the best solution would be to use a pneumatic wrench and an assistant to keep the straps in check. Sadly that didn’t work either because the (very large) compressor is situated at the other end of the premises. As a result of which we ran out of air hose well before we reached the car.
Time for plan C, forget the compressor and use a cordless impact wrench. Biggest problem here is that I don’t have one, nor any of my friends close by. Luckily a local employee from one of our framework contractors came to the rescue. Enabling me to borrow this lovely toy over the weekend.


Usually this heavy duty tool is in daily use on this kind of work:


Needless to say this made light work of the removal of the tank’s support straps. Actually so easy that I had 3 of the 4 mounting points undone by the time the assistance arrived! Though the extra pair of hands made the actual removal of the tank so much easier.


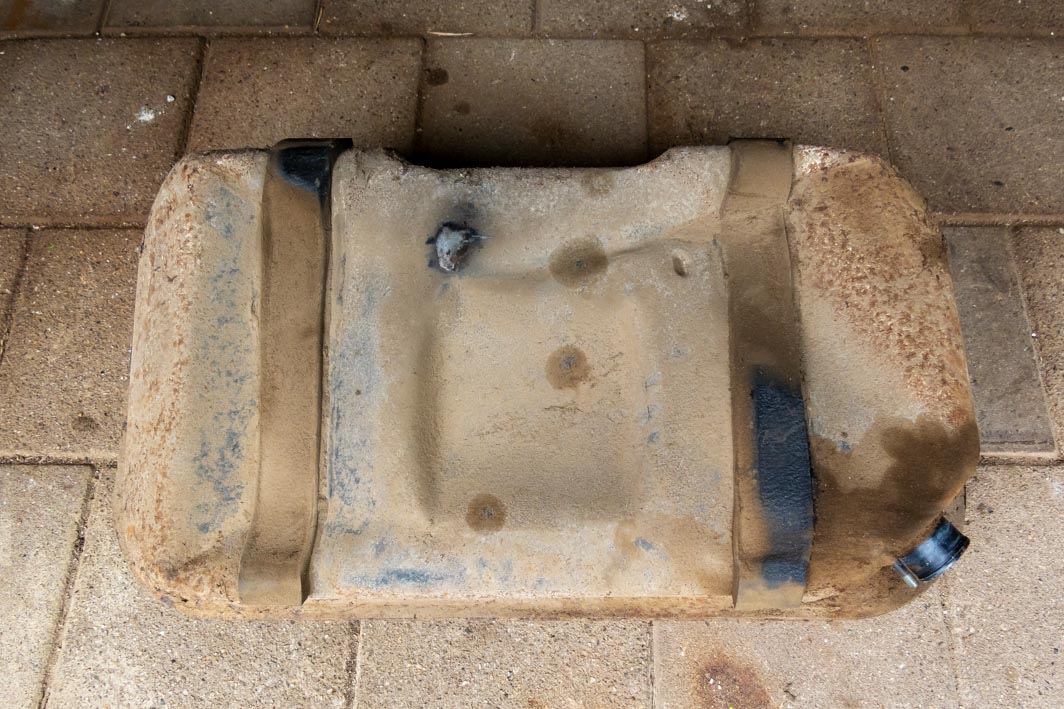
As can be seen in the pictures above the damage to the tank is not limited to the bottom of the tank. So it looks like it will only be fit for the skip. Luckily the tank’s support straps and mounting studs turned out to be in fairly good condition. And after some tender loving care they will be fit to be used again. Result!


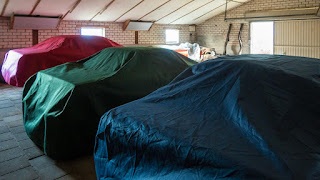
And with the tank removed rather quickly I was able to remove doors, boot lid and hood frame. But the biggest challenge is probably still in the future! Removing all parts stocked in the other spare body I will be using!

Sunday, 29 May 2022

Spark plugs


As part of the pre MOT service I decided to change the spark plugs on both my road going TR7’s. To start with the plugs from ‘t Kreng. The Sprint powered car. These plugs have been in the engine since September 2014, covering 10.509 kilometres since.


They don’t look to bad, but I think the fact that cylinder #1 is slightly down on compression shows here. A check of the valve clearances might also be a good move!


While working on this car I did another check of the connecting tube (UKC2538) between inlet manifold and water pump cover. After the previous inspection I had cleaned and dried the area. And guess what, it was completely dry this time! So for the time being no action required!


Next it was time to change (and check) the DHC’s spark plugs. These were also fitted in 2014. But they have covered 20.220 kilometres since.


Again not much wrong , though I wonder while the plugs #2 and #3 are slightly wet with fuel. Rather weird as the engine hasn’t turned since September last year. Also clear that there is a light oil deposit on plug #3. Maybe a proper tune up (valve clearances and timing check ) will improve things here. But first I think the car needs to be used more!

Sunday, 30 January 2022

FHC resto nr. 139; Fuel line


With the brake pipes and hoses fitted to the car it was time for the next and final pipe bending job. The fuel pipe(s) from the tank to the engine bay. I purchased a bespoke
tool for this last year. And for the short pipe from tank to RH rear wheel well (PKC390) it worked perfectly, as these pictures show.


But for the more complex main pipe, the lack of a proper reference point on the tool proved the tool useless. Time for 2150mm off new 5/16” copper pipe and another cheap tool from the internet. This time I chose a similar tool as the (main) tool I used for shaping the brake pipes.


And with this tool (and its ability to use reference points) bending the main fuel pipe (PKC389) in its correct shape, turned out to be fairly easy. This was aided by a few original pipes which I could use as a template. But it was again rather time consuming!


With both the pipes finished it was time for their final stage, fitting them to the car. But before I could do that, I first had to fit the various plastic clips to the body, needed to support the pipe underneath the car. This turned out to be rather time consuming. Especially cleaning the anti-chip-coating from the small steel mounting heads for the clips along the sill (ZKC924) took me well over an hour!


But after that the clips still didn’t want to go over the heads properly. This time caused by the sharp edges of the clips digging into the thick anti-chip-coating. Luckily that was easily solved with a sharp pen-knife. This was used to chamfer the “front” edges of the clips a little, and thus preventing them from digging into the anti-chip-coating:


Final preparations consisted of slightly enlarging the mounting holes for some of the other pipe clips. And with that job done, it was time to fit the various clips to the car;

Rear bulk head

Sill

Cross over behind the passenger foot well

Left hand front chassis rail

And with all clips in place it was time for the moment of truth; fitting the fuel pipe itself. Didn’t start well, as one of the clips broke immediately. Luckily I have a few (second hand) spares. But the chosen replacement decided to break while fitting it to the car. Bugger! The second replacement went on without any problems. As did the pipe itself. It needed hardly any adjustments to get a decent fit!


On to the next job; checking and refurbishing the remaining wiring looms and fitting them to the car.