Wednesday 24 June 2020

Another MOT for the DHC


This morning the DHC was presented at a friend’s workshop for her biennial safety and environmental inspection (or APK as it is called here). Most important (for me that is) part of the inspection were the readings from the brake test and the emissions test.


To start with the brakes. With the readings [N] shown above (left to right Front, Rear, Handbrake), it was a clear pass. But I am still not really happy with how they perform. Maybe I am just spoiled because my two other cars (‘t Kreng and a late Land Rover Defender) both have discs all round. And as such have a much better pedal feel. Especially when compared to a 40 year old front-disc and rear-drum set up!


The emissions test was a fail, though that didn’t come as a surprise. The workshop owner guessed that already, during my last visit to him with this car in November last year. And he was proved to be right: with a CO percentage of 6,17% it was slightly rich. Nothing to worry about as it only needed adjusting both adjusting nuts by one flat to get the readings well below the maximum of 4,5%. Another pass!


All the other checks and the general visual inspection revealed no further problems.


So another clean sheet of health for the next 2 years. Turned out that since the previous APK the car covered nearly 7000 kilometres. Not bad considering a general lack of time and three other cars to 
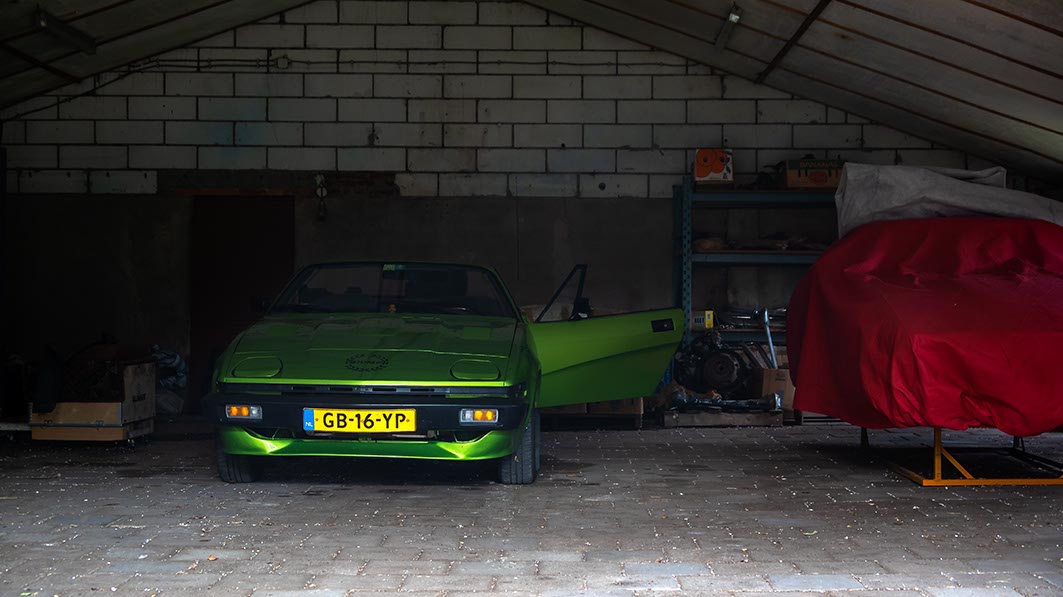
spent time on! Time to kill some more time with a scenic tour on the way home (including a short photo shoot) to enjoy the fine early morning weather!


Sunday 21 June 2020

DHC: Pre MOT check and first drive


Due to the current Corona pandemic I haven’t spent much time on the DHC so far this year. I only swapped the brake light switch while in the shed earlier this year. But as she is booked for her biennial safety and environmental inspection (or APK as it is called here) soon, I thought it a good idea to check if everything still was functioning properly. And that is what I did yesterday.
I started with the lights, and in particular the brake lights. And that’s because I changed the brake light switch earlier this year. I needn’t have worried, the brake lights worked. As did all the other lights. But I was in for a little surprise, as the lights in the instrument cluster (converted to LED last year) were burning in a different pattern now (the middle LH bulb was now on strike, instead of the one on the extreme left). Looking at the picture below I think it is safe to say that when I remove the two middle LED’s, there still is plenty enough light to clearly read all the gauges in the dark. Oohh … and I almost forgot to mention that the clock stopped working and the fuel gauge now reads ¼ full permanently!


The wipers, screen washer, heater and horns also did function properly. Time to move over to the engine bay. All levels still were as I left them almost 7 months ago, and no traces of oil or coolant in the rectangular hole underneath the water pump. Only the level for the carburettor’s oil dampers was low. But that was to be expected. And pretty easy to solve with the small oil container I carry in the engine bay for this reason!.


But not everything was as it should be. Despite a new front pulley and oil seal, which I fitted a few years ago, there still is an oil leak there. Will probably have to look at the markings on the dipstick. As it could be caused by over-filling the sump. To be continued one day when I find the time to calibrate the Dolomite dip stick to this engine.


As the suspension and brakes were thoroughly checked and refurbished last year, in preparation for Club Triumph’s 10 Countries Run, I decided to leave these alone. So I finished the inspection with the tyre pressures. They all had dropped a little, from 2,0 to 1,9 Bar to be precise. Easily rectified with a tyre gauge and a bicycle pump.

This afternoon I took the car for a short two hours’ (or 100 kilometres)  drive to see if everything else was OK with the car. It looks like! But more importantly it was nice to be driving with the wind in the hair again.


And after that she was tucked away again in the shed. Though not for 7 months but till this Wednesday, when she’s booked for her biennial APK inspection (TüV Prüfung for the Germans or MOT inspection in the UK).


Wednesday 17 June 2020

FHC resto nr. 96; Starting on the wiring


Since cleaning the body harness already a few weeks ago, I compiled a list of all the connectors, wires etc. I think I am going to need for the renovation of the various wiring harnesses for the car. And to help me with this  I used the list from when I restored the DHC 10 years ago. Most important parts are modern (so called super seal) connectors to replace all important connectors outside the cabin and boot area.


But I also will need a few rolls of (non-adhesive) wrapping tape, PVC insulation sleeves, and some lengths of correctly colour coded wires to adapt the later harnesses for a roof mounted interior light.


And with all the correct tools at hand it was time to start with the first harness. For this I choose the simplest harness on a TR7, the gearbox harness UKC 9200, together with the matching reverse light switch. Yes I know, that combination wasn’t fitted to a 1976 TR7, but my car will get a 5-speed gear box and the later 12 fuse main harness! And despite it being a very simple combination, it was in need of some proper tender loving care as the two pictures below clearly show.


After a close inspection of this harness it was decided that the wires (all three of them) were good enough to be reused. And as expected the connectors were heavily contaminated with oil, road grime and showed clear sign of oxidation. Also the protective sleeve had seen better days. So this too was discarded. This left me with the wires only, and these were cleaned thoroughly. Time to get the wiring tools out, to remove the old connectors and fit the new ones.


And with the correct tools the removal of the old, and crimping on the new contacts was the proverbial piece of cake. The only challenge (If you can call it that) was using the correct connector block for the wire’s ends, and put the wires in the connector blocks in the right order. To help me with this task I used the many pictures I took during the restoration of my DHC, some 10 years ago. Call it standardization!


Though small progress it is a start. The remaining wiring harnesses are next in line. I presume it will be a few weeks before they are all refurbished …

Saturday 6 June 2020

40th Anniversary for the DHC!


It is exactly 40 years ago today that my DHC was first registered. Which, with the current rules here in The Netherlands, means that from now on she’s tax exempt. For the second and hopefully last time, I have to add J.


And what better way to celebrate than with a look back. I already posted a lot of pictures a few years ago of the car in its current guise, to celebrate 30 years of ownership. This prompted me to go in search of some previously unreleased footage of the car as it was at the beginning of my ownership. And pretty much as it left the factory:

Crossing the Mechelderbeek (NL 1989)

On The road from Paarlo to Melick (NL 1989)

Triumph Competitions, Slingerberg Geulle (NL 1990)

Near the Ruins of Bleijenbeek Castle (NL 1990)

In the countryside near Graby, and my first trip with the car to Britain (UK 1990)

Triumph Competitions, Spa-Franchorchamps circuit (B 1993)

Overlooking the valley of the river Gulp near Gulpen (NL 1994)

At the finish of the 6th edition of “De Nachtrit”, Town Hall Vaals (NL 1994)

Returning from a trip to Britain, Channel Tunnel (F 1995)

Touring The Lakes, Eskdale (UK1997)

Touring The Lakes, Wrynose Pass (UK 1997)

And finally a picture of the car taken at the end of last year’s driving season
(Baarlo NL 2019)

Monday 1 June 2020

FHC resto nr. 95; Cleaning side lamp lenses

Killed another few hours on the restoration of the ’76 TR7 this Whit Sunday weekend. While going through the boxes with spares in search of a gearbox harness (I really should make an index!), I found an undamaged RH front side lamp lens. I already had sourced an undamaged LH lens for the “to-do-when-I-have-nothing-better-to-do-box”.


So with the set complete (RTC1794/1795) I spent a few hours cleaning them. For this job I used some rather exotic cleaning materials 😋 Like an old nail brush, a sponge with scouring pad and an old tooth brush! And warm water, washing-up liquid and toothpaste of course. Nothing high tech really!


Most of the dirt came off pretty easily. Only a few small patches of what looked like tar put up something resembling a fight, which they lost against some hotter water.
With all the dirt removed and the lenses rinsed of I noticed that the plastic surface had become dull in places. That is where the tooth brush and tooth paste came in. And after some polishing they look like new again.


That would mean that the job was finished. But I decided on a little detailing. This to prevent dirt, that will inevitably find its way between the lens and the gasket, from being visible. I used this trick on the DHC, and almost 10 years on the lenses still look fresh. To achieve this I painted the inside of the outer rim silver, using a felt tip paint marker from Tamiya.


In my opinion it looks much better than the original transparent finish of the outer rim.