Showing posts with label Transmission. Show all posts

Tuesday, 30 December 2025

My TR7’s in 2025


One final look back on 2025 from a TR7 point of view, before 2026 is well and truly upon us. Starting with the repairs of the DHC’s body. Below are a few shots of the work done so far. More in the relevant blogposts;

Early in the year the original body shell of that car saw the light of day again,
after many years of storage in the shed.
Ready for the next chapter in this car’s life and a new beginning!


After paint removal and shot blasting.


The repairs of the right hand sill and rear wing edge.


Rear of the right hand cabin floor section.

Left hand sill repairs.

Rear right hand suspension pick up points.

Next car in line for some attention was the 1976 TR7. Actually looking back not much work was done to this car (proof HERE!). But there has been some progress. Starting with a few small interior jobs.

Refurbishing and fitting the early style roof mounted interior light.

Fitting the gear-lever-gaiter-finisher to the gear-lever-gaiter.
It wasn’t as straight forward as it looks because I wanted the top of the
gear-lever-gaiter to be folded inside by a few millimetres to give a nicer finish.


Reassembling and mounting the steering column.
Always nice putting nice shining parts back on a car!

Than there was the business off redoing the gearbox extension 
because
my first attempt turned out not to be thorough enough. I think it is now.

And swapping the mounting hardware for the brake
balance pressure reducing valve for some nicer items.

Later in the year I had a go at fitting the ill-fitting but very nicely refurbished repro parcel shelf to the car. Needed an extra pair of hands to complete this job. But well worth the effort. And with the parcel shelf in place the boot trim could be finished:


But most of my Triumph time was spent on ‘t Kreng. Starting with another water pump replacement earlier in the year, after which the car was used as much as possible.


So far this pump has been pretty fine, with only a few very tiny leaks from time. But that is nothing to worry too much about with a graphite drag seal. These can always leak a tiny bit. So the most worrying bit is the lack of time to use the car on a regular basis. And thus preventing oxidation starting on the water pumps sealing surface. Which in turn can start another leak. But I did my best, covering exactly 2750 kilometres since fitting the new pump in the second half of April 2025. With the last drive just over a week ago:


End I reached an important milestone with this car. The car's odometer is around the clock for the second time in its life! Sadly at the moment the roads are covered in rock salt to prevent icing. So the next drive will be “somewhere” in 2026!


Tuesday, 9 September 2025

Out and about with ‘t Kreng


It’s already been a few weeks ago since I changed the hydraulic fluid in the brake and clutch circuits of ‘t Kreng. But I hadn’t had the opportunity to test the car after the bleeding session. Luckily last Saturday Roger and I had planned to do the (hopefully!?) final reconnaissance of the route for this year’s edition of our “Nachtrit”.
Though I did have some reservations on choosing ‘t Kreng as the car for this tour, I ultimately decided to go for it! And glad I did, as it was a fabulous ±450 kilometres long drive from door to door. And circa 300 kilometres of these were driven on, mostly Belgian, country lanes and back roads.


It was jolly good fun. So much so I did forget to take some pictures from time to time! It was also a stark reminder of how good this car still handles after all those years since she was restored.

Lunch stop in the small village of Barvaux-sur-Ourthe.

Route de Saint-Antoine in Fays

And when I returned home I thought it would be nice to check how these ±450 kilometres would show on the hydraulic fluid of the clutch system. Well here’s the answer. The picture I took directly after bleeding:


And for comparison the picture I took upon returning home with just over 450 kilometres later. Already looking slightly murky. And it clearly shows to me why the hydraulic systems need regular fluid changes:


The cooling system again performed faultlessly!

Sunday, 17 August 2025

More TLC for ‘t Kreng


Part two of the general service and maintenance check of ‘t Kreng, which was carried out over this weekend. With the most important job being flushing and bleeding the hydraulic fluids. From a mileage point of view this wasn’t really necessary. But both clutch and brake fluid were well over three years old. Where my normal interval for these fluids is two years. So time to call on the help of a friend for a traditional flushing and bleeding session!
Starting with emptying and cleaning the clutch cylinder’s reservoir. And this immediately showed why regular hydraulic fluid changes are absolutely essential. The fluid I sucked out of the clutch cylinder’s reservoir was almost completely black. Forgot to take the picture but the one in this earlier post gives a good indication on how it looked! After that the reservoir was cleaned and filled was fresh brake fluid (Bosch DOT4). Flushing and bleeding the clutch system was left till later though.


We moved to the brake system instead. Starting with the removal of the brake master cylinder’s pressure failure switch. Always tricky as this one is by now old and brittle. But I succeeded to remove it intact. Probably helped by the anti-seize paste I used when I re-fitted it a few years ago.


With that hurdle successfully out of the way, we could start flushing and bleeding the brake system. Starting with the front brakes which are fed through the rear chamber of the fluid reservoir. This chamber was also first emptied with a small manual suction pump, after which it was filled with fresh fluid. And the flushing/and bleeding could begin, starting with the front calliper on the right hand side. For both sides together, we used twice the contents of the rear chamber. No air came out.


As the reservoir’s front chamber can’t be emptied with my simple pump (a large syringe type affair) we had to empty this chamber by pumping the brake pedal with one of the bleed nipples at the rear open. My assistant was a bit overzealous though, emptying the front chamber too far. Which resulted in some air being drawn into the system. Luckily the air could be bled very easily though one of the two bleed nipples at the back.


Next job was flushing the clutch system. With the reservoir filled with fresh fluid, and the old fluid still in the pipe, it should be clearly visible when all the old fluid was expelled from the system. It was! But just to be sure all the old fluid was expelled, the contents of a full reservoir were flushed through the system after clean fluid came out of the master cylinder. Job done! Actually the biggest problem here was removing the rubber dust cap from the slave cylinder’s bleed nipple underneath the car! It had collected some oil, resulting in a rather slippery dust cap.


Next on the to-do-list where the wheels. They would certainly benefit from a good clean. Rather straightforward with warm soapy water and a collection of different brushes. I did need a shower afterwards!


Final job on the on the to do list was cleaning the two earth points behind the head lamp mounting panel. Hardly any oxidation there, only a lot of paint. So I cleaned away the paint around the mounting points and refitted the earth points using some copper slip to prevent future corrosion.


And the final job for the day was cleaning the steering wheel and treating it with a leather conditioner. The lack of use in the recent years had dried out the steering wheel’s leather cover. And after well over thirty years of service (it started life with me when I fitted it to a Mini Cooper, in 1994!), it could do with some tender loving care. It did soak up quite a bit of leather conditioner fluid.


Sunday, 9 February 2025

FHC resto nr. 168; A few small jobs

Over the weekend I spent some time in the shed. Mostly to do some work in preparation for the repairs of the DHC (more on that later). And in between I carried out a few small jobs for the ’76 car. Starting with the gear lever gaiter. This was refurbished over 10 years ago, but it was still missing the top finisher. This part was 3D printed already 4 years ago but I never got round to fit it. But that is sorted at last!


The next job was to trial fit a new reverse light switch. As the original items have the wires fixed permanently they are becoming prone to failure with age. This is caused by the aging wires breaking of where they are soldered to the switch. And the original switches are no longer available. So I went in search of an alternative, which I found in the parts list for LT77 equipped Land Rovers (part number PRC2911G). And as you can see it is a perfect fit. Now I only have to fabricate a short loom with two spade connectors on one end and a two pin super seal connector on the other end. Spot the difference!


It looks like old oil and grime is coming to the surface of the alloy casting!

And final job should have been fitting the mounting tube and bearing carrier for the steering column. But an inspection before started work revealed some serious distortions of the mounting tubes for the column switches’ shroud. Probably caused by excessive temperatures during the paint removal process (pyrolysis). So another job that is added to the to do list (cleaning and painting the sourced item from the shed.


Sunday, 15 October 2023

FHC resto nr. 155; 10 Years into the project


The coming week (on October the 17th to be precise) it is exactly 10 years ago that I purchased my last TR7. A pretty early Dutch FHC which was first registered on the 6th of October 1976. It left the factory clad in a Pimento Red (CAB) coat of paint and was fitted with a black cord (CPAA) cloth interior.
I actually stumbled upon the advert for this car while I was doing my periodic internet search for a set of Wolfrace Turbo wheels for my DHC. The rest is history as they say!

2013-10-12 After a short test drive to get an indication of the cars mechanical parts,
before agreeing on the actual purchase;

The original plan was to give it a proper service, a few repairs where necessary, a fresh MOT, and sell it on minus the Wolfrace wheels. But I was never any good at selling cars. And I have always been longing for an early Dutch registered Speke built TR7. Mainly because I really have come to like the clean lines of the early bonnet design.
So I decided to restore it to a more or less standard looking car, with a few (reversible) period detail changes incorporated in the process. And the schedule wasn’t too ambitious either! It should be completed by the time the car became tax exempt some three years later.


Sadly life (and death) intervened several times in the past years. As a result of which the car is still not finished 10 years on! Though I am getting there slowly but surely. At least this 10 year “jubilee” gave me an excuse to trawl through the well over 2000 digital pictures shot so far during the restoration. And post this pictorial summary of the work done so far. In chronological order;

2014-01-29 Removal of the engine while dismantling the car,
in preparation for the body repairs;

2014-02-12 The empty shell remaining after dismantling of the car was completed;

2014-03-15 While the body was away for paint removal and shot blasting,
I started on various parts needed in future. The rear suspension in this case;

2014-03-29 The drivers footwell after shot blasting;

2014-03-29 The left hand front inner wing area after shot blasting;

2014-03-30 Another part that arrived well ahead of schedule;
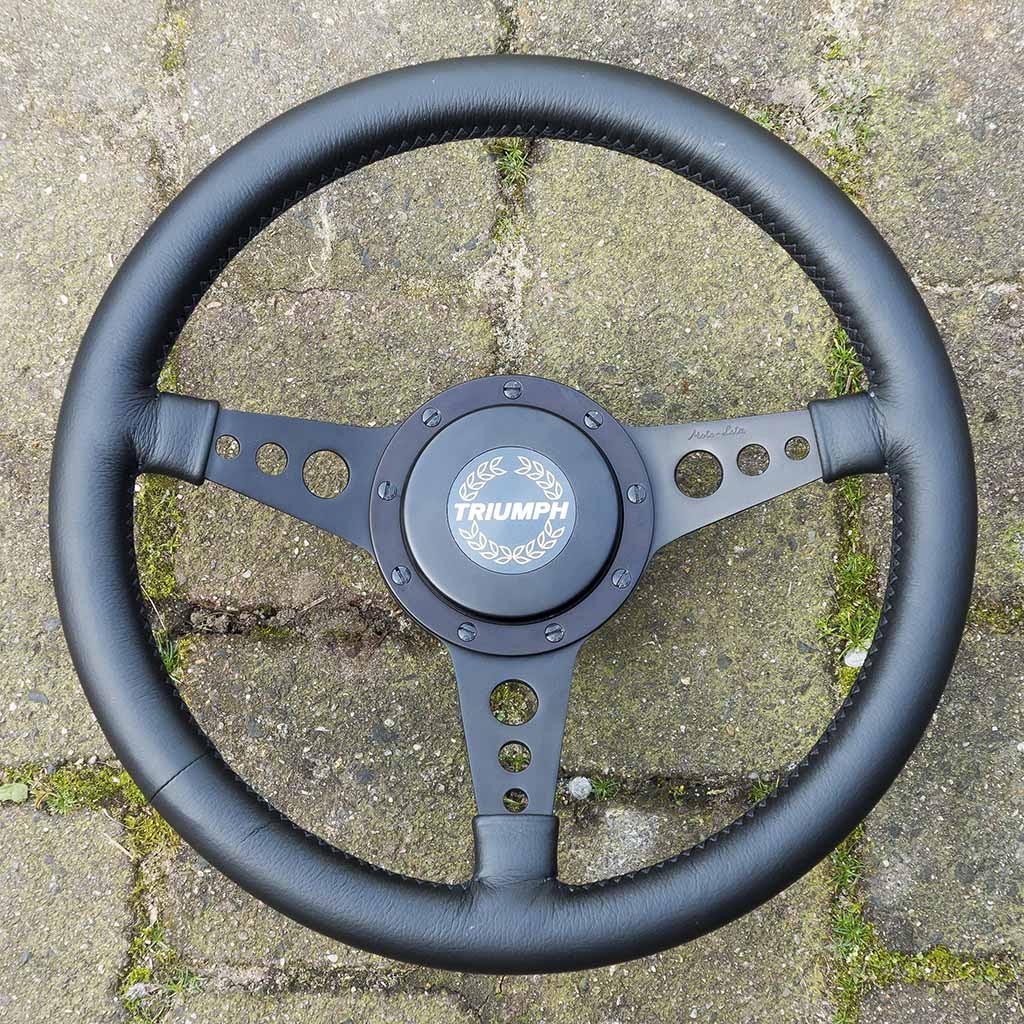
a slightly customised 14” Moto Lita MK4 steering wheel;

2014-05-24 Reconstructing the incorrect small fuel filler rear deck,
and the heavily butchered boot floor;

2014-05-28 Rear deck and boot area finished;

2014-06-11 Adjusting the left hand door gaps;

2014-06-25 Repairs on the right hand inner front wing area;

2014-07-10 Welding finished and waiting for final shot blasting
and coating with a primer;

2014-07-30 The refurbished seats covered in a specially woven red/black McBeans tartan;

2014-07-30 Recovered GRP parcel shelf;

2014-08-20 One of the repaired doors after returning from E-coating;

2014-09-09 Traditional paint preparations, filling and smoothing the roof;

2014-10-11 The car’s chosen colour combo;

2014-12-11 Nearly ready for painting;

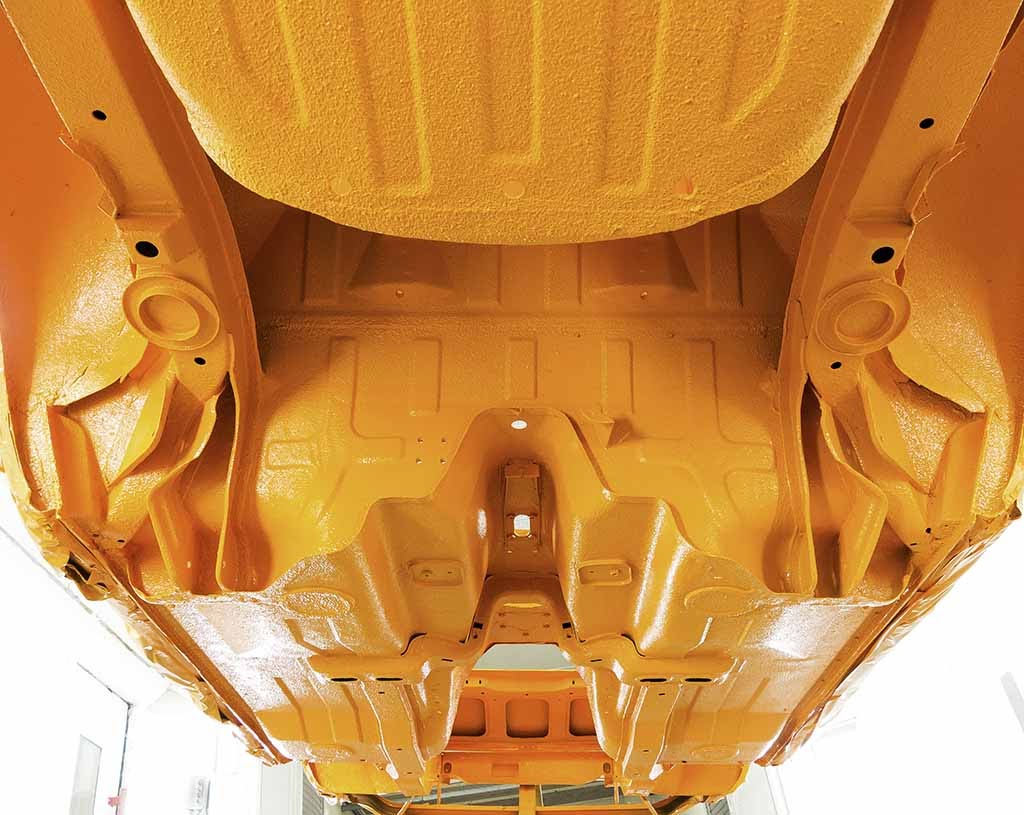
2015-01-10 Applying the anti-chip coating to the body’s
underside in preparation for painting;

2015-01-19 Ready for painting bottom and inside;

2015-02-05 After the first visit to the painters. The interior, the engine bay
and the underside painted in lovely and bright “Nearly-Topaz-Orange”;
I have since found out that RAL2000 Yellow orange is a pretty close match.

2015-06-12 Home made striping and decals ready for application;

2015-06-13 The body, doors, boot lid and bonnet are ready for painting;

2015-09-08 Painted in its chosen colour at last, and waiting for the
satin black paint to be applied to the sills and the rear light panel;

2015-09-14 Back in the shed in lovely “Nearly Topaz Orange”;

2015-12-22 Fitting the sound deadening (or anti resonance) pads to the interior;

2016-01-09 The original VIN plate and body tags,
clearly not fit to be reused on a fully restored car!

2016-01-14 One of the little projects that got out of hand a little, especially time wise.
Remanufacturing the body tags (with a twist) and the VIN plate.
The joys of modern software and online remanufacturing possibilities;

2017-05-10 The refurbished early Speke model throttle pedal;

2017-05-21 The refurbished parts for the pedal box, plus a few new ones;

2017-06-03 The inside of the newly coated fuel tank;

2017-12-20 The small parts shot blasted in preparation for plating;

2018-01-04 The small parts after zinc plating and (black) passivating;


2018-01-10 Refurbished gear box extension;

2018-03-31 The end of an era and a sad farewell. Clearing out the shed at René’s premises,
after he passed away. It was also the first time I saw the body outside in bright sunshine.
It did cheer me up a little;

2018-09-14 The refurbished head lamp supports;

2018-10-06 Fuel tank and fuel filler neck in position;

2019-01-06: Refurbished parts for the boot lid lock mechanism;

2019-03-23 Pedals and refurbished heater fitted;

2019-12-08 Refurbished parts for the door handles and ignition lock;

2020-02-27 Modern aftermarket (Volvo/BMW) brake light switch fitted;

2020-02-29 Fitting a few exterior trim parts;

2020-03-15 The new heart for the car, a NOS Sprint short engine
(with Mahle pistons!) and cylinder head;

2020-05-09 Adapted Allen head bolts for mounting the ignition switch;

2020-06-01 Cleaning and detailing the front side lamp lenses;

2020-09-23 Spot the problem! A water pump cover that escaped British Leyland’s quality control!
Needles to say I opened up the blocked passage leading to the radiator

2020-09-24 Refurbished water pump cover and a very rare original TR7 Sprint water transfer housing.
And yes the blocked opening of the pump cover was opened up;

2020-09-29 Fitting the homemade decals to the boot lid;

2020-09-27 And fitting part of the striping to the sides of the car;

2020-12-06 The refurbished front side lamp units;

2020-12-12 The side lamps fitted to the front bumper;

2020-12-19 Detail of the striping on the front wing and bonnet area;

2020-12-19 The striping running along the left hand side of the car;

2021-02-13 In the shed and the winter Sun just catching the vibrant paint work;

2021-05-10 Remanufactured alloy 5-speed shift pattern on the gear lever knob;

2021-05-13 Completed Sprint/SU inlet manifold, including my own design
alloy carburettor mounts and insulation spacers;

2021-07-06 Detail of the home made nose decal;

2021-11-13 Close up of the early type bonnet safety hooks;

2021-11-13 Brake balance valve and cunifer brake pipes;

2021-12-24 Remanufacturing the brake pipes for the back axle
using conifer pipe (top is the original);

2022-01-07 Locally fabricated stainless flexible brake hoses;

2022-01-08 Fitting the brake pipe running from the brake balance valve to the back axle;

2022-07-31 Refurbishing the engine harness (RKC 5511);

2022-09-28 Refurbishing the main harness (PKC 1946)

2023-01-21 Notes to help me refitting all the wires in
the correct order in the various connector blocks;

2023-02-22 The refurbished fuse box in the main harness (PKC 1946)

2023-05-20 The main harness in position, seen through
the opening for the right hand head lamp pod;

2023-10-08 Original pattern remanufactured door seals fitted;

Looking back over the past 10 years there have been a fair amount of ups and downs. But overall I am well pleased with the work done so far. And stating the obvious; I’m really looking forward to get the finished product back on the road. And that moment is slowly but surely drawing near!