Sunday 26 April 2020

FHC resto nr. 91; A few Small jobs

While removing the body harness from the old DHC shell two weeks ago, I decided it would be a good idea to remove the back axle from that shell and replace it with the redundant 4-speed back axle from the ’76 FHC, to keep the shell moveable. I had mentally prepared myself for somewhat of a struggle here. Luckily, when I replaced the completely worn original suspension bushes somewhere in the early 90’s of the previous century, I used copious amounts of copper grease. And two weeks ago I was able to reap the benefits! All the nuts and bolts came off without much problems. As did the back axle itself. And the stiffer rubber Triumph Tune bushes fitted in the early 90’s of the previous century turned out to be in pretty good condition. As were the trailing arms. And with the 4 speed back axle being considerable lighter (compared with the 5-speed axle) fitting it to the shell was rather straightforward.


The idea behind removing this back axle is that, with all my spare back axles together and “freely” accessible, I can now easily inspect and compare them. And thus decide what back axle I will be using for this car. But I also think it is about time to (slowly) start on a new back axle for ‘t Kreng.


And although the picture above might suggest something else, all axle casings and brackets are in remarkable good condition. From top to bottom;
·         CL 12290: from a late Solihull built California PI DHC (71.823 km);
·         CL 12397: the original back axle from ‘t Kreng (101.458 km);
·         CL 11314: an earlier Solihull European spec. FHC (72.492 km);
·         CH 35143: The original back axle from my DHC (>200.000 km).
As you can see in the list above the later 3.45:1 (CL) ratio back axles are clearly in the majority in the shed over the 3.90:1 (CH) ratio. So it looks like the car will get a 3.45:1 back axle, just as the DHC. That is because I want to reserve the 3.90:1 axle to build a spare axle for ‘t Kreng! On the other hand the Dolomite Sprint also used a 3.45:1 differential ratio. Although that car is a slightly lighter package. To be continued …

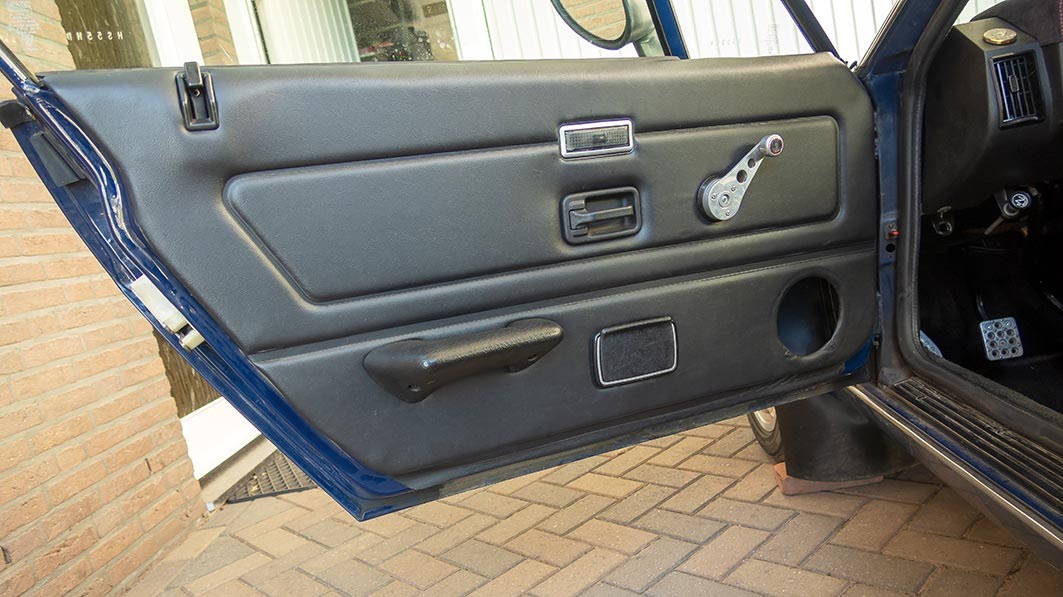
And while working on the DHC shell I found a few small parts that looked to be in very good condition, and might come in handy. To start with a very tiny part, the boot light switch. Probably never been touched since it was fitted to the car in early 1980. It only needed a good clean.


But while trying to get to grips with my spare parts last weekend, I found out that I have circa 10 of these switches. All brand new and still in their original packaging. And to add insult to injury I found out that these switches don’t fit in the boot of a ’76 body shell. Of course the original switch hasn’t been found so far. Bugger!

Another item I removed from the shell was the prop shaft’s bump stop (UKC8268). I know, it is a part not fitted to early cars, but it is very good at protecting the brake line to the back axle, in case the prop shaft bottoms out (I have the mangled remains of a bump stop somewhere in the shed, to prove what can happen).


Fitting the bump stop will be a bit of a challenge though, as the ’76 shell of course is missing the necessary welded on mountings studs. And using nuts & bolts will prove my arms are not long enough. But it also has a wiring clip which is welded to the end of the transmission tunnel. And I also overlooked this 😕 And this clip might well be in the way of the bump stop! I’ll see that somewhere in the future. At least the DHC shell has the same clip, though it looks to be positioned more off centre compared to the ’76 FHC’s shell…


And to end this post. While working on the shell I noticed that the original alloys, with which the car left the factory, are marked K 79 (I presume that means November 1979). So it looks like my DHC is a fairly early production car.


Saturday 25 April 2020

A Milestone for my Land Rover

Despite the Covid 19 pandemic I have been pretty busy at work with various projects that have to be continued to secure the waste water purification in our province. And for that the transportation pipelines need some tender loving care from time to time 😋

Relining one of the main transport sewers from the sewage treatment plant in Roermond.
The pipe had the decency to collapse only days before the planned renovation!

Preparations for an inline inspection of a concrete DN900 pressure pipeline in Schinnen.
One of the main sewage pipelines in our province transporting up to 6000 m³
of sewage water per hour to the treatment plant in Hoensbroek.


Replacing a badly corroded steel pipeline fitted to the bridge across “Het Juliana kanaal” near Illikhoven.
We choose to drill under the canal and part of the neighbouring industrial estate, using heavy HDD equipment.

And as a result of these projects running simultaneously the Defender has seen well above average use over the past few weeks. Resulting in this milestone, as today the car passed the 200.000 kilometre mark.


An interesting but totally irrelevant detail, it happened at exactly the same spot were my previous Defender passed the 100.000 kilometre mark! And to celebrate this I went for a social-distant-friendly green lane tour afterwards!


Sunday 12 April 2020

FHC resto nr. 90; Wiring - body harness


I finally found some time to spent a full afternoon in the shed yesterday. The main objective was to remove the body harness from the body shell of my first car. When looking for a spare driver’s seat belt a few months ago, I noticed that the body harness was still fitted to that body shell. But more importantly, at first glance it looked in pretty good condition. And despite the fact it isn’t quite correct for an early FHC (no wires for the roof mounted interior light), I decided to remove it. Even when I won’t be able to adapt and use it on the ’76 FHC, it will give important comparison data. That’s because this should be the original body harness for this car!
With all necessary tools loaded in the Defender I headed towards the shed. And the first job for the day was jacking up the car’s rear and putting some axle stands for safety.


This of course was necessary to reach and disconnect the wiring from the fuel tank (and I had some more work planned). Disconnecting the wiring from the tank sender unit immediately yielded a problem. The earth connector turned out to be corroded in place, and as a result it broke from the wire. Luckily that was the only real problem I encountered on the wiring.


With the fuel tank’s wiring pulled back inside the car I moved over to the boot area. Here I was in for a pleasant surprise. I was under the assumption that the rear light units already had been removed from this car. They hadn’t! It turned out that all the wiring in the boot area were still connected. Luckily these connectors all came off without problems. My first thought was to leave the rear light units in place. But as there’s no rear bumper to protect them, it seemed safer to remove them and store them away safely in a cupboard. And I had to remove the left hand unit anyway in order to remove the LH boot trim board. Which in its turn was necessary to enable me to access the wiring for the bot light. I did take my time for the removal as the lenses are easily damaged. But I succeeded in removing them undamaged.


And better still, they are in rather good condition. Only a few scratches on one of the lenses. Always good to have an extra spare pair in stock, as they are starting to get scarce!

With the rear lights and the trim boards out of the way I switched my attention to the interior part of the wiring harness. First job was to remove the harness from under the A-post trim and the sill carpet, followed by the seat area. Luckily both seats had already been loosened somewhere in the past, because they had to come out to reach the seat belt wiring. And their removal did improve access to the handbrake wire.
It was back to the boot after that, starting from the end of the harness. The boot light wires and switch. The light armature had already been removed in the past, so it was only a matter of carefully pulling the harness from the boot lid. Same with the licence-plate-lights wiring on the opposite side of the boot. Though that was a bit more tricky due to the extra wires and connectors. But I managed to pull that part of the harness out too without damage. A small light and an assortment of small tools did help. The final connection to be disconnected was the earth point near the right hand boot lid hinge.


After everything was disconnected it was time to remove the harness from the car. Of course with so many single wire connectors the chance of one getting caught somewhere and ripping it of is ever present. So I took my time here, and 10 minutes later the harness was out of the car and on the shed’s floor.


And what I had already guessed, while removing the harness, was confirmed. This is one very original and completely unmolested body harness. It even has the label with its part number (RKC 3630) still attached to it after all these years.


So now I can start in earnest with the preparation for the various wiring harness’ for the ’76 FHC.

Saturday 4 April 2020

Door lock mechanism woes


During the past winter I replaced the door lock barrels from ‘t Kreng. This was done to create a matching lock set for the ’76 restoration project. Fast forward to the first drive of the year, and a problem reared its head. Opening the driver’s door from the outside went as usual. But it was when I had stopped to take a few pictures, that I noticed something wasn’t as it should. The driver’s door wouldn’t open in the normal way (pull the inside handle and push the door open with the elbow). It actually needed a fair amount of force to open. First thoughts were that something had come loose or that l had refitted some of the parts in the wrong way.


Today I had some time for a closer look. But after the removal of the door card I could only conclude that nothing had fallen of, had come loose or had been fitted incorrectly. Time for a close inspection of the movement and action of the mechanism. Using the outside handle showed that everything was functioning as it should. But when the inner door handle was pulled, it was clear that the mechanism wouldn’t release the latch fully.


When pulling the inner door handle the arrowed lever (B) should push the circled lever (A) down. To fully release the latch, the top of lever A should be completely pushed down and hidden from view. But with the inner handle pulled against its stop, still half of the lever was visible. What became clear though was the fact that there was a large amount of free travel when the inner handle was pulled. Only at the last part of the handle's stroke would lever B start to push the lever A down. Looking very closely at the action of the various parts of the mechanism showed that there was a lot of play in the various parts of the mechanism. But also the connecting rod (arrowed C below) from the latch mechanism proved to have a huge amount of play.


All this added up, and was enough not to release the lock from the inside. As I didn’t want to go to the shed I decided on a little experiment, shortening the pull rod. So I cut of the bent part and put a new hook on. Looked promising but even this minimal shortening proved to be too much. With the handles escutcheon fitted the door would open at the lightest touch. Not good! So I still had to make the trip to the shed, to find another pull rod and a better lock and latch mechanism. Luckily I knew exactly where these parts were stored, so within 45 minutes I was back home.


Swapping the “new” mechanism was straight forward, as per the book! Though I did use the opportunity to remove the old plastic spire nuts that hold the door handle in place, and replaced them with new ones. Always nice to have these small parts in stock! And while I was at it I thought it a good idea to also put new connectors on the door lights wiring. That didn’t solve the light from not working though! But at least I again have a fully functional door locking mechanism.


And that left me with the final job for the day, refitting the door card and the various trim parts. I have to admit that with the work finished, the interior looked most inviting for a quick blast through the country!