Sunday 30 January 2022

FHC resto nr. 139; Fuel line


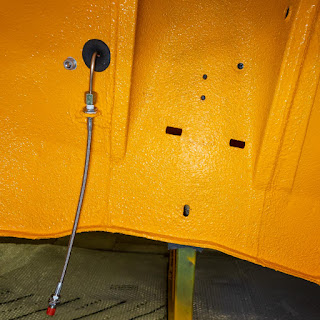
With the brake pipes and hoses fitted to the car it was time for the next and final pipe bending job. The fuel pipe(s) from the tank to the engine bay. I purchased a bespoke
tool for this last year. And for the short pipe from tank to RH rear wheel well (PKC390) it worked perfectly, as these pictures show.


But for the more complex main pipe, the lack of a proper reference point on the tool proved the tool useless. Time for 2150mm off new 5/16” copper pipe and another cheap tool from the internet. This time I chose a similar tool as the (main) tool I used for shaping the brake pipes.


And with this tool (and its ability to use reference points) bending the main fuel pipe (PKC389) in its correct shape, turned out to be fairly easy. This was aided by a few original pipes which I could use as a template. But it was again rather time consuming!


With both the pipes finished it was time for their final stage, fitting them to the car. But before I could do that, I first had to fit the various plastic clips to the body, needed to support the pipe underneath the car. This turned out to be rather time consuming. Especially cleaning the anti-chip-coating from the small steel mounting heads for the clips along the sill (ZKC924) took me well over an hour!


But after that the clips still didn’t want to go over the heads properly. This time caused by the sharp edges of the clips digging into the thick anti-chip-coating. Luckily that was easily solved with a sharp pen-knife. This was used to chamfer the “front” edges of the clips a little, and thus preventing them from digging into the anti-chip-coating:


Final preparations consisted of slightly enlarging the mounting holes for some of the other pipe clips. And with that job done, it was time to fit the various clips to the car;

Rear bulk head

Sill

Cross over behind the passenger foot well

Left hand front chassis rail

And with all clips in place it was time for the moment of truth; fitting the fuel pipe itself. Didn’t start well, as one of the clips broke immediately. Luckily I have a few (second hand) spares. But the chosen replacement decided to break while fitting it to the car. Bugger! The second replacement went on without any problems. As did the pipe itself. It needed hardly any adjustments to get a decent fit!


On to the next job; checking and refurbishing the remaining wiring looms and fitting them to the car.

Saturday 8 January 2022

FHC resto nr. 138; Brake pipes part 6

And the final part I dare say! Yesterday I had to pay one more visit to my local brake specialist. To collect yet another brake pipe and a small handheld flaring tool. The last item was necessary as I decided I would use the original holes in the nose panel. And as such I would be working without the correct template pipe. But by using my late template pipe, the drawings from my parts manuals and the car itself as template, I was able to create a new pipe. Though this time I had to do most of the shaping in the shed.


With this last hurdle taken it was at last time to fit the brake pipes to the car. But not before I had to spent some more time searching. For the braided flexible brake hoses this time. Luckily this time the search lasted only 5 minutes!


And that left me with the final job. Fitting them to the car. This time there were no more problems. Even my first attempt at using a flaring tool went well!

RKC1033 (PRV to back axle):


RKC1005 (PRV to LH front strut)
& RKC1007 (PRV to RH front strut):


Flexible hoses:


All pipes turned out to be fairly spot on. Though they all needed some on the spot tweaking to get a near perfect fit. Rather pleased with the result. And I now have regained some experience to tackle the final one; the fuel pipe.

Wednesday 5 January 2022

FHC resto nr. 137; Brake pipes part 5

Who said it would be easy! I went to the shed today to trial fit RKC1038, the brake pipe running from the pressure reduction valve to the RH front calliper. I had hoped that despite it being roughly two inches too long, I’d be able to adapt it a little so it could be made to fit. Sadly it wasn’t to be! So a visit to my local brake specialist is on the cards somewhere this week.


But while I was there I decided to check the underside of the nose section in more detail (see picture above), as there was some doubt lingering in the back of my mind. And when I dismantled the car the (badly corroded) brake pipes were discarded without giving them a second thought. Wrong! As the picture below of the same area in my DHC (before restoration) proves;


Clearly visible are the extra holes for the two middle clips, lower down the nose section. Probably a result of the introduction of the TR8, which uses the same shell, but has the radiator further forward in the nose.
So I have to decide whether to drill two extra holes (with visions of a drill emerging through the nose 😜) or make up a pipe along the original pattern (which I threw away!). Choices …


And with nothing better to do I decided to fit the necessary brake pipe clips and start with plugging some holes. In this case a combination of aftermarket clips and original ones, as long as they are black! Unused holes on the sides and on top of the chassis legs were plugged with modern rubber plugs;


Hopefully I can soon report on fitting the brake pipes and flexible hoses. And there is the unfinished business with the fuel pipe!

Saturday 1 January 2022

FHC resto nr. 136; Brake pipes part 4

I left you here last year, with these two pipes to go. Part numbers RKC1038 (or RKC1005) and RKC1033 to be precise. And as expected, due to their length and form, they turned out to be rather challenging (read time consuming) to bend properly. I started with the latter, the pipe running from the pressure reduction valve to the back axle.
As expected it took me a good few hours to get this one finished. It looks quite good alongside the original one. On the original pipe I encountered a few what looked like non original bends, probably caused when pulling the pipe from the car or while in storage. Luckily I had a second template for cross reference. But I expect some fine tuning will be necessary when it will be fitted to the car.

RKC1033

The final pipe was also the longest of them all, running from the pressure reduction valve to the RH front calliper. As with all the longer pipes I didn’t work from one end to the other, but worked from both sides. Starting at one end and working to a spot that leaves the most adjustability in case the pipes are too long or too short. And then work from the other end towards that same spot. And glad I did. As you can see in the picture below, the straight part running across the nose of the car is longer as on the original pipe. But it looks like there is enough room available for the necessary adjustments. Time will tell.

RKC1038


Next and final  job on the brake pipes will be collecting all grommets and clips and fit everything to the car.