Showing posts with label Cooling system. Show all posts

Saturday, 9 May 2026

Is it leaking?


Or isn’t it! The continuing story of ‘t Kreng’s coolant system: I have been using ‘t Kreng on a few occasions over the past few weeks in order to add some miles on the odometer. But mainly to see how the coolant system behaved after all the cooling hoses’ small leaks had been sealed. And as such the car was also used as transport for a few works meetings and project location visits in the northern part of our province.


And guess what, only shortly after I set of for the first meeting, the low coolant level light came on. This happened while standing at traffic lights or driving very slowly through traffic. It would switch of while pulling away from traffic lights or accelerating. Though much more reluctant than it would usually do.
And there was another problem that reared its ugly head. With only a little over 100 kilometres on the odometer since the last fuel stop the fuel gauge was lingering just under the half way mark. Did I have a fuel leak? Or perhaps someone tried to syphon fuel from the car? As I already was running late I decided to ignore the instruments and warning lights and carried on the journey. At least the temperature gauge seemed to function properly! So all in all a rather enjoyable day. I even manged to capture an army Chinook helicopter that was assisting with a forest fire in the area. Rather impressive bearing in mind there is 7.600 litres of water in the Bambi bucket hanging underneath the Chinook:


I eventually returned home without any further problems. It is probably unnecessary to mention that I set aside some time last weekend to thoroughly inspect the cooling system once again:
  • Starting with the header tank. It was clearly visible that the coolant level had dropped at bit. I later remembered I hadn’t topped up the system after I tightened the coolant hose connections the last time;
  • The hole underneath the water pump was next in line. This was dry;
  • The radiator was free from any visible leaks (hardly surprising!);
  • All the hose connections between the radiator and the heater were checked with tissues. All were completely dry;
  • The heater’s core pipes hidden underneath the dashboard were also dry, with no traces off coolant in the tray underneath the heater;
  • The coolant drain plug in the engine block also showed no leaks. As did the head gasket.

So this morning I decided to take the car for a trip to visit a few friends. But not before I had topped up the coolant level. After which it was time to check the fuel gauge by topping up the fuel tank just across the border in Germany. Turned out the amount of fuel that went into the tank was in accordance with the amount of kilometres covered. But the low coolant level light again had a life of its own. Switching on and of several times during the short run to the petrol station. Till I remembered I was still running with the choke out slightly. And when I pushed the choke back the low coolant level light switched off. Which reminded me of a problem with the temperature gauge last year. When switching on the lights the engine temperature would rise according to the temperature gauge, and drop when the lights were switched of. At the time this was diagnosed as a bad earth in that circuit (around the instruments.). And it all adds up. So maybe I’ll have to bite the bullet and pull the instrument cluster from the dashboard for a good clean of all connectors and also clean the earth points in the interior (those in the engine bay were dealt with last year). And the low coolant level light didn’t switch on again during the next 100 or so kilometres. As a result of which it was an even more enjoyable ride!


Sunday, 19 April 2026

Cooling system ‘t Kreng

A short update on the cooling system of this car. After fitting a nice new aluminium radiator she was used for our traditional Easter Monday tour. Everything turned out to be fine with the temperature gauge sitting slightly lower compared with the old (slightly leaking) radiator. And the low coolant level warning light didn’t come on. Until I was less than a mile away from the location for the start of the event.


As the temperature gauge still was at its normal level I drove on to the start. And with the car in a parking space I could inspect the damage. Sure enough there was a serious leak from the radiator side of the top coolant hose. Actually one I had expected as I have a tendency to tighten them only as much as is necessary to prevent damage to the ageing hoses. And with some heat in them the hoses get soft and could be tightened a little. Easily rectified with a small socket set I had brought with me especially for this purpose. Though the weird thing was that the coolant level hadn’t dropped much. At least not enough for the low coolant level warning light to switch on. The tour itself turned out to be rather uneventful from a cooling system point of view. And it was a nice drive!


But pretty soon after I started on my homeward journey, the low coolant level warning light switched on again. As the temperature gauge showed a rather healthy level, I decided to ignore the light and drive home. And sure enough when I arrived home there again was a leak from one of the coolant hoses. Be it a very small one. The coolant level hardly had dropped in the header tank.

And that got me thinking. So when I used the car for a local trip this weekend I kept an eye on the instruments and the coolant hoses. The hoses remained free of leaks and the low coolant level warning light didn’t switch on. Why wouldn’t it switch on now? The only conclusion I can come up with, is that with the tiny leaks there was also some pressure loss in the system. Resulting in a change of density of the coolant fluid and as such a change in the conductivity of the coolant, triggering the probe in the header tank. Seems far-fetched but I can’t see another explanation. Anyone a better explanation?

Saturday, 4 April 2026

New radiator for ‘t Kreng


In the summer of last year I
mentioned a tiny leak from ‘t Kreng’s radiator. At the time I decided to keep an eye on it and put the almost 30 years old radiator’s renewal a bit further up the car’s to-do-list. Fast forward 8 months and the coolant level in the header tank was dropping what seemed ever more quickly. Though still not life threatening; I could easily drive the car for several hours without the coolant level dropping enough to ignite the low-coolant-level -light.


But every time I took the car for a spin (every few weeks) the coolant level needed topping up by approximately 0,25-0,35 litres. And as I couldn’t find any other traces of coolant leaks from the engine I decided to bite the bullet and pay a visit to local aluminium fabricator H&S Speed Equipment. The brief was the same as thirteen years ago, make me another aluminium radiator for one of my TR7’s. And last week I got a message that it was ready for collection. Well ahead of schedule, that's always good!

It wasn’t cheap, but the quality of the work again looks very good. And as with the radiator he fabricated for the DHC earlier, this one too is slightly larger compared to the original TR7 radiators. Always good to have a little more coolant and cooling surface doing its job! But the main reason for the slightly larger dimensions is the fact that this way a standard aluminium cooling matrix could be used.


And because my work agenda was empty for yesterday (Good Friday), I decided to take the day off from work and install the new radiator. Which was pretty straight forward, though while removing the old radiator, I was reminded that it would be a good idea to cover the front of the fan and the back of the oil cooler with a cardboard shroud. This to prevent damage to the new radiator by the protruding bolts or sharp edge on the oil cooler. Lesson learned!
In the picture below the two radiators are put side by side for size comparison. And the anoraks should already have noticed that the old radiator isn’t a standard TR7 item. It is slightly higher compared to an original one, and it is slightly thicker. But compared to the new one the cooling matrix’s dimensions are slightly smaller.


And the new radiator in position, showing the crude but very effective cardboard protection shroud in place over the fan. As a result of which the new radiator slipped in position without any problems. After which the top mounts could be fitted. But not before the mounting rubbers were put in place on top of the radiator and the blanking boards on both sides of the radiator had been removed. This was to help create better access to fit the top mounts from the front of the radiator. With the radiator resting against protective shroud covering the fan, there was enough room to slip the mounting brackets in position. Job done, after tightening the four mounting nuts!
In the end, I spent more time modifying the aluminium mounting plate for the interior ventilation hose, than I needed to replace the radiator . . .


And finally a few pictures of the radiator in place, with the hoses connected and the system filled with fresh coolant. So far no visible leaks on the hose connections. A test drive this weekend will tell if this has finally solved the loss of coolant!


Tuesday, 22 July 2025

She wants to tell me something


Over the past few weeks I have been using ‘t Kreng as much as possible to see how the engine and in particular the cooling system behaved. And on that note I took the car for a longer trip into neighbouring Belgium last Saturday afternoon and evening. This 370 kilometres overall trip turned out to be rather enjoyable. The car really came back to life again during this trip. And most importantly the cooling system looked like it was fully functional again. But after driving through some rather dark patches of forest I found that the temperature gauge had risen noticeably. My first thoughts were that this might be caused by the moist and cool air inside the forest, providing cool dense air to the fuel mixture and as such giving a leaner mixture. That wasn't really a satisfactory answer to the problem, but the only one I could come up with at that moment. Until I switched of the lights while coming out into the daylight that is! As soon as I flicked of the light switch the temperature gauge would drop back to its normal reading. So over the next few kilometres I did switch the lights on and of several times. And sure enough switching on the lights would increase the gauge’s readings. While the needle would drop immediately after the lights were switched of. And the clock also had a mind of its own, switching on and off rather randomly during the day!


It looks like the few years of idleness have had some impact on the cars electrics. So the first items to check will be the earth points and connectors of earth wires directly related to the lights and the light switch. This check can be combined nicely with a slightly overdue regular service. And of course use her more often! With that I already made a start, as I have covered well over a 1000 kilometres so far since fitting the new water pump. Which equals the mileage of the past two years together!


Saturday, 14 June 2025

Stress test for ‘t Kreng’s cooling system


Today saw the final test for the cooling system of ‘t Kreng. And to be honest I wasn't looking forward to it! The weather forecast predicted temperatures off up to 32ºC in the area. Not very appealing from a driver’s comfort perspective. And with a measured maximum outdoor temperature of 31,4ºC it indeed was rather hot in the car. Though I needn’t have worried about the car itself or the cooling system. She behaved as if nothing had happened. With the water temperature gauge’s needle sitting rock steady at its normal position. But while waiting in a traffic cue at some roadworks I decided to capture the temperature gauge’s normal position. Guess what I noticed. And another pointer that I should use this car more often! (Since fitting the new water pump I have been using the car on a weekly basis. Covering on average 100 kilometres per week)

For the rest the driving even was fairly enjoyable despite the heat. And I decided to make a stop to take some pictures at an often used location for my cars;


Monday, 9 June 2025

‘t Kreng’s water pump

p.s. the damage to the spark plug caps was caused many years ago by a stone marten.
He/she was handled properly without any animals being harmed in the process!

The last time I reported on this subject there still was a small leak from the slot underneath the water pump. But it looked like it was starting to seal better after each drive. There was no noticeable drop in the coolant level every time I returned home. Though there would always be a tiny trace of coolant from the slot underneath the water pump. At least the driving always was nice!


On the driveway to the former fiefdom “Jongenhof” near Lerop - St. Odiliënberg.
A for the Euregio typical large carré farmhouse and former seat for a feudal lord.

Today I took the car for a 2½ hour drive, but not before I wiped of all traces of coolant from the slot. During this drive the temperature gauge remained rock steady at its normal position, with the needle just touching the ½ mark. The coolant light only lit up briefly when starting the car. And when I returned home late in the afternoon, there again was the mandatory check for any leaks. The slot and the area underneath were completely free of coolant traces. Success at last I hope. Time will tell!


Sunday, 11 May 2025

Testing ‘t Kreng’s water pump


Over the past two weeks I have been using ‘t Kreng a few times for some local trips. So far the car has covered well over 200 kilometres since the new water pump was installed. There still is a slight water leak from the pump. But that has been gradually decreased over time. Though when I returned home from a longer drive last Saturday there again was a small trickle from the slot underneath the pump when I switched off the engine. The coolant level hadn’t dropped visibly though.
Another positive point is that the coolant light hasn’t come on during the various tours. That might partly be due to the fact that I polished the coolant level probe in the header tank before filling the system with coolant. And the temperature guage is fairly stable too. This might point to a better sealing water pump, causing less pressure changes in the coolant system. Fingers crossed!


Time for a tank full of RON 102 octane fuel

Sunday, 27 April 2025

A TR7 filled weekend

Last week I managed to fit the new water pump. And this weekend I found some time to fill ‘t Kreng’s coolant system. And after leaving it overnight I found no leaks. Looks like a result!


So the final job for the Sunday morning was refitting the carburettors and the strut brace. After which it was time for a short 50+ kilometres test drive. And the car certainly did her name proud. After only a few kilometres the Low Coolant warning light came on! As the temperature gauge wasn’t even at its normal working position I decided to ignore the light for the time being. And sure enough the light switched off again a few seconds later. And the temperature gauge rose to it’s normal working position and remained there for the rest of the drive.
As it already was late in the afternoon the roads were fairly quiet despite the glorious weather. Time to enjoy the fine spring weather and the car’s still razor sharp handling.


And when I returned home early in the evening the much dreaded check for any leaks. There was a slight hissing sound coming from the hose connecting the header tank with the radiator. As that hadn’t been touched during the work carried out over the past few weeks, and there was no visible leak, that was ignored. But there was a tiny trace of coolant from the weep hole underneath the water pump. See how that develops over the coming weeks!

Another job on a rather TR7 filled weekend was preparing my last spare body for transport over to the work shop next weekend. This body is rust free but has extensive and badly repaired accident damage to the left hand front of the car. So this body will supply the necessary parts that will be needed to repair the various rusty areas of my DHC.


Sunday, 20 April 2025

Fitting ‘t Kreng’s water pump


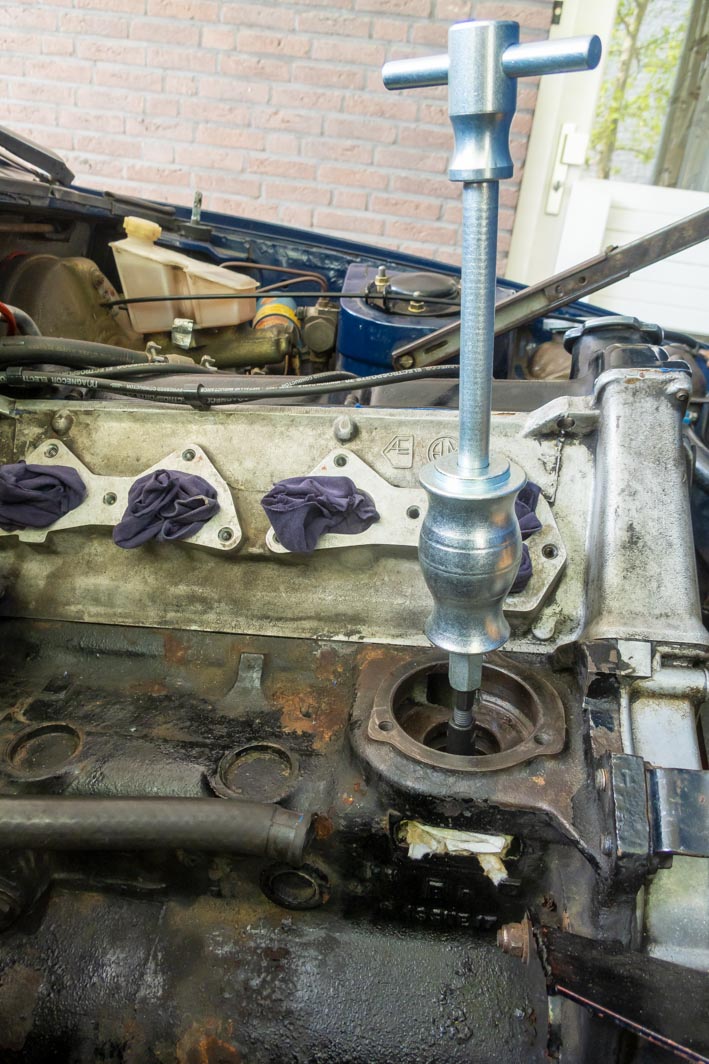
Two weeks ago I removed the water pump with the idea of reconditioning it again. But on closer inspection I found the new (after market) seal hadn't seated properly. This matched my hunch pretty well. So after exchanging some ideas with various people who should have knowledge on the subject, I decided to bite the bullet and go for a brand new water pump. And as these have become fairly expensive, I decided to also renew the water pump’s spindle bush. And with the correct tool, removing this bush should have been easy.


Sadly though that didn’t work. The available rim at the bottom of the bush was to thin the get enough grip on the bush, as a result the puller slipped through the bush constantly. And because of that the bush got damaged. As there was no way back it was time for a rethink and some appropriate brute force. Using an old reshaped screw driver as a cold chisel between the engine block and bush. It looked fairly crude and messy but it did the job without any damage to the block or the jack shaft. The bush did suffer though!


The remains of the original bush (#145022)

Halfway through the cleaning of the orifice for the spindle bush

After the bush was successfully removed and everything cleaned thoroughly it was time to fit the new bush. And with the aid of a small tool made from a damaged water pump axle and some lubrication, the bush could be gently tapped into position. At least that went quickly and without drama!


This also applied for the next job, fitting the water pump. Again all contact surfaces in the block and on the gears were lubricated. After which the pump slipped in without drama. I only had to help a little with a ring spanner on the impeller bolt (turned counter clockwise) to get the pump seated correctly.


Final jobs before the time ran out on Easter Sunday were measuring the required gasket thickness for the water pump cover, fit the cover and fit the inlet manifold. When I fitted the inlet manifold last year it felt like the threads of one of the mounting holes in the head was damaged. That's why I had mentally prepared myself for this job, and had a thread repair kit on hand. But I needn’t have worried. This time all (stainless) bolts went in without any problems!

Remain the final jobs for later in the coming week;
• Connect all hoses;
• Fill the system with coolant;
• Check for leaks;
• Refit the carburettors.