I actually stumbled upon the advert for this car while I was doing my periodic internet search for a set of Wolfrace Turbo wheels for my DHC. The rest is history as they say!
2013-10-12 After a short test drive to get an indication of the cars mechanical parts,
before agreeing on the actual purchase;
The original plan was to give it a proper service, a few repairs where necessary, a fresh MOT, and sell it on minus the Wolfrace wheels. But I was never any good at selling cars. And I have always been longing for an early Dutch registered Speke built TR7. Mainly because I really have come to like the clean lines of the early bonnet design.
So I decided to restore it to a more or less standard looking car, with a few (reversible) period detail changes incorporated in the process. And the schedule wasn’t too ambitious either! It should be completed by the time the car became tax exempt some three years later.
Sadly life (and death) intervened several times in the past years. As a result of which the car is still not finished 10 years on! Though I am getting there slowly but surely. At least this 10 year “jubilee” gave me an excuse to trawl through the well over 2000 digital pictures shot so far during the restoration. And post this pictorial summary of the work done so far. In chronological order;
2014-01-29 Removal of the engine while dismantling the car,
in preparation for the body repairs;
2014-02-12 The empty shell remaining after dismantling of the car was completed;
2014-03-15 While the body was away for paint removal and shot blasting,
I started on various parts needed in future. The rear suspension in this case;
2014-03-29 The drivers footwell after shot blasting;
2014-03-29 The left hand front inner wing area after shot blasting;
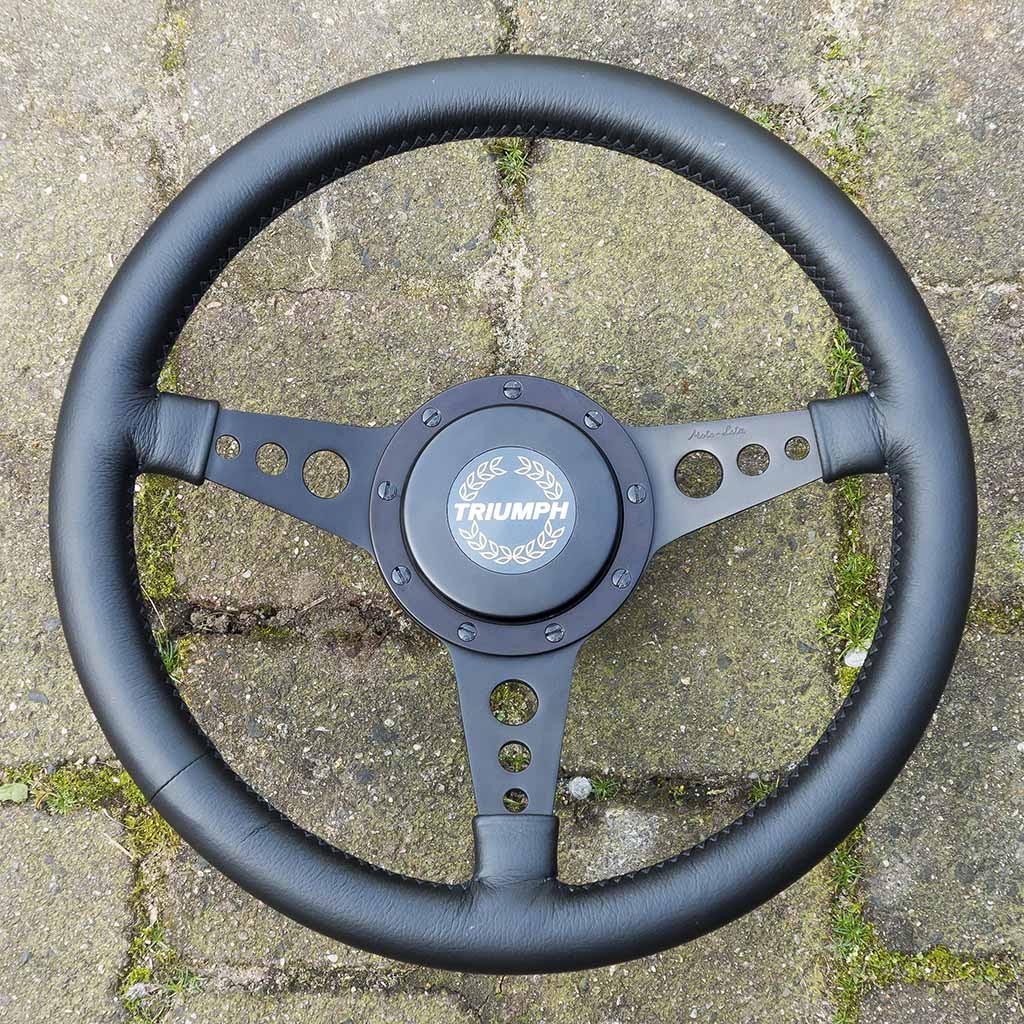
2014-03-30 Another part that arrived well ahead of schedule;
a slightly customised 14” Moto Lita MK4 steering wheel;
2014-05-24 Reconstructing the incorrect small fuel filler rear deck,
and the heavily butchered boot floor;
2014-05-28 Rear deck and boot area finished;
2014-06-11 Adjusting the left hand door gaps;
2014-06-25 Repairs on the right hand inner front wing area;
2014-07-10 Welding finished and waiting for final shot blasting
and coating with a primer;
2014-07-30 The refurbished seats covered in a specially woven red/black McBeans tartan;
2014-07-30 Recovered GRP parcel shelf;
2014-08-20 One of the repaired doors after returning from E-coating;
2014-09-09 Traditional paint preparations, filling and smoothing the roof;
2014-10-11 The car’s chosen colour combo;
2014-12-11 Nearly ready for painting;
2015-01-10 Applying the anti-chip coating to the body’s
underside in preparation for painting;
2015-01-19 Ready for painting bottom and inside;
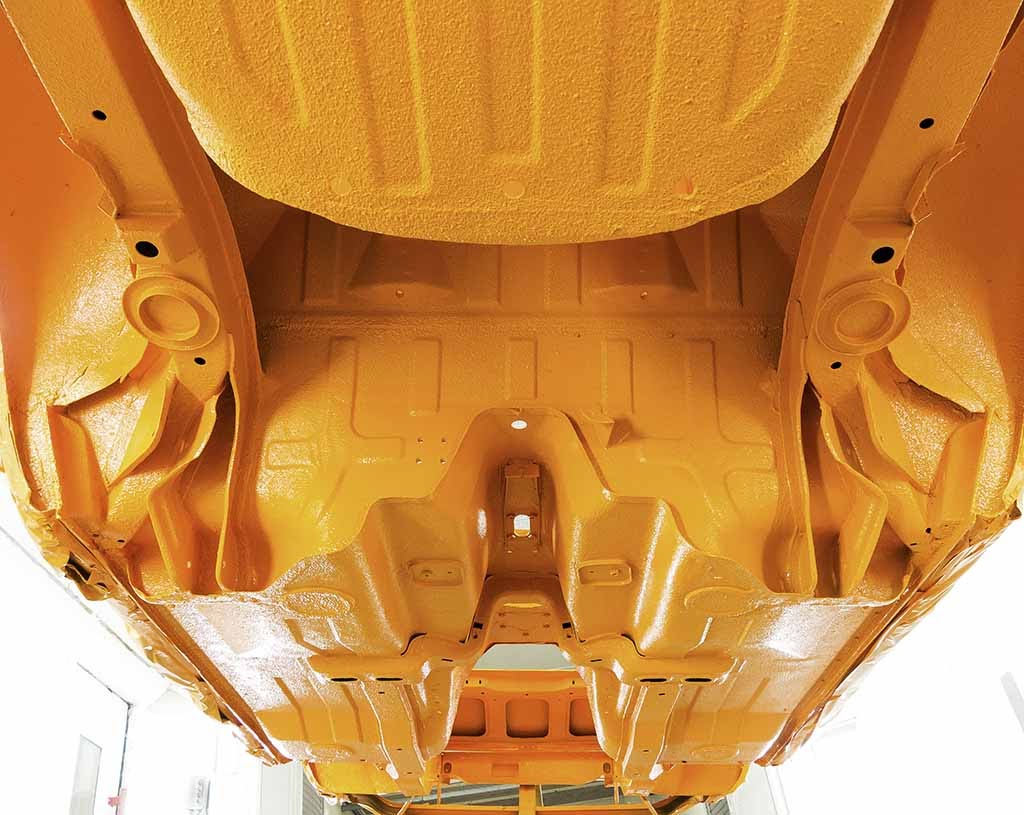
2015-02-05 After the first visit to the painters. The interior, the engine bay
and the underside painted in lovely and bright “Nearly-Topaz-Orange”;
I have since found out that RAL2000 Yellow orange is a pretty close match.
2015-06-12 Home made striping and decals ready for application;
2015-06-13 The body, doors, boot lid and bonnet are ready for painting;
2015-09-08 Painted in its chosen colour at last, and waiting for the
satin black paint to be applied to the sills and the rear light panel;
2015-09-14 Back in the shed in lovely “Nearly Topaz Orange”;
2015-12-22 Fitting the sound deadening (or anti resonance) pads to the interior;
2016-01-09 The original VIN plate and body tags,
clearly not fit to be reused on a fully restored car!
2016-01-14 One of the little projects that got out of hand a little, especially time wise.
Remanufacturing the body tags (with a twist) and the VIN plate.
The joys of modern software and online remanufacturing possibilities;
2017-05-10 The refurbished early Speke model throttle pedal;
2017-05-21 The refurbished parts for the pedal box, plus a few new ones;
2017-06-03 The inside of the newly coated fuel tank;
2017-12-20 The small parts shot blasted in preparation for plating;
2018-01-04 The small parts after zinc plating and (black) passivating;
2018-01-10 Refurbished gear box extension;
2018-03-31 The end of an era and a sad farewell. Clearing out the shed at René’s premises,
after he passed away. It was also the first time I saw the body outside in bright sunshine.
It did cheer me up a little;
2018-09-14 The refurbished head lamp supports;
2018-10-06 Fuel tank and fuel filler neck in position;
2019-01-06: Refurbished parts for the boot lid lock mechanism;
2019-03-23 Pedals and refurbished heater fitted;
2019-12-08 Refurbished parts for the door handles and ignition lock;
2020-02-27 Modern aftermarket (Volvo/BMW) brake light switch fitted;
2020-02-29 Fitting a few exterior trim parts;
2020-03-15 The new heart for the car, a NOS Sprint short engine
(with Mahle pistons!) and cylinder head;
2020-05-09 Adapted Allen head bolts for mounting the ignition switch;
2020-06-01 Cleaning and detailing the front side lamp lenses;
2020-09-23 Spot the problem! A water pump cover that escaped British Leyland’s quality control!
Needles to say I opened up the blocked passage leading to the radiator
2020-09-24 Refurbished water pump cover and a very rare original TR7 Sprint water transfer housing.
And yes the blocked opening of the pump cover was opened up;
2020-09-29 Fitting the homemade decals to the boot lid;
2020-09-27 And fitting part of the striping to the sides of the car;
2020-12-06 The refurbished front side lamp units;
2020-12-12 The side lamps fitted to the front bumper;
2020-12-19 Detail of the striping on the front wing and bonnet area;
2020-12-19 The striping running along the left hand side of the car;
2021-02-13 In the shed and the winter Sun just catching the vibrant paint work;
2021-05-10 Remanufactured alloy 5-speed shift pattern on the gear lever knob;
2021-05-13 Completed Sprint/SU inlet manifold, including my own design
alloy carburettor mounts and insulation spacers;
2021-07-06 Detail of the home made nose decal;
2021-11-13 Close up of the early type bonnet safety hooks;