Showing posts with label 8V engine. Show all posts

Sunday, 29 June 2025

TR7 Head removal tool


Last weekend I took part in Club Triumph’s Coast-2-Coast run (a full report including the aftermath later). I was actually invited by Howard to co-drive the course car. But when I arrived at his home before the start of the event, I was reminded of the fact that some years ago I sent him an AutoCAD DWG-file of the cylinder head removal tool for a TR7. And contrary to me, he had a go at having one made. Sadly since than he wrote of his TR7 in an accident, and got himself a TR7-V8 (the late Paul Darbyshire’s car). As a result of which he hadn’t any use for the tool. So he decided to donate it to me! Which of course is much appreciated!


Probably will do some detailing on it somewhere in the (near?) future. I also have to search for the correct fasteners. But that should be relatively straightforward, as these are mentioned in the previously mentioned file!

Sunday, 21 August 2022

More 10CR checks


Spent a few hours over this weekend, preparing the car for the 10CR. Starting on one of the lifts in a friends workshop, with the aim of checking all rubber fuel hoses from below. First check was the fuel hose between the (FI) fuel tank and the 8mm metal pipe running to the engine bay. After cleaning 12 years of road grime from it, I found out there was nothing really wrong with it. Which turned out to be a good thing! Because I was reminded that on a FI tank the supply hose connection is 12mm. Clearly forgot that over the 12+ years since I restored this car 😶 At the time I fitted a fuel resistant 8mm hose with a 2mm wall thickness inside the hose end that connects to the 8mm pipe.


So that would have been a challenge to replace with a half empty tank and only normal fuel hoses at hand. All the rubber fuel lines in the engine bay were also in good condition. Not really surprising as these were all renewed in the past few years.
To prevent future problems, I think I will replace the two separate outlet and sender units for a normal carburetted version. The tank’s redundant hole should be straight forward to close up with a round steel plate with the same dimensions as the sender unit’s base plate.


Next job was a bit of tinkering and cleaning of the carburettors. Starting with the suction chambers and pistons. Main job here was polishing the inside of the suction chambers and the pistons outer rims. Though one of the pistons had clearly accumulated some dirt on its piston’s surface.


With the internals cleaned I spent some time on the custom carburettor linkage. Mainly consisting of a good clean and some fresh grease inside the link rod ends. Inspecting the rod end’s surfaces proved there was nothing wrong. And as such still one of the better adaptations on this car.


Final jobs were a detailed general check of the engine bay; emptying the catch tank, changing the routing of the two fuel hoses connecting to the carburettors, checking the earth point (found and rectified one loose bolt behind the RH headlight, caused by a stripped thread). Next weekend I will have a look at the front suspension. But in between I’ll start with preparing the route for my GPS and mark the route out on a good old fashioned paper map!


Saturday, 6 August 2022

Pré 10CR check DHC


Spent most of this Saturday’s afternoon on another check for the car of choice for next month’s 10 Countries Run. First area to get some attention were the rear brakes. Because the brake pedal’s travel is still to long for my liking. The drums where a nice tight fit over the brake shoes, with no ridge.


Of course hardly surprising as they were machined in 2019. And after that the car wasn’t used as much as I would have liked due to the Covid pandemic. But despite the lack of use the handbrake adjusters were still free and working properly. And no sign of leaks from the 5 year old rear brake cylinders.


With a clean bill of health for the rear brakes, it was time for a rather simple but also important job. Checking the valve clearances. And about time these were checked. The last time I checked and adjusted them was in 2007, when the engine was in the Bordeaux red DHC.

Rather pleased with the condition under the cam cover. Especially considering this engine has been in use since 1994. It is actually the first car engine I built myself!


And 15 years and 44.531 kilometres on I found the clearances weren’t too bad. One spot on, five less than 0,05mm to tight, one between 0,05 and 0,10mm to tight and one 0,05mm to wide. While typing these words I have still not decided whether to adjust them or not ... To be continued!


Saturday, 2 July 2022

Post MOT service DHC


With a fresh MOT for the DHC, it was time for her postponed service. Most important being the fluids (the hydraulics were ignored as these were changed last year) First the old oil filter and drain plug were removed, so the still warm old oil could drain from the engine. Pretty easy when you have access to a four post lift!


With the engine oil draining from the engine I turned my attention to the fluid levels in the gear box and back axle. Both turned out to be fine. Which was hardly surprising, as there were no signs of any leaks from both. This couldn’t be said from the engine’s front crank shaft seal (UKC 3344). This was leaking badly, though it wasn’t a fail yet! But bearing in mind it was fitted less than 5 years ago (together with a new front pulley), I can only conclude the seals quality was rather poor. So I decided not to use the normal TR7 suppliers, but my trusty vernier caliper and a specialised bearing supplier. Taking reference measurements from a spare front pulley and timing cover, I found out I was looking for an 1 7/8” x 2 5/8” x 3/8” oil seal. And I ordered a few of these, from a renowned manufacturer (Eriks) and reasonably priced.


And with the car on the four poster lift, access to the front pulley and the oil seal was easy, making it a straight forward, 15 minutes job. The biggest challenge (if it could be called that!) was putting in the new seal. This took a few extra minutes as access is limited by the fan shroud. What was obvious though, was that the quality of the new seal felt much better. The old one felt much harder. See if that was the cause for the seal’s short life span! Final job was cleaning the filth left by the oil leak.


Next in line, and final job for the day, were the custom-prop shaft’s union joints grease fittings. Greasing them was easy, but getting the surplus grease from between the yokes wasn’t. As the amount of grease against the gear lever extension clearly shows (I might fabricate a shroud to prevent this happening in future to protect the connector!?)


After which it was time to enjoy the car for a few hours. The most important point of attention here were the brakes. And I am pleased to say that they are slowly settling in. The pedal still is very light, but the feeling is starting to get confidence inspiring. Will do my best to add some more miles before September …

Sunday, 19 June 2022

Pré MOT check DHC


But I’ll start with a belated happy 42nd birthday for the DHC, as she was first registered on the 6th of June 1980! As for this posts title: The initial plan was to fully service the DHC yesterday, in preparation for its upcoming biennial MOT. But with temperatures in the shade of almost 35ºC that wasn't an inviting perspective. So I decided to limit the work to the most vital bits and carry out the service somewhere after the car’s MOT later in the week.
I started with a check of the wheel bearings and a visual check of the other visible suspension bits. After which I moved my attention to the engine bay. Traditionally the first check is the water pump area. Always nice to see nothing wrong there.

Routing and condition of the choke cable.
The (6mm fuel) hose is there to prevent the cable from kinking.

Checking the custom throttle actuator rod

No play or funny noises on the viscous coupling and pulley bearing.

Clean connectors on the hi-torque starter motor

Checking lights etc.

And finally a few overview pictures of the engine bay. Certainly not concourse condition, but not too shabby either after 12 years of use since her restoration was completed.


Sunday, 29 May 2022

Spark plugs


As part of the pre MOT service I decided to change the spark plugs on both my road going TR7’s. To start with the plugs from ‘t Kreng. The Sprint powered car. These plugs have been in the engine since September 2014, covering 10.509 kilometres since.


They don’t look to bad, but I think the fact that cylinder #1 is slightly down on compression shows here. A check of the valve clearances might also be a good move!


While working on this car I did another check of the connecting tube (UKC2538) between inlet manifold and water pump cover. After the previous inspection I had cleaned and dried the area. And guess what, it was completely dry this time! So for the time being no action required!


Next it was time to change (and check) the DHC’s spark plugs. These were also fitted in 2014. But they have covered 20.220 kilometres since.


Again not much wrong , though I wonder while the plugs #2 and #3 are slightly wet with fuel. Rather weird as the engine hasn’t turned since September last year. Also clear that there is a light oil deposit on plug #3. Maybe a proper tune up (valve clearances and timing check ) will improve things here. But first I think the car needs to be used more!

Sunday, 21 February 2021

Coolant leak DHC


Or preparing the car for the first drive of the year! As the weather forecast for the weekend was very nice, I decided that one of the jobs for the Saturday was a check-up for the DHC. It turned out all fluid levels were OK, though the dip stick might tell a different story.


But it is the dip stick from a Dolomite 1850. In the past I checked the exact level by filling the sump with the exact amount of oil. And with this in the sump, the level was halfway between the tip and the low level mark. In other words the oil level was almost at the maximum mark.
The coolant level also was nearly at its maximum level. But when I checked for signs of leaks underneath the engine I found a small puddle of coolant sitting on top of the sub frame. As it was sitting right underneath the water pump, that was where I started the search. But the infamous hole was bone dry.


The same applied for the other regular leakage point, the connector pipe between the inlet manifold and the water pump cover. Everything was dry there too. Also the joint between the waterpump cover and the block showed no leaks. This only left one option. The top of the hose that goes from the water pump cover to the radiator. And sure enough, there was coolant on the back of this hose back. And on closer inspection I found this originated from the top of the hose. It turned out the jubilee clip pictured above had become a little lose. Quite easy to rectify!


The final jobs were topping up the oil in the carburettor dampers and checking the tyre pressures. They were all at about 1,8 bar. So they needed a little extra air, as I run the tyres on this car at 2,0 bar on all four corners.


And this afternoon I was able to enjoy a glorious winters day with the hood down. Sadly all photogenic places were cramped with people, so only the one picture as proof.


It was nice to be out again in this car, and before I knew it, I was back in the shed with 165 kilometres added to the cars odometer. It was an afternoon well spent indeed!


Sunday, 21 June 2020

DHC: Pre MOT check and first drive


Due to the current Corona pandemic I haven’t spent much time on the DHC so far this year. I only swapped the brake light switch while in the shed earlier this year. But as she is booked for her biennial safety and environmental inspection (or APK as it is called here) soon, I thought it a good idea to check if everything still was functioning properly. And that is what I did yesterday.
I started with the lights, and in particular the brake lights. And that’s because I changed the brake light switch earlier this year. I needn’t have worried, the brake lights worked. As did all the other lights. But I was in for a little surprise, as the lights in the instrument cluster (converted to LED last year) were burning in a different pattern now (the middle LH bulb was now on strike, instead of the one on the extreme left). Looking at the picture below I think it is safe to say that when I remove the two middle LED’s, there still is plenty enough light to clearly read all the gauges in the dark. Oohh … and I almost forgot to mention that the clock stopped working and the fuel gauge now reads ¼ full permanently!


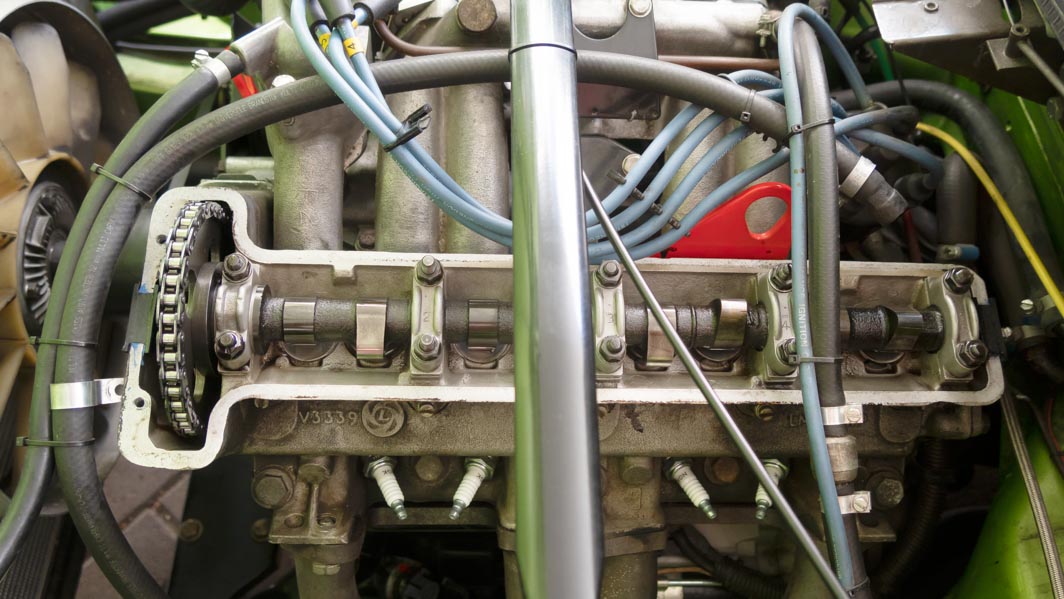
The wipers, screen washer, heater and horns also did function properly. Time to move over to the engine bay. All levels still were as I left them almost 7 months ago, and no traces of oil or coolant in the rectangular hole underneath the water pump. Only the level for the carburettor’s oil dampers was low. But that was to be expected. And pretty easy to solve with the small oil container I carry in the engine bay for this reason!.


But not everything was as it should be. Despite a new front pulley and oil seal, which I fitted a few years ago, there still is an oil leak there. Will probably have to look at the markings on the dipstick. As it could be caused by over-filling the sump. To be continued one day when I find the time to calibrate the Dolomite dip stick to this engine.


As the suspension and brakes were thoroughly checked and refurbished last year, in preparation for Club Triumph’s 10 Countries Run, I decided to leave these alone. So I finished the inspection with the tyre pressures. They all had dropped a little, from 2,0 to 1,9 Bar to be precise. Easily rectified with a tyre gauge and a bicycle pump.

This afternoon I took the car for a short two hours’ (or 100 kilometres)  drive to see if everything else was OK with the car. It looks like! But more importantly it was nice to be driving with the wind in the hair again.


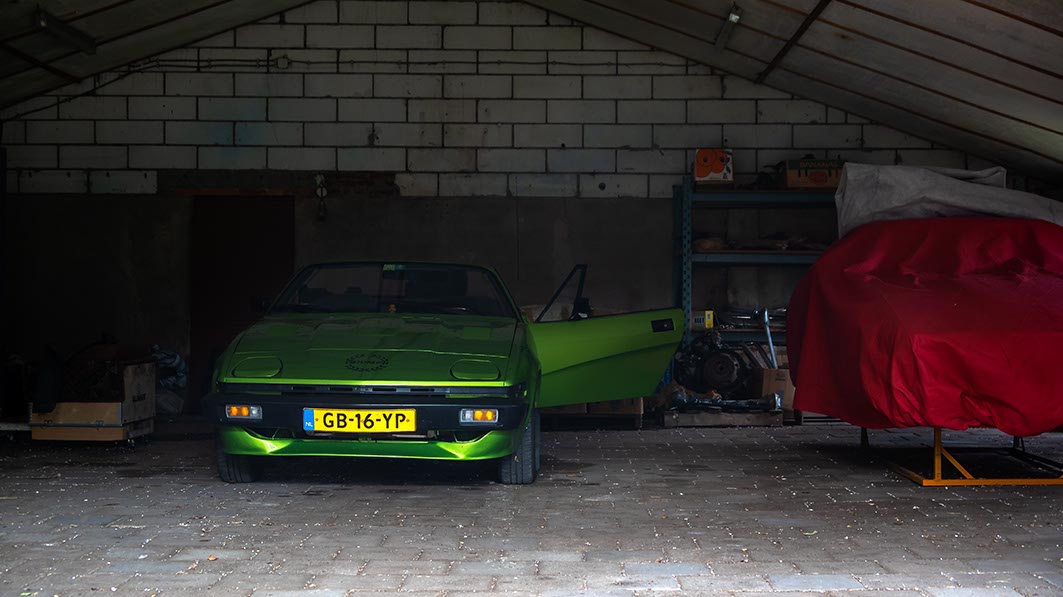
And after that she was tucked away again in the shed. Though not for 7 months but till this Wednesday, when she’s booked for her biennial APK inspection (TüV Prüfung for the Germans or MOT inspection in the UK).