Showing posts with label SU. Show all posts

Sunday, 21 August 2022

More 10CR checks


Spent a few hours over this weekend, preparing the car for the 10CR. Starting on one of the lifts in a friends workshop, with the aim of checking all rubber fuel hoses from below. First check was the fuel hose between the (FI) fuel tank and the 8mm metal pipe running to the engine bay. After cleaning 12 years of road grime from it, I found out there was nothing really wrong with it. Which turned out to be a good thing! Because I was reminded that on a FI tank the supply hose connection is 12mm. Clearly forgot that over the 12+ years since I restored this car 😶 At the time I fitted a fuel resistant 8mm hose with a 2mm wall thickness inside the hose end that connects to the 8mm pipe.


So that would have been a challenge to replace with a half empty tank and only normal fuel hoses at hand. All the rubber fuel lines in the engine bay were also in good condition. Not really surprising as these were all renewed in the past few years.
To prevent future problems, I think I will replace the two separate outlet and sender units for a normal carburetted version. The tank’s redundant hole should be straight forward to close up with a round steel plate with the same dimensions as the sender unit’s base plate.


Next job was a bit of tinkering and cleaning of the carburettors. Starting with the suction chambers and pistons. Main job here was polishing the inside of the suction chambers and the pistons outer rims. Though one of the pistons had clearly accumulated some dirt on its piston’s surface.


With the internals cleaned I spent some time on the custom carburettor linkage. Mainly consisting of a good clean and some fresh grease inside the link rod ends. Inspecting the rod end’s surfaces proved there was nothing wrong. And as such still one of the better adaptations on this car.


Final jobs were a detailed general check of the engine bay; emptying the catch tank, changing the routing of the two fuel hoses connecting to the carburettors, checking the earth point (found and rectified one loose bolt behind the RH headlight, caused by a stripped thread). Next weekend I will have a look at the front suspension. But in between I’ll start with preparing the route for my GPS and mark the route out on a good old fashioned paper map!


Thursday, 13 May 2021

FHC resto nr. 128; Sprint inlet manifold

Another sidestep! This time because some new tools and stainless fasteners arrived. I also needed some adhesive to bond the shift pattern into the gear lever knob. And while I was happily messing about with it I thought it a good idea to glue the two halves of my spare alloy SU carburettor mounts together. How I had them made has been documented previously HERE and HERE. So I won’t bore you with the details. And bonding the two halves together was pretty straightforward, using a small spatula to apply the (polymer) adhesive to two of the halves. After which the parts were clamped together using the counter sunk screw bolts that function as mounting studs for the carburettors. Easy!


Next job was to inspect and run a thread tap through all the threaded holes of the manifold. Turned out two holes had badly damaged threads. So these got a thread repair. Though one of the thermostat house bolt holes decided to put up a bit of a fight. But I got the thread insert fitted correctly in the end. So to make sure the insert really was OK, I decided to try to fit the thermostat housing first. But why trial fit when you have the parts lying around to fit it permanently? The thermostat is an original MG Rover item (PEL10002EVA). I even found a (i.m.h.o. highly recommended) cardboard gasket to go with thermostat housing


Turned out I needn’t have worried! Both bolts could be tightened down properly. Time for the last job on the manifold for now, fitting the carburettor’s mounts.


Sunday, 21 June 2020

DHC: Pre MOT check and first drive


Due to the current Corona pandemic I haven’t spent much time on the DHC so far this year. I only swapped the brake light switch while in the shed earlier this year. But as she is booked for her biennial safety and environmental inspection (or APK as it is called here) soon, I thought it a good idea to check if everything still was functioning properly. And that is what I did yesterday.
I started with the lights, and in particular the brake lights. And that’s because I changed the brake light switch earlier this year. I needn’t have worried, the brake lights worked. As did all the other lights. But I was in for a little surprise, as the lights in the instrument cluster (converted to LED last year) were burning in a different pattern now (the middle LH bulb was now on strike, instead of the one on the extreme left). Looking at the picture below I think it is safe to say that when I remove the two middle LED’s, there still is plenty enough light to clearly read all the gauges in the dark. Oohh … and I almost forgot to mention that the clock stopped working and the fuel gauge now reads ¼ full permanently!


The wipers, screen washer, heater and horns also did function properly. Time to move over to the engine bay. All levels still were as I left them almost 7 months ago, and no traces of oil or coolant in the rectangular hole underneath the water pump. Only the level for the carburettor’s oil dampers was low. But that was to be expected. And pretty easy to solve with the small oil container I carry in the engine bay for this reason!.


But not everything was as it should be. Despite a new front pulley and oil seal, which I fitted a few years ago, there still is an oil leak there. Will probably have to look at the markings on the dipstick. As it could be caused by over-filling the sump. To be continued one day when I find the time to calibrate the Dolomite dip stick to this engine.


As the suspension and brakes were thoroughly checked and refurbished last year, in preparation for Club Triumph’s 10 Countries Run, I decided to leave these alone. So I finished the inspection with the tyre pressures. They all had dropped a little, from 2,0 to 1,9 Bar to be precise. Easily rectified with a tyre gauge and a bicycle pump.

This afternoon I took the car for a short two hours’ (or 100 kilometres)  drive to see if everything else was OK with the car. It looks like! But more importantly it was nice to be driving with the wind in the hair again.


And after that she was tucked away again in the shed. Though not for 7 months but till this Wednesday, when she’s booked for her biennial APK inspection (TüV Prüfung for the Germans or MOT inspection in the UK).


Sunday, 10 March 2019

FHC resto nr. 77; Heater rebuild part 8


Again a set back with the heater’s connecting tubes. It has already been several months ago that I visited the shed in search of a good original heater pipe assembly. But before sending it of for coating I thought it a good idea to have the ends shot blasted first to check if there was enough metal left there to get a water tight seal. There was. After which it was well over a month later that I finally found time and motivation to have them galvanised. Sadly something went wrong there and the assembly was badly damaged. Both pipes were torn from the mounting plate leaving me with three loose and parts:


Being rather fed up with the whole thing I decided to go back to one of my initial ideas for the pipes’ fire wall crossing. As the base plate was badly deformed where the tubes had been welded to it I decided to use the plate I prepared for my original set up last year. But with a slight adaptation of the extra mounting point to make sure this wouldn’t foul the larger grommets now being used: 


In my previous post I mentioned an upgrade I am working on for the DHC (actually PAS). As there still are some doubts about the clearance for such a set up I decided on another trip to the shed. This time  for a comparison picture of some inlet manifolds. Clearly visible is that the FI manifold needs some extra space at the front where the PAS pump should sit. And one of the other future plans is to the fit a modern injection set up to the DHC using an original set up as base:


Both to be continued, the heater hopefully soon! Because as long as that isn't fitted I can't and won't start with the wiring and the rest of the remaining jobs on the car …

Tuesday, 25 September 2018

Reconnaissance LTV Nachtrit 2018


Yesterday I finally got the SU carburettors on the DHC set up correctly, using the emission tester from a friends workshop. Turned out that it was running pretty rich at almost 7% CO, but that was easily rectified by turning the adjustment nuts 3 flats up. Which gave a reading of just above 3%. Synchronising them brought the CO level to 3,5%. With an idle speed of circa 1000 rpm. Result! Sadly the homeward journey turned into a shower dodging contest. So it was kept short ...


But today the weather forecast was much better, so I used the reconnaissance for the 30th edition of our Nachtrit, which will be held on Saturday the 27th of October, as an excuse to take the DHC for a drive in the country. And it turned out to be a rather enjoyable day, clocking up well over 300 kilometres all together. A few pictures of some of the areas we will be visiting this time;


And the car behaved quite nicely. Most noticeable is that since fitting the slightly richer needles, the engines temperature is running slightly lower than before. So that looks good. And another trip planned for this Sunday!

Saturday, 22 September 2018

New carburettors - final take (5.1)


It had to be something simple! This morning I visited a friend's workshop, for some kind of second opinion on the carburettors. And after coffee and vlaai we started with a few checks. His verdict was that the throttle disc of the front carburettor wasn't aligned properly. Which also meant that fine tuning had to wait till this was rectified. After some more coffee and vlaai I headed home to do some household shopping, after which I made myself comfortable to remove the carburettors again to check the alignment of the throttle disc of the front carburettor. Well there was nothing wrong with the throttle disc. It was nicely centred and moved freely. But by the time I found that out I already had found the culprit for the problems, this small piece of tissue paper:


Rather embarrassing really! While fitting the carburettors for the umpteenth time I almost forgot to remove one of the gags of tissue paper I had stuffed in the two manifold ports to prevent dust from entering. But with the front carburettor loosely in place I noticed my error. So I just pulled the carburettor back a bit and pulled the gag of tissue paper out. And I didn't notice that a small piece tore of and remained behind on the two lower mounting studs, where it got wedged between the carburettor flange and the manifold mount. And here, soaked in fuel and preventing an airtight seal, it could provide extra air and fuel. But it could also prevent the throttle disc from closing properly. Resulting in the problems mentioned in the previous two posts on this subject. I knew it had to be something embarrassingly simple!
With the carburettors again in place it turned out very simple to set the idle speed at around 950 rpm. I won't set it any lower as the idle will become rather lumpy. This being caused by the by now ancient Triumph Tune TT10204 Fast Road (280° duration) cam shaft that is fitted to the car's engine. Hopefully I'll be able to fine tune the carburettors within the next couple of days and see how the car runs now!


At least I am now again rather experienced in removing and adjusting SU carburettors and have gathered a lot of knowledge on SU working pressures, needle valve closing pressures, fuel pumps and so on. And I have learned not to use tissue paper to keep dirt out, but to use cloth rags in the future. But also to take my time to carry out  certain jobs, and not rush them!

Wednesday, 19 September 2018

New carburettors - take five


How time flies! It is already well over a month ago, that I decided I needed a few spacers to go between the fuel pump and the engine block. The idea was that fitting the spacers would reduce the throw of the fuel pumps arm. This way I hoped the fuel pressure would be lowered enough to get the car running well enough to drive her to friend's garage. And there I would be able to check the fuel pressure from the fitted mechanical fuel pump. It turned out I was on the wrong track! Fitting various spacers (ranging from 1,5 up to 6 mm) didn't change the engine's running at all. Luckily they were not very expensive to make ...


Though a round trip to pick up the fuel pressure gauge from a friend would have been slightly more cost effective. Which I eventually did as I couldn't get a decent idle from the engine. So I had to take the fuel pressure gauge to the car, just to rule things out! With the pressure gauge plumbed into the fuel supply system I found out that the fuel pressure was actually pretty low at just 0,07 Bar (or 1,0 psi). So not a chance that the carburettors were over fuelling because of the fuel pressure being too high!
I already had checked the free movement of the floats and the proper functioning of the needle valves. And these had turned out to be fine. As there still was some fuel sitting around the jets, it did look like a float problem. As the carburettors are fully rebuilt I presumed that the floats were set correctly. But I decided it would be well worth another check. The front float turned out nicely within the prescribed range. Though the rear one wasn't. With the float cover held upside down, the float wasn't resting on the float needle but on the float lid itself, though it just closed of the needle valve. But not fully compressing the needle valve's spring! Luckily I found a thin spacer for the needle valve seat in one of my spare carburettors. This brought the gap between the top of the float and the lid within the prescribed range. And after that I was able to start adjusting the idle speed. That's when I found another small problem. The throttle lever pins to be precise:


I had placed them to far apart on the spindle, resulting in them locking inside the throttle levers. Again a small gain! With these two jobs completed I was able to bring down the idle speed from 2000 rpm to under 1500 rpm, result at last! And just in case I swapped the original carburettor needles (BDL) back to see if this would change anything, it didn't.
With the carburettors now performing fairly well and the car driveable, it was time to enjoy today's fine autumn weather:


This was to blow away any cobwebs from the engine in preparation for a visit to a  friend's workshop which is planned for this Saturday. Here I have the opportunity to use his calibrated emissions tester for fine tuning the carburettors. And a second pair of eyes to check for anything else I might have overlooked. Yes I still have a strong suspicion I have overlooked something simple and obvious!
As for the car, she behaved rather well, but doesn't pull as strongly as with the slightly richer needles (BCE), I fitted before. So these will be swapped before Saturday! And the idle speed remains around 1500 rpm, with a slight irregularity from time to time. Also to be continued ...

Saturday, 18 August 2018

New carburettors - take four


Since fitting the new carburettors things have not exactly been going to plan! I left this bit of TR7 ownership a week ago and with a few hours to spare today I had another go at tuning the carburettors. At least the previous actions did have an effect, as there were no more fuel leaks. But she still refused to idle at a proper engine speed. This time the engine didn't react at all on winding up the idle screws, and kept running at over 2000 rpm! Time to go for a short test drive. Overall the engine runs nicely but when slowing down for low speed corners there was a distinctive petrol smell. But on returning home there were again no visible leaks, which prompted me to have a proper look at the old carburettors. The throttle discs were almost completely closed!
As the reconditioned carburettors have been checked and double checked, I think it is by now safe to rule them out. Though the symptoms could be caused by a faulty float needle valve. Time for a rethink and a browse through my personal notebook, this blog! And that was when I was reminded of a slight problem that reared its head when I fitted this fuel pump only days  before the 2014 edition of Club Triumph's Taith o Amgylch Cymru (or Tour of Wales):


I did have some problems while fitting the pump to the engine. At the time I thought this was purely caused by the lobe on the idler shaft being in the wrong position. And this seemed to be confirmed by the fact that after rotating the crank shaft half a turn the pump slipped in place without any problems. I also checked the new pump's lever arm length against the original pump. The last one was of the long arm variety, fitted with a half inch thick spacer. Well actually two quarter inch ones:


As the new pump had a significant shorter lever I fitted it without the spacer, and headed for Wales. At the time I didn't think much about the fact that the idle speed had risen somewhat to around 1500 rpm. I simply adjusted it till the idle speed was around 1000 rpm and carried on with touring Wales.

Fast forward four years and bearing the above in mind I thought it a good idea to compare the pump fitted to the car with two original TR7/Dolomite 1850 fuel pumps. One with a long and one with a short lever arm, and with the current fuel pump in the middle:


At first glance the two pumps on the right look more or less the same. But after some measurements I found the following dimensions between the pump's mounting flange and the end of the lever arm where the cam lobe touches (from left to right): 57mm - 48mm - 44mm. So it seems like a safe bet that the fuel pressure might be too high, but how high? As I don't have a fuel pressure gauge I think I'll start with a 3 or 4 mm spacer. And hopefully that will get the car driveable enough to my friendly workshop to check fuel pressure and carburettor settings.
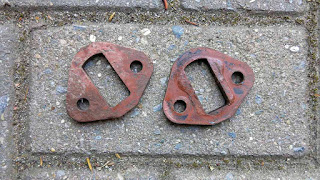
At least a scan of a fuel pump gasket enabled me to produce a file for machining the spacer. To be continued ...


Wednesday, 8 August 2018

New carburettors - take two & three


With the carburettors again removed from the car, and the cause for the problems clear, it was time to address these problems. Which meant replacing all throttle and choke brackets with known original items. And as mentioned some two weeks ago, for these I used the parts that I had already prepared for the engine for the '76 FHC:


But I also swapped the different shaped choke lever link for an earlier model from the carburettors that came of the car. All pretty straight forward except for the fact that the temperatures have been well above 30°C over the past few weeks. So it all took slightly longer than expected. But early last week all parts were swapped and they were ready to go back on the engine.


Sadly while trying to do a basic tune up in preparation for the fine tuning, scheduled for last Saturday, I found out that whatever I did the front carburettor couldn't be adjusted properly. That was when I noticed a fuel leak from the float chamber of this carburettor. It turned out that the rubber seal from the jet assembly had been dislodged while changing the choke lever link. Long and very frustrating story cut short, the carburettors were removed again and I visited a friend for some much needed small parts to stop the leak and get the carburettors going properly!


And these parts (spring clips, seal and stripped jet assembly nut) were fitted to the carburettors over the previous days. Which meant I could use a bit of my spare time today to fit them back on the engine again. And with the practice and experience I got from fitting them several times over the past few weeks, this time it took me less than half an hour to fit them and connect everything. At least something positive out if it!


Remains the final task of fine tuning and balancing them. But that's for another day.