Saturday 28 November 2020

FHC resto nr. 115; Refurbishing the front side lights

Although the temporary guest is also in need of some attention, I decided to spend some time on my own project. And one of the jobs that was waiting to be finished were the front side lights. During my (late) summer holidays I collected my spare lights from the shed. And after inspecting them, I decided that it was best to dismantle them completely and refurbish two complete sets (leaving me with one spare set). So I started with dismantling the chosen units.


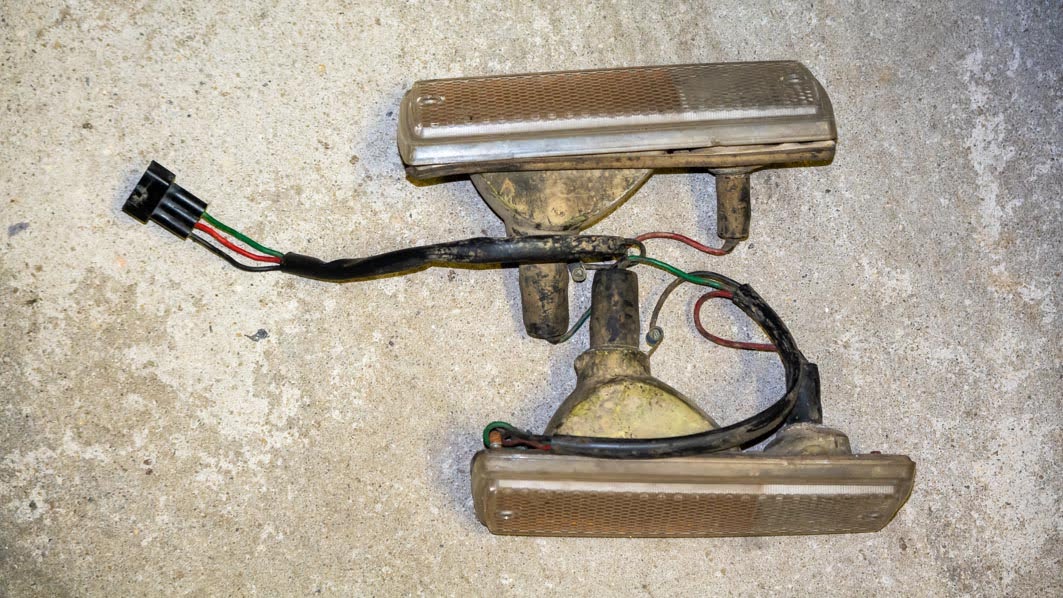
To take them apart you first have to remove the connectors. Not too difficult using the correct tools. Though some connector pins didn’t need tools, as they fell apart at the slightest pull. One of the reasons why I always place the connectors well out of harm’s way!


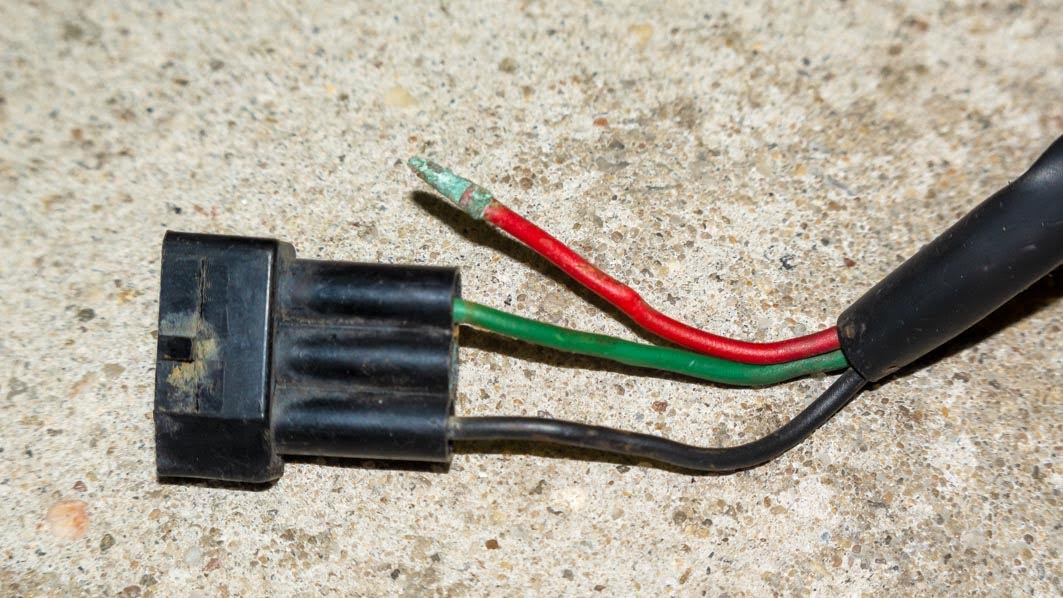
With the connector blocks removed the connectors themselves were unceremoniously cut off. They were too far gone to be of any future use. And removing them enabled me to remove the rubber boots, and the wires plus contact points for the bulbs, from the armatures.


And after an evening of pulling the armatures apart, including drilling out a few lens screws, removing all mounting bolts (or their remains), and hammering out some dents, I was left with various assorted parts:


The lenses of course won’t be used as I finished a pair of these for the car almost half a year ago. So the lenses pictured above will be for the spares department. Same applies for the gaskets. These will be replaces with new ones.
The final stage for this part of the front side light refurbishment was a trip to a friend’s work shop and his bead blasting cabinet. But first one of the armatures had to be cleaned of a thick layer of under body seal. The final process of bead blasting the four chosen armatures was rather straightforward. Though much more time consuming than expected. The rather old blasting medium and a slowly emerging blockage in the nozzle didn’t help here. But I got there in the end. This should give a good base for the next stages, painting and assembling of the armatures.


Friday 27 November 2020

A drive at last!


Managed to start the weekend a few hours earlier today. And as the weather was very nice I decided to take ‘t Kreng for a spin. Last time I used her was when I drove her to her biennial inspection on the first of July! So it was no surprise she was a bit reluctant to start. The cold weather certainly didn’t help here. But on the fourth attempt the engine fired, and even settled into a fairly steady idle. Time to enjoy the local country site and a few hours of driving.


Because of the cold weather and the fact that the holiday season is well past (not mentioning Covid-19), it was rather quiet on most roads. Which meant I could drive the car in anger from time to time. I have to admit that due to the low mileage I have done with this car over the past year, I had almost forgotten how much fun she is to drive.


Yes, due to the pretty stiff suspension set up, she is harsh when pottering around on bad surfaced country lanes, but on full chat she still is absolutely lovely to drive. Well balanced and surefooted with brakes to match. But the best bit is that she can be steered with the throttle without getting massive oversteer.


Sadly I have only a few days left this season. On the first of December she’ll have to go into forced hibernation again till the first of March. Hopefully 2021 will be a better year from a driving point of view!

Tuesday 24 November 2020

Parts donor part 2


I had a slightly better look at the parts car that we put in the shed over the past weekend. Didn’t do an in-depth inspection, which will have to wait till I clean it out and start pulling parts of it. And when I am done the remainder will be passed on to a fellow TR7 enthusiast who will probably use this fairly solid looking car to re-shell his current restoration project.
And as it was Sunday when I took the pictures, I didn’t crawl underneath the car but only took a few “external” pictures of the it. But the overall impression isn’t too bad!


First its origins and the VIN plate;
  • *TPAEJ8AA404354* This was a bit of a surprise as it was originally registered almost a month after ‘t Kreng. But its VIN number is well over 500 earlier;
  • Paint code CDE or Carmelian (according to the Parts Catalogue) or Carnelian Red (as it seems to be its correct name). The car clearly had a respray somewhere in its history but looking at the engine bay they stuck with the original colour;
  • Interior trim JAJ or Navy Blue Velour. I am afraid the seat’s covers are in a fairly sorry state, so will probably be discarded. While the frames will be stored for future use. Unless someone offers me two good bare frames for them!


As can be seen in the picture above the car has only covered 87173 kilometres. And the instrument cluster looks in good condition. So might yield some useful spares. 
And according to the car’s mileage the engine, which will remain with the car, might still have some life left inside. At least the engine bay looks unmolested. Though a bit … euhh … neglected


The upper part boot area looks fairly normal for a car that has led the life it did. With some rust in all the usual areas. And clearly showing why all my cars have the early mechanical boot-lid-stay. The gas struts can’t even hold up the hinge itself. Let alone with a heavy boot lid fitted 😜


The boot floor and spare wheel well will have to wait for a detailed inspection, as the boot is filled with old and mouldy interior parts. So I left them where they were. 
And to finish this post a few exterior pictures of the car:


Oh … and being a late European specification fixed head, it is factory fitted with an Edrose folding roof. But that is hidden by the bonnet.


Sunday 22 November 2020

Fitting the refurbished strut brace to ‘t Kreng


Shortly before the end of my holidays in September, I picked up a smallish batch of freshly powder coated parts. These were mostly for the ’76 car. But there was also a freshly coated strut brace for ‘t Kreng. But when I went over to the car to fit it, I was confronted with an unpleasant surprise. For no obvious reason the strut brace was now about 5 mm too long! Rather strange indeed, as the adjustable mounts on the bar had been very securely locked in position. At the time I managed to fit the bar. But that was only possible by moving the top of both struts outwards by a few millimetres. Time for a rethink!


Fast forward and last week the solution suddenly occurred to me. Due to the weight of the car the now unsupported strut towers had moved inwards. The fact that the almost 40 year old car’s body has had a tough life certainly has aided here. So the solution should be pretty simple: Get the weight of the wheels, and the strut towers should move apart. Thus enabling me to fit the strut brace in its original position. Sounds easy and it turned out to be just that.


First the two mounting rings (and strut tops) were put back in their original position (glad I marked out the original position). And the mounting nuts were tightened up properly so the strut tops couldn’t move anymore.
After that the brace bar was put into position, but with only one of the two mounting bolt loosely fitted in position. After which I slowly jacked up the front of the car, while keeping an eye on the other end of the bar. In the picture below the car had only been raised a small amount.


And with the front springs almost fully extended, the holes in the bar and the mounting ring were aligned correctly. Result!
 Remained the easy task of tightening the two mounting bolts and lower the car. Hopefully I will be able to enjoy her within the next few days, before her mandatory hibernation starts on the 1st of December.


Saturday 21 November 2020

Parts donor

Picked up another TR7 this weekend. One from the last batch of European spec Solihull built FHC’s. It is an originally Dutch registered car, registered on the 11th of May 1982. So almost a month younger than ‘t Kreng. It was unearthed from a friends place. And from the picture below it is clear that this friend already removed some parts, which should keep her own FHC TR7-V8 on the road.
As she had no further use of what remains of the car it was offered to me for free. Needless to say I accepted the offer. So the car was pulled from its resting place, loaded onto a trailer and transported to the shed. Initial plan had been to wait till the Christmas Holidays, and transport it directly to a friend’s workshop where we could dismantle it in a few days. But that plan had to be ditched due to external influences.
At least I can start with stripping most of the smaller and lighter items from the car in the coming weeks. As such I will pull the wiring, front spoiler (fairly decent), both bumpers, front and rear screen, gearbox, back axle (yet another 3.45 diff) and a few minor bits and pieces from the car. After which it will be passed on to another TR7 minded friend who is also in the process of restoring a FHC. And the body of this car is fairly solid considering its age. And it has a factory sunroof which he likes! So his restoration plans might very well change now …
And it enabled me to start the DHC for the first time in two months! This to allow access for this temporary guest.

Thursday 19 November 2020

FHC resto nr. 114; Striping, take 2


I left this part of the restoration at the end of my holidays in September. At the time I was waiting for new plotting foil to arrive. And this was because I was in need a new right hand rear wing stripe (…) and the two slightly adjusted short stripes on the front wings. I also wanted to change the TR7 logo underneath the blanking plates on the rear wings. Sadly at the time we had run out of black cutting plotter film. But since previous week that problem was solved.


As the plotting file shown above had been prepared already a few months ago, it was quickly loaded into the plotter. And the outlines of the remaining pieces (and a few spares) where cut into the film within a few minutes. But due to the gloss black finish of the (PVC) film it was rather difficult to determine the exact position and outlines of the various separate pieces.


This didn’t really help with the next stage of converting the digital file into separate striping pieces and decals: The time consuming task of removing all the excess film material from the sheet. To start with the larger “outside” sections on the sheet. An hours’ worth of carefully removing excess film produced the clear outlines of the various pieces.


After which came the next task of removing the various “inside” pieces. Though again time consuming, with the correct tools (shown in the picture at the top of this post) this too went very well. Have to admit that it was a rather fiddly job. But also rather rewarding. An evening well spent!


The next stage was cutting up the sheet and adding the application film to the various parts. Despite all the correct tools, this clearly took much longer than expected.


But all the parts are now ready to be applied to the car. And I have a few spare sets in case they wear of or get damaged somehow. Another evening well spent!


Can’t wait to see them all fitted to car! But another (short term) project in between first. Probably more on that soon. 

Saturday 7 November 2020

FHC resto nr. 113; Boot light (#151353)

Slowly preparing the parts needed to finish the boot area. Today I was able to tick the boot light (#151353) of the list. I am 95% sure I should have one or two complete units lying around somewhere. But so far I have only found one incomplete unit. It was missing one of the brass contacts. Luckily I managed to source a complete unit from a friend today.
First job to do was to remove the contacts and drop them in a small dish filled with a cleaning vinegar & salt solution.


After that it was time to attack over 40 years of accumulated dirt.


It did look rather dirty, but it is complete and has no visible damage. And after soaking it for 15 minutes in hot soapy water, most of the dirt and wax-oil could be scrubbed of without too much effort. It did need some tiny detailing with white spirit afterwards to get all the dirt of. And by this time the contacts had been soaking long enough in the home brewed solution. After rinsing any acid residue, they only needed a little attention with a fine scouring pad for a nice finish (considering they are well over 40 years old). Another small job done.


Next job (I think) should be sorting the last bits of the boot wiring. There’s also the unfinished business of the striping …