Showing posts with label Seatbelts. Show all posts

Friday, 25 December 2015

FHC resto nr. 44; Small progress


Managed to do a few small jobs on the FHC. First I finished the sound proofing of the body shell by rectifying a few minor blemishes and faults caused by the lowish temperatures when I applied them. This last issue meant a few pads were coming loose at some of their edges or had some air trapped underneath. But with the paint stripper and some blunt tools that was easy to rectify. I also added the last missing pieces on the inside of the sills ...


And for comparison, the same area in a FHC ...


With the soundproofing finished I spent the rest of the afternoon cleaning up all threads of welded in nuts and threaded plates. As it seemed rather inappropriate to cover up the car without any visible proof of an afternoon well spend, I decided it would be nice to fit the first few parts, the seat belts ...


Next steps; refurbish the rear lights and the wiring loom.
But there are some other jobs to do on my TR7's this winter ...

Sunday, 15 March 2015

Refitting the Webers


Last week I received another box containing various parts for my three TR7's. And among these parts there were also two rather vital small bags, which contained a pair of Weber DCOE stud kits. When I wanted to fit the carburettors a few weeks ago, I noticed that several of the original studs were badly worn. So not fit to reuse ...


But I did use them to trial fit the carburettors with the new sealing plates. This showed me that the original studs that came with carburettors were too long. With the ends of the two top studs touching the carburettor body, the seal was still lose between carburettor and manifold flanges. Clearly needed some shorter studs, which among other things I ordered through Demon Tweeks ...


In the picture above the difference in length between the old and new stud is quite clear. Even though the previous sealing plates were slightly thicker, due to the studs being too long it was impossible to tighten them up fully.  And this also for me explains how it was possible for the mounting holes on the carburettors to wear out as they did.
After removing all of the old studs and inserting the new ones (using the proven two-nuts-locked-together-method)  it was time for the carburettors to be fitted. This is a rather straight forward job, except for the fact that for the top nuts there is hardly room for decent spanner access. So rather time consuming to get the top nuts tightened.


The short spanner throw also prevented decent feel as to how tight the nuts were. So to get all nuts torqued down more or less the same I used a set of feeler gauges to measure the gap between the cup washers that retain the rubber grommets.


And to show the problem, the amount of room in front of the top studs. In this case there is about 5 millimetre room between the end of the stud and the carburettor's body. With the old set up is wasn't possible to get a 1 millimetre feeler gauge in the gap.


Now waiting for the last bits to get the car ready for the road. I also ordered new seat belts but clearly something went wrong with the lap straps when they packed them at the factory ...

Wednesday, 17 July 2013

10CR Preparations part 1

With the start of the 10CR less than 50 days away it was time to start preparing the chosen car for the event, the DHC. But first she needed a new valuation for the insurance. The valuator (same guy who did the valuation after the restoration three years ago) was positively surprised by the new paint job, and how well the car had "aged" despite three trips to the Alps. And this showed in cars new value ! And the insurance as ever were rather quick to change the insurance policy! With this administrative job done, it was time to start on the car itself.

First job was fitting some extra equipment, like a pair of drink bottle cages. First wanted to fit them somewhere on or near the B-posts. But in the end I thought this location would be much better...


Also fitted a map-light-magnifier, to aid navigation on the night time section through France, on the first and longest stage of the event, together with an invaluable pen(cil)holder to prevent loose pens all over the foot wells ...


And while checking the fuel gauge I found out why part of the instrument panel was not illuminated. One of the bulbs had decided to pack up, but not before overheating badly and melting part of the green cover. Clearly something wrong with this bulb as the other covers were in perfect condition despite their bulbs (with the same Wattage) having seen much more action in the past three years ...


The fuel gauge turned out to be OK, so next item to check is the tank sender, but for that I'll first have to drive the car for a few more kilometres to get the tank a bit more empty ...

Another item on the to-do-list was some maintenance to the leather seats. This had been postponed several times because I hate the job, as it's rather boring and time consuming applying hide food with a cloth or a brush. But over the past few weeks I have been searching for better and easier options, which in the end I found in the shape of a spray bottle of Nikwax Leather Restorer. I have been using Nikwax products for my walking boots for years now, but I missed the fact that they also had for other products. And as with all their products it's rather easy to apply, spray on, wait a few minutes, wipe of excessive product, ready. Covering the car's interior to prevent overspray took longer. Some shots before, during and after treatment ...


Remaining list of things to do;
  1. Get some more miles on the new gear box;
  2. Fit banded steel wheels with new tyres;
  3. Get the fuel gauge working, now looking for another tank sender;
  4. Check back axle bearings;
  5. Fit new front anti-roll-bar and check alignment;
  6. Fit new badges/stickers;
  7. General service;
  8. Connect map light magnifier and fit some extra interior lights.
I have started on the last item on the list, fitting some extra lights to aid retrieval of dropped items from the foot wells in the dark. For this I will be using small green LED's which will be strategically placed to illuminate the foot wells and the glovebox. The ones in the steering column shroud fitted already ...

Monday, 10 May 2010

DHC report nr. 89; Seats & more

Yesterday morning I took the seats for the DHC down from the attic, where they had been stored for nearly 12 years. First thing was to give them a thorough treatment with some hide food. And after wiping them of today, I brought them over to the shed to put them in the car. But first I had to finish the last bit of the dashboard, fitting and connecting up the dashboard loom to the instrument panel.


If I hadn't forgotten to look at one of the many pictures I took when dismantling the car, I wouldn't have had to return home to see how these four wires had to be connected to their respective warning light.


With the wiring and cables sorted, fitting the instrument panel and shroud was the proverbial piece of cake!

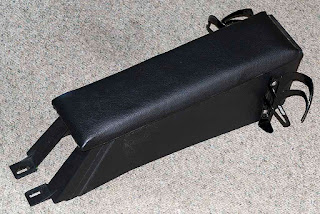
Having to return home meant a slightly belated lunch break, after which it was time to put the seats back in the car. Took a far amount of time, especially enlarging the holes in the floor carpets to accommodate the seat’s frame spacers. But with the holes enlarged, fitting the seats themselves again was pretty straightforward. Only the least accessible bolt on both seats put up a bit of a fight, which they both lost. And to finish a good day’s work I fitted the steering wheel and the arm rest, but the last one was fitted as an afterthought, so after I put away the camera.


And when I returned home there was this large package waiting for me, containing this rather lovely alloy radiator. Ordered it through Robsport, and have to say it took a little bit longer than expected but still in time to fit in the slightly stretched time schedule. But it’s been worth the wait, the quality of the work looks very good indeed.


Ordered this one with an update of 't Kreng’s coolant system in mind. See how the engine behaves, as this radiator should be more efficient than the original one.