Showing posts with label Gear box. Show all posts

Saturday, 1 March 2025

FHC resto nr. 169; Gearbox extension take 2

One of the two jobs I unfortunately had to redo recently; cleaning the gearbox extension. I put everything together after I cleaned the alloy part in question thoroughly in 2018. At least that was what I thought. Fast forward 8 years and I found what looked like old grime and oil was coming to the surface of the alloy gearbox extension.


Time to redo the job and hopefully this time with a better end-result! First step was thoroughly washing the casting in very hot water with a good degreaser and a collection of different brushes. This removed a fair amount of grime and oil. Actually much more than expected. The water was pretty black afterwards. Needless to say, the extension was rinsed of with lots of clean hot water. After which it was time for an extra treatment, blasting the alloy parts with glass beads. Well pleased with the end result! Hopefully this time I got rid of all the oily muck in the casting.


And the final step was fitting all replated steel parts back to the gearbox extension. All rather straightforward. I only have to adjust the reverse gear baulk plate to its correct position. But for that the extension needs to be fitted to the gearbox.


Edited on the 8th of March 2025: added the finishing touches to the gearbox’s extension today. This meant fitting the new reverse light switch plus a nicely bead blasted and blackened lock nut and fitting a plastic cover over the wiring harness clip.


Sunday, 10 January 2021

FHC resto nr. 119; Parts donor's yields

With the car passed on to its next, and hopefully final, chapter, it was time for me to go over the proceeds. Overall well pleased with the parts this car yielded. And I think it is safe to say that some might even manage to change my plans for the ’76 car. To start with this almost brand new looking radiator:

Radiator

Yes this is the later radiator model, so shouldn’t be fitted to an early car. But I like standardisation and reliability, and am not bothered too much about originality. I also firmly believe that a car is for driving, not for show grounds. So the ’76 car will get the later cooling system with the header tank instead of the overflow bottle. But the most important reason for this change is that the latter system is the better of the two! 


My original plan was to have another alloy radiator fabricated locally, to the same specifications as the alloy radiator
that was fabricated locally for my DHC But with such a good spare that seems like a waste of money to me! But before I commit myself I will have to flush and pressure test this one first! Just to be sure.

Wiring

Also some of the wiring harnesses, especially the main wiring harness, will probably find their way into the ’76 car. Though it doesn’t look like much in the picture above, a first quick check while removing them from the car showed some very unmolested wiring harnesses:


Engine harness RKC5511

Facia harnessRKC4348

Main harness PKC1946

Again a closer inspection of these three harnesses will determine whether they will be used or not.

Clutch assembly
An unexpected yield are the clutch cover and plate. As they looked almost new, I retrieved them from the engine. And with them removed from the car, the first impression proved to be correct, they indeed are almost brand new. So after a thorough clean, they too will find their way into the ’76 car.


Front screen
The same can probably be said about the front screen. While removing it, the front surface felt very smooth, so probably only very few (tiny) stone chips. There is also no delamination at the edges worth mentioning. Only a shallow chip in the left hand top corner. Probably there since the screen was fitted to the car at the factory, as it was completely hidden behind the stainless screen surround trim. Again a good clean and a closer inspection will determine whether it will be used or not (I have a few spares as back up though!).


Transmission
And finally the transmission. The car had only covered 87.173 kilometres, and the overall condition looked like she was pretty well cared for in het past life. So the plan is to use both gearbox and back axle for the ’76 car. I would have loved to put a 3.90:1 ratio back axle under this car. But I only have one spare axle with that ratio. And that will be used to build the new back axle for ‘t Kreng (the one in front in the picture below).


So the ’76 car will also get a 3.45:1 ratio back axle. Just as the DHC. As it stands now that will be the third one from the front., bearing serial number CL 11955. Will see how a bog standard Sprint engine will cope with this ratio. I take comfort in the fact that the Dolomite Sprint also came with this gear ratio.


And I want to keep the gearbox and back axle together for no obvious reason. So this gearbox, bearing serial number CL-130837C will find its way into the ’76 car too.


Of course for both the back axle and gearbox applies, that they will only be used after an inspection & a clean bill of health, and a good clean. And I have a small adaptation in mind for the gearbox, which I have already used successfully on the DHC’s gearbox. To be continued! 

Thursday, 15 August 2019

10CR Preparations (#4)


It hasn’t been going to plan last week, with most jobs taking more time than planned. But earlier this week I managed to delete another item from the list. But not before an important shopping trip with the Defender 😋


Last week I thought there might be a problem with the main earth points, but on closer inspection it turned out they were all in perfect condition.


This together with two very lazy and out of sync headlamps last Sunday made me take out the multi meter again. And sure that showed what I was expecting by now. Despite hardly any use since my last drive, and with the battery switched of in between, it showed 10,4 Volts now. A drop of a little over 2 Volts in less than two weeks’ time. And during the last two outings the voltmeter had been reading as it always has done. So that should rule out the alternator. Time for a check of the by now just over 9 year old battery at a friend’s workshop on Tuesday. Voltage had now dropped to 8,1 Volts. But more importantly, of the cranking power of 330 A nothing worthwhile survived. Time to say farewell to this battery and get a new one!


Plan for the Wednesday was to put the battery in, and enjoy the car for a few hours. But that was not to be. While cleaning the battery area, I decided it would be better to use the available time to give the car a general check over. I started with a thorough clean of the breather catch tank. Turned out to be rather full of water and oily gunge, which took quite some time to remove (I made a mental note to drain it more often!).


But refitting it also took much longer than expected as one of the bolts at the front of the cam cover didn’t want to go back in properly (I had to remove them because the hose from the cam cover to the breather tank was fitted to these bolts with stainless P-clips). In the end I decided it would be better to remove the cam cover and put in a re-coil to the bolt hole. But with the can cover removed I could wind the bolt fully down in small steps. Though initially it was very heavy. But in the end it turned out the thread was in fairly good shape. And the cam cover could be re-fitted without any further problems. At least it gave me an opportunity to inspect the cam shaft. Nothing wrong there. Actually looking pretty good for a 25 year old engine which has done well over 100.000 kilometres!


After which it was time change the gearbox oil. Before starting with the breather tank, I had removed the drain plug from the ‘box. So it could drain while I was working on different parts of the car. Turned out there was some swarf on the plug. But not too bad. And the drained oil didn’t look to bad either, with no particles visible there. The plug after removal and after cleaning:


Re-filling the gearbox with new oil was rather straight forward as ever. Measure the correct amount of oil (Castrol Syntrans 75W-90) and let gravity do all the work:


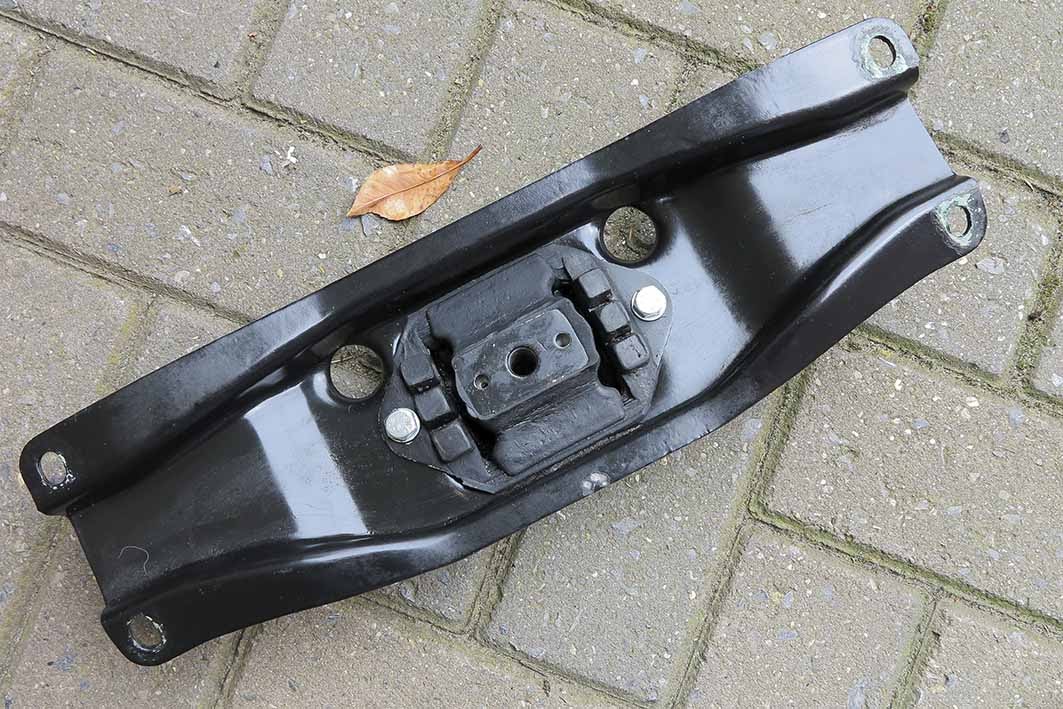
With the car jacked up and the gearbox topped up, I also gave the prop shaft's grease nipples a few squirts of grease, another item of the list. So the list now is as follows;
Check wear pattern on front brake pads and address some light squalling under light
braking;
  • Check if the carburettors throttle’s open fully and lubricate linkage and throttle cable;
  • Clean the leather seats and treat the leather with a conditioner;
  • Fuel gauge, the old unit was registering almost empty constantly. See what the change of instrument cluster has had on this fault, I suspect the sender unit in the tank though;
  • Buy motorway vignettes for Switzerland and Austria:
  • Load the four stages of the route into the GPS and copy the route to a road atlas as back-up (just in case);
  • Check and probably replace battery;
  • Clean the contact areas of the three main earth point on the car’s engine;
  • General service and check of all mechanics, including greasing the prop shaft and a check for any leaks;
  • Oil change for the gearbox (Castrol Syntrans Multivehicle 75W90);
It’s now about time I take the car out for some test runs and to enjoy it!


Wednesday, 19 April 2017

Boring statistics


Only 492 kilometres in 564 days since returning home from the 2015 edition of Club Triumph's 10 Countries Run! That was the total count when I pulled the DHC from the shed on April Fools Day. From that point of view 2017 already looks much better, with 747 kilometres covered since she was allowed back on the road after her mandatory three month winter hibernation. With most of those kilometres being clocked up over the past Easter weekend. All rather enjoyable ...


As I had some doubts about the repair of the gearbox' leak I decided on another inspection of the area in between various Tours. After a few hundred kilometres there indeed was some oil there, but very little. But I decided to remove and inspect the oil plug nevertheless. It still was tight and there was a tiny trace of oil. Time to remove the plug and give it a closer inspection. Sure enough two of the threads were slightly damaged, but nothing a good clean with an M8 die would rectify. And just to be sure I used some Teflon tape to aid sealing and locking it in position. Officially I should have used Loctite for that but I tried that the previous time. And probably due to some oil left in the galley that didn't work. Hopefully it is better now.
There was another, rather positive, side effect to this repair. As the gearbox' oil pump didn't loose pressure any more the gear changes have improved significantly!


Sunday, 9 April 2017

Small jobs on the DHC


Last week I did an oil change to the DHC. And while giving the under-bonnet area an inspection while waiting for the oil to drain from the sump, I noticed that the bolts of the thermostat cover and inlet manifold showed clear signs of galvanic corrosion. So I made a mental note to change them for stainless steel ones. These being less prone to this type corrosion when mounting alloy parts together. The initial plan was to change them somewhere later in the spring or early summer. But as I had a day of from work last Thursday to have the car's alignment checked I thought it a good idea to also pay a visit to a local stainless fastener specialist. But first things first, checking and adjusting the front wheel alignment. This meant that the first stop of the day would be at a friend's workshop to put the car on the alignment rig.


With the car on the lift and all the gear fitted, we found out that the alignment indeed was out, but not as much as I had feared. It actually still was within the factory tolerances. But as the steering wheel was slightly askew the alignment was adjusted to get everything spot on again.

After that I decided to add some miles to the car, and there was a good excuse for that! When I dug out the car from the shed last weekend I thought it a good idea to check in the records what needed servicing. That was when I found out that I only drove the car around 500 kilometres after returning from Club Triumphs 10 Countries Run .... on the 14th of September 2015. Oops! So rather pleased I managed to add some 200 kilometres to the odometer on Thursday. Also managed to source the stainless UNC bolts required for the inlet manifold and thermostat cover. And as I had enjoyed driving the car too much, there was no time left that day to fit the new bolts.


But with the weekend upon me it was time to get the spanners out and add some bling. All rather straight forward really.


But as ever the half hidden bolt between the coolant pipe and number one inlet put up a bit of a fight. But some 15 frustrating minutes later this one was replaced too. A small socket set certainly helped here. Though it certainly didn't help that the socket and joint piece fell of the extension piece and rolled to the most inaccessible location underneath the carburettors ...


Another thing on the to-do-list was a not so small oil leak from the gear box. When I discovered it last summer I thought the leak was from the take-off from the speedo cable but after I jacked up the car I found out there was only oil around the rear 'box mount. The rest of the 'box was completely dry, as was the oil seal from the rear flange. That was when I remembered that I removed the plug from the 'box oil pump galley which I made up when I restored the car. It worked very well, but I had to replace it with the original plug because it (just) touched the gearbox's cross member.
Time to remove the mount and find out where the oil was coming from. Sure enough there were clear signs that this plug indeed was the culprit, as the oil on the gearbox mount clearly showed ...


And sure enough the plug that should seal the oil galley was loose. Haven't got a clue how that could happen (probably didn't tighten it enough!) but at least pretty easy to rectify with a #4 Allen head key.


After which it was time to clean and degrease the gearbox' mount ...


... and put everything back to where it belonged.


Last job for an afternoon well spent was topping up the gearbox' oil level. Easy with some simple tools.


Wednesday, 6 July 2016

Gearbox oil change DHC

Although the weather is slowly but surely improving, we haven't seen much summer so far. Though we can't complain about a lack of rain! And as a result the DHC hasn't seen much action so far. Actually I only drove her to a friend's workshop for its biennial MOT and back. And while driving home I thought I could hear a very slight whining noise which seemed to be coming from the gearbox. But only under prolonged braking/retardation. As the gear changes were rather good I didn't pay much attention to it. But it kept nagging at the back of my mind.

So for peace of mind I decided to check the oil in the gearbox today. Initial plan was to just top up the oil level. But bearing in mind the awkward position of the filler/level plug and the fact that the previous time I drained the oil it had been rather murky, with lots of swarf on the drain plug, I decided it would be better to drain the 'box and refill it with fresh oil. Removing the drain plug revealed a plug that still did contain a bit of swarf but notably less compared with previous time ...


And the oil that came out did contain only very little contamination, but most importantly no swarf from the synchromesh rings or the gears ...


Time to refit the drain plug, remove the filler plug and put 1,6 litre of Castrol Syntrans Multivehicle 75W90 in. Easier said than done when you are lying underneath the car with a rather inaccessible filler hole! Luckily I did have a bit of PVC tubing lying around, which, together with a funnel, makes life so much easier (thx for the tip Phil) ...


With the 'box refilled I turned my attention to the drained oil. I always use the containers from the new oil to store the old oil. And I was mildly surprised to see that all the drained oil fitted inside one 1 litre container. With a little room to spare! Clearly the small oil leak I noticed last year in preparation for Club Triumph's 10CR needs rectifying sooner rather than later ...