Showing posts with label Electrics. Show all posts

Tuesday, 22 July 2025

She wants to tell me something


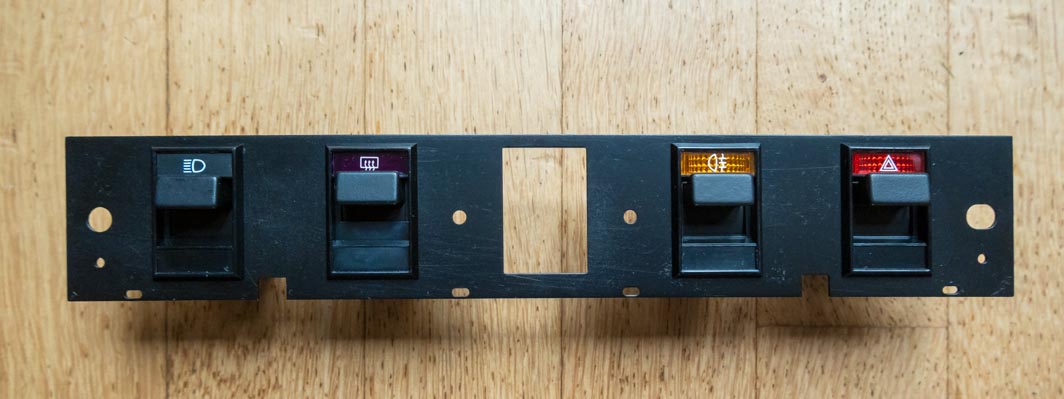
Over the past few weeks I have been using ‘t Kreng as much as possible to see how the engine and in particular the cooling system behaved. And on that note I took the car for a longer trip into neighbouring Belgium last Saturday afternoon and evening. This 370 kilometres overall trip turned out to be rather enjoyable. The car really came back to life again during this trip. And most importantly the cooling system looked like it was fully functional again. But after driving through some rather dark patches of forest I found that the temperature gauge had risen noticeably. My first thoughts were that this might be caused by the moist and cool air inside the forest, providing cool dense air to the fuel mixture and as such giving a leaner mixture. That wasn't really a satisfactory answer to the problem, but the only one I could come up with at that moment. Until I switched of the lights while coming out into the daylight that is! As soon as I flicked of the light switch the temperature gauge would drop back to its normal reading. So over the next few kilometres I did switch the lights on and of several times. And sure enough switching on the lights would increase the gauge’s readings. While the needle would drop immediately after the lights were switched of. And the clock also had a mind of its own, switching on and off rather randomly during the day!


It looks like the few years of idleness have had some impact on the cars electrics. So the first items to check will be the earth points and connectors of earth wires directly related to the lights and the light switch. This check can be combined nicely with a slightly overdue regular service. And of course use her more often! With that I already made a start, as I have covered well over a 1000 kilometres so far since fitting the new water pump. Which equals the mileage of the past two years together!


Sunday, 9 February 2025

FHC resto nr. 168; A few small jobs

Over the weekend I spent some time in the shed. Mostly to do some work in preparation for the repairs of the DHC (more on that later). And in between I carried out a few small jobs for the ’76 car. Starting with the gear lever gaiter. This was refurbished over 10 years ago, but it was still missing the top finisher. This part was 3D printed already 4 years ago but I never got round to fit it. But that is sorted at last!


The next job was to trial fit a new reverse light switch. As the original items have the wires fixed permanently they are becoming prone to failure with age. This is caused by the aging wires breaking of where they are soldered to the switch. And the original switches are no longer available. So I went in search of an alternative, which I found in the parts list for LT77 equipped Land Rovers (part number PRC2911G). And as you can see it is a perfect fit. Now I only have to fabricate a short loom with two spade connectors on one end and a two pin super seal connector on the other end. Spot the difference!


It looks like old oil and grime is coming to the surface of the alloy casting!

And final job should have been fitting the mounting tube and bearing carrier for the steering column. But an inspection before started work revealed some serious distortions of the mounting tubes for the column switches’ shroud. Probably caused by excessive temperatures during the paint removal process (pyrolysis). So another job that is added to the to do list (cleaning and painting the sourced item from the shed.


Tuesday, 7 May 2024

FHC resto nr. 162; Facia switch panel finished


I left this part of the car’s restoration a few days ago with an illumination strip that needed some of the lettering filled in with paint. And after the enamel paint had hardened, the excess paint could be gently scraped off with a surgical knife. With the final job being polishing the visible transparent illumination strip. For this I used another proven method; gently rubbing toothpaste over the surface to give a smooth and clear finish.


And this brought me to the final part of this job; assembling the facia switch panel, using all previously prepared parts including the front panel refurbished well over a month ago. When it was changed from light grey to black.


The actual assembly was rather straightforward, with the most “difficult” part being the application of the black tape that is used to prevent light leaking from the bottom edge of the illumination strip. But within only a few minutes after starting the re-assembly the switch panel was finished. So to end this short post a few pictures of the finished switch panel:


Next planned job for the '76 car will be fabricating something completely different and pretty small! Oh ... and there might be an issue with ‘t Kreng’s coolant system (a leak!?)

Saturday, 4 May 2024

FHC resto nr. 161; Facia switch panel

The connector blocks of the four dashboard switches.
As they will be fitted to the car from left to right;
the light switch (TKC3963), heated rear screen switch (TKC3965),
fog light switch (TKC3964) and hazard light switch (TKC3962)

Almost finished the dashboard switch panel. In my last post I got as far as dismantling the switches and making a start on cleaning and refurbishing them. Today I managed to finish the switches. First job being cleaning the connector blocks.
At first I thought it would suffice to polish the contacts with a fine sanding brush on my Dremel drill. But there was to much grease on them. So the connector blocks also got my standard cleaning treatment (hot soapy water and brush) to get rid of the grease residues. After which the various contacts could be properly polished.

Light switch (TKC3963)

Heated rear screen switch (TKC3965).
Now with matching purple lens!

Fog light switch (TKC3964)

Hazard light switch (TKC3962)


After which the various contacts were lightly greased were necessary, using various types of traditional switch gear greases depending on function. So Vaseline for protecting the surfaces from corrosion and high temperature non-conductive grease to lubricate the toggle pins and springs. This turned out to be more time consuming than expected. But eventually all switches were reassembled and could be fitted to the mounting plate.


Final job should have been fitting the illumination strip and the facia panel. But after cleaning the illumination strip, I noticed that the paint on some of the lettering had come of and needed filling in. Luckily I still have some fine paint brushes and white enamal paint. Now waiting for the paint dry, after which the excess paint can be polished off and the switch panel can be finished.


Sunday, 21 April 2024

FHC resto nr. 160; Dashboard switches

Started another small but time consuming job for this car. Searching through my stock of spare parts and selecting four dashboard switches and cleaning them. But first I had to dismantle them. And as can be seen in the pictures below they are all in pretty good condition. With only minor corrosion on the heated rear screen and fog light switches:

Light switch (TKC3963)

Heated rear screen switch (TKC3965), I still haven't found
the missing purple lens that goes into the top of the switch …

Fog light switch (TKC3964)

Hazard light switch (TKC3962)

Next step was cleaning the various parts of the switches, staring with switches tumblers. I used my proven cleaning method on them; hot soapy water in combination with an old electric toothbrush. It clearly got rid off more than the tumblers dirt. They came out rather dull and grey.


And after treating them with a good degrease with Vinylkleen the flat grey appearance worsened considerably. But with a few coats of Vinylkote they came out pretty nice and fresh again.


The final job for the day was cleaning the tiny toggle pins (warm soapy water) and ditto springs (brake cleaner). Taking extra care not to lose any of these tiny parts down the drain or sending them of into the unknown!


Sunday, 17 March 2024

FHC resto nr. 157; Slowly starting again after winter


It’s been far too long since my last report on this subject. Well on any TR7 related subject actually! But I haven’t been completely idle on things TR7 over the last few months.
To start with I had to search through my spares again. This time to look for another rear screen, as on closer inspection the chosen one had badly corroded heating wires. Luckily I found one that turned out to be much better in that area.


Next problem area (still) are the mounting holes for the rear parcel shelf. But as soon as the weather improves and I have enough time that should be rectified, together with fitting the newly chosen rear screen.
And while trawling through my spare parts I thought it might be a good idea to use the opportunity to sort out some more stuff; various electrical stuff this time. Plenty of spares left, but with three 40+ years old cars one never knows when something fails.


Back to the interior. Thanks to Russ I am now in the possession of an early US spec steering wheel. For no obvious reason I always liked the style of their design. Probably because they shout 1970’s. So when this one was advertised I couldn’t ignore it. In the pictures Russ sent to me, it looked like there were some tiny blemishes. But after a few hours of cleaning with hot water, dish-washing liquid and some brushes, it came out pretty nice. As new actually! A trip to a friend’s workshop, to use his blasting cabinet for the centre pad’s steel mounting plate, certainly helped with the finishing touches. Together with some new fasteners that is;


But that immediately leads to another problem, what steering wheel to choose for this car? As I also have this Moto Lita steering wheel which I ordered earlier in the cars restoration. Also very 70’s. Choices! Luckily the last one can also be used as a replacement in ‘t Kreng or my Defender.


And thanks to a recent trip to England I finally managed to get black (RAL 9005) vinyl paint (Rawlins Vinylkote) The joys of Brexit, as a result of which they didn’t deliver outside the UK anymore! But I can now start to rejuvenate some of the interior parts. So more cleaning to be done in the following weeks.


More interior parts to follow!

Monday, 7 August 2023

FHC resto nr. 151; Door speakers


In my last post I mentioned the (re) discovery of a decent pair of original door speakers, pictured above. And since then I even found a few hours to clean them.


Next time I will handle them it will be to fit them to the door cards that were refurbished already some 7 years ago.


And to finish this rather short post; I finished another small project recently. Designing my own under bumper spot light bracket on the computer. Now I only have to find a firm locally that can laser cut the various components from 3 mm sheet steel. But I will probably first make a CAD (Cardboard Aided Design) version to check dimensions and clearance on the car.


Saturday, 8 July 2023

FHC resto nr. 150; Finishing touches for the wiring


Slowly but surely the moment is approaching where I can start fitting the interior trim to this car. And about time I dare say! But first I had to finish the final wiring harness. The door harness (TKC3831) for the passenger door. On a ’76 car there shouldn’t be one, only the two wires for the door speakers. Though I thought it a good idea to use both, because it would simplify any wiring adaptations. It would also enable me to use the harness to power the mandatory map reading light that will be fitted to the co-driver’s door. And I had to splice in two extra wires to power the early type roof mounted courtesy light. The finished item:


Today we braved the sweltering heat, with temperatures well over 30°C, to work on some unfinished business. Last time I found some spare time to work on this car, I had to admit defeat while trying to fit the rubber bellows (BRC901; bottom left in the picture below) between the A-post and the doors front panel.


This was mainly caused by the fact that they shouldn’t be there. The areas where the bellows are fitted, are double skinned. Though with later cars the inner skin has a larger hole. Being an early car I had to drill through both skins as there were no holes in both A-posts or the door fronts. As a result the thickness of the edges is twice that, for which the bellows are designed, making it pretty difficult to get them into their designed position. Time for plan B and call in the help of a long-time friend, and car mechanic, to provide some extra hands to assist. He kindly asked me to get out of the way, and about an hour later both bellows and door harnesses were in position! Actually feeding the wires from the cabin into the doors turned out to be the most difficult part of the job.


Mainly because the bellows were compressed slightly where they passed through the double skins. Making for a very tight fit for the harnesses’ connectors. But with some guidance and tape we got both wires through: and in position.


And while tidying up the shed afterwards, I stumbled upon a pair of door speakers. These were put away to be used on this car, but I stored them to well! As a result of which they were lost for a few years! They look in pretty good condition and should clean up well.