At the start of my Christmas holidays, I decided
to transfer most of my tools to the shed, and spent a Saturday afternoon there.
And with the temperatures well above 10°C I thought it a good idea to finish
the ’76 car’s striping and decals. Even the Sun came out for a brief spell!


With everything prepared and ready (including water cooker and hairdryer) I decided to start with completing the driver’s side. This meant applying the striping to the left hand front wing and replacing the TR7 decal underneath the blanking plate. Which shouldn’t be too difficult, and as such ideal as a warm-up. In the end the only slightly difficult part was folding the striping over the rear of the front wing. And that was due to limited access to the area. But I managed to get some warm air and my little finger between the wing panel and door to press the foil firmly in place.

Next was the rather 70’s style “TR7” decal I had applied a few months ago. I didn’t like the look of it, mainly because the font style clashed with the SPRINT cut-out in the door stripes. So the “original” decal was removed and replaced with a slightly down sized Speke nose decal. I have to admit that this looks much better.

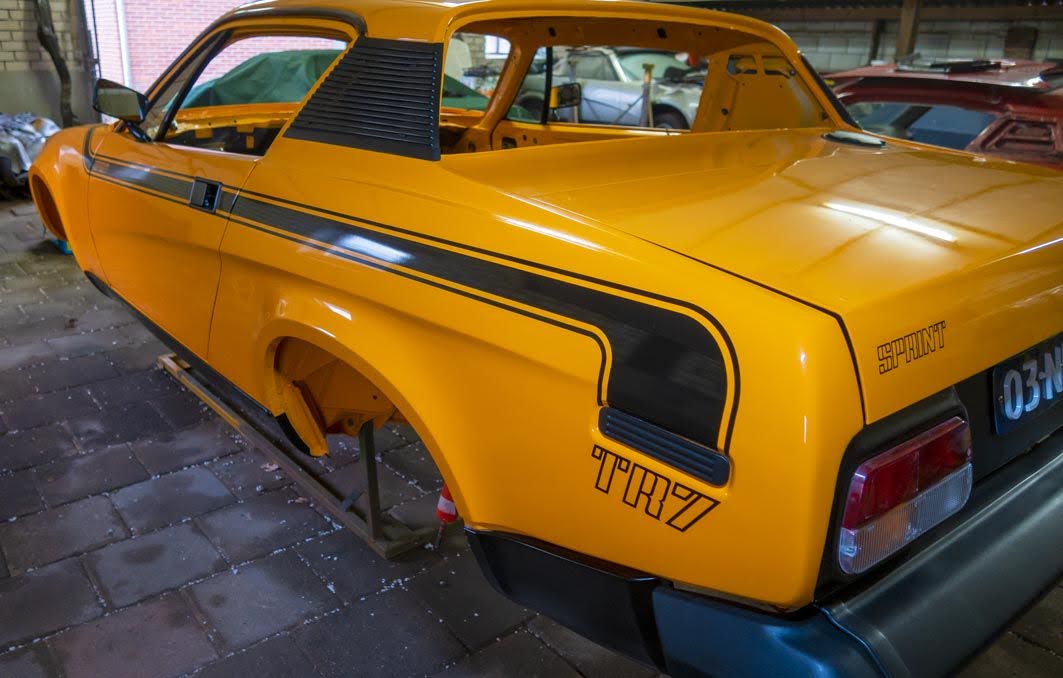
After this warm-up exercise came the most important and difficult part for the day: The striping for the right hand rear wing. As with my previous attempt I needed to reposition this part a few times to get the correct position. But this time it was successful.


After which the application foil could be gently removed. And due the length of the part tricky. Especially for the two narrow side stripes, which have a tendency to stretch a bit when removing the application foil.

Although not 100% perfect. There is a tiny fault in the upper side stripe. And the alignment to the back of the door could be better. Though this is fault is exaggerated by the fact that the door sits a little to the inside. And that is because the seals are not in place yet. But overall I am well pleased with the end result.


The final part to apply was the “TR7” nose decal. For its position I used an instruction leaflet I found on the internet, forgot when and where. And at the time I stored a digital copy on my computer. Just in case! And after 15 minutes of positioning scraps of masking tape, careful measurements and placing markers, I had produced this seemingly random pattern. Which enabled me to put the nose decal in position. The cross hairs (just visible on this decal in the second picture in this post) were used to align it correctly between the markers.


As there still was a little daylight left, I decided to carry a few smaller jobs on the cars. The first being fitting the bulbs to the front side lights. As with my other two TR7’s I opted for standard spec bulbs, which were pulled from my the spares stock.
The final job for the day was fitting the hand brake lever I prepared well over two years ago. But first the rubber dust cover needed some attention. It has a little tear at the nose, where the cable connects. Apart from that it is in good condition, and will probably outlast any cover sold these days. The cable tie is there to remind me of a small tear at the nose of the bellows of the cover. When the hand brake cable is fitted I’ll tighten the cable tie over this tear to prevent it from getting longer. Fitting the actual hand brake lever was the proverbial piece of cake.


Edited 24-12-2020: I found out something went wrong with the screen calibration while developing the digital negatives. As a result of which the colour of the pictures was to yellow. This is now rectified. And in the process I added a few pictures which, with the correct colour, turned out much better.
No comments:
Post a Comment