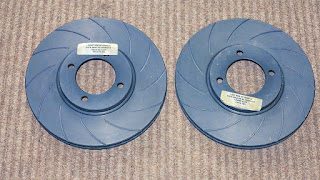
I left you last weekend
with the wish to continue this story as soon as possible. Well here is! Last
Wednesday I visited local brake specialist C&C Parts to explain the problem
and drop of both pairs of callipers. Comparing the two pairs revealed a few
differences which were overlooked when I ordered the new calliper set. But that
was hardly surprising as I only sent them a picture of the old set. Despite
that they adapted the new set free of charge, and almost within 24 hours.
That’s what I call customer-friendly!
The two most important
differences were the thickness of the callipers’ mounting lugs and the chamfer
on the wheel hub side of the calliper. The width of the lugs was easily
rectified by two spacers of the correct thickness to go between the outside of
the callipers mounting lug and the steering arms.
But while comparing an
original Até M16 calliper, which they had in stock, with my old callipers, as supplied by S&S Preparations many moons
ago, revealed that these had been
chamfered on the outside of the wheel hub side. So that’s what they did too. They
also found two slight machining faults on the mounting lugs. Needless to
mention that these were taken care of with the milling machine too.
So today, with the weather
forecast being absolutely unfit for outdoor spannering (sunny and 35°C), I continued
the work where I left it last weekend. But not before I had to do a task that
didn't represent much on paper, but still took me more than half an hour to
complete. Cutting a gasket to fit between the brake servo and the car’s bulkhead.
For this I used 2 mm thick adhesive EPDM (closed-cell-foam) rubber. Looks good
enough for a part that will be hidden from view!
After I finished the
gasket I switched my attention to the back of the car, emptying the rear brake
circuit of the car of its remaining
brake fluid. This was in preparation of the removal of the brake master
cylinder and servo. Pretty easy too. Put a hose on the rear bleed nipple, put
the end in a jar, loosen the bleed nipple and let gravity do the work. With
gravity doing its job I started preparations for the removal of the brake
master cylinder. Most important of these were loads of old towels to protect
the paint work from damage by spilled brake fluid. Did I mention that I hate
removing brake pipes …
I shouldn’t have
worried. No damage was done to the cars paint. Actually no brake fluid was spilt at all. And the removal of the brake
master cylinder and brake servo was rather straight forward. Even the servo’s
mounting nuts in the interior of the car underneath the dashboard could be
reached fairly easily with the correct tools (a very small ¼” ratchet wrench). Which
meant that it didn’t take long until I had created some space for the new parts!
Fitting the
reconditioned servo turned out to be easy too. I expected that I would need assistance
here, but I needn’t have worried. The Servo remained in position long enough
for me to put a nut on one of the mounting studs underneath the dashboard. Only
the steering column support tube that is fitted to one of the servo’s mounting
points did put up a feeble fight. But that didn’t last long.
Next job was fitting
the brake master cylinder. But when I removed it from its package I was greeted
by three threaded holes to connect pipes to. Not good when the car has only two
outgoing pipes from the brake master cylinder. The difference is clearly
visible in the picture below.
But there was no need
to panic. As the ’76 FHC won’t be ready for a while I decided to remove the brand new brake master cylinder from that car, so I could finish the DHC as soon as
possible. But when I went over to the shed I found that this brake master
cylinder had the some threaded connecting hole. But on closer inspection it
turned out that this hole had been plugged. At least that will make rectifying the
other brake master cylinder pretty easy.
And after moving the
tools from the boot of the Defender back to the car port I could finish the
under bonnet install of the new brake system.
Only items left were the
two brake pipes from the brake master cylinder to the brake proportioning
valve. But on closer inspection I decided not the reuse these as they clearly were
not fit for purpose any more. So that job was postponed for the time being.
Time to start on the
brake callipers, though by now the temperature was well passed 30°C. Time to
call it a day really! But as fitting the callipers should be straight forward,
and I really wanted to know if they did fit correctly now, I carried on. I
needn’t have worried, they do fit properly. And there’s even a few millimetres
of clearance between the callipers and the wheel hubs. Result!
Next job, store the tools
and give in to the heat! The only remaining jobs are ordering some new brake
pipes, bend these in the correct shape, fit them to the car, and bleed the system.
To be continued in part 6!


