But while moving the pedal extension, I noticed a lot of light grey dust on the floor of the car. This turned out to come from the carpets backing material.
Understeer is when you hit the wall with the front of the car. Oversteer is when you hit the wall with the rear of the car. Horsepower is how fast you hit the wall. Torque is how far you take the wall with you ... Or ramblings on three originally Dutch TR7's (a 1976 FHC, a 1980 DHC and a 1981 Sprint powered FHC), including the work done to them and their (ab)use all over Europe. With some of my other passions thrown in from time to time ...
Sunday, 26 May 2024
FHC resto nr. 164; Trial fitting the carpets
But while moving the pedal extension, I noticed a lot of light grey dust on the floor of the car. This turned out to come from the carpets backing material.
Saturday, 11 May 2024
It's definitely leaking again
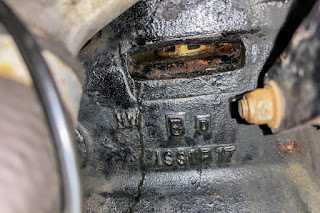
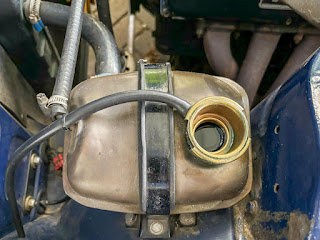
This couldn’t be said of the slot underneath the water pump. That was pretty moist. This left me with only one option to check it. Fill the header tank and see if it was still leaking.
And as you can see in the second picture it sure is. Will check tomorrow how much it is leaking over approximately 24 hours without pressure in the system.
Edited on the 12th
of May 2024:
I did another check of the coolant level this evening. And after well over 30
hours the level in the header tank has dropped. But only marginally. And all
the coolant that leaked from the pump wasn’t enough to escape from a single folded
tissue paper stuffed in the slot …
Maybe it’s time for my proven leak repair solution! Drive the car more and see if that (again I should say) solves the problem. As it might well be that due to its long period of inactivity some corrosion started on the sealing surface of the impeller. And some use could get rid of the corrosion. Hopefully soon to be continued!
Thursday, 9 May 2024
FHC resto nr. 163; Spreading the load
Or strengthening the rear of the armrest. With the facia switch panel back to its former glory, it was time to switch my attention to the rear of the interior. The Armrest to be precise. For those who have owned or worked on a TR7 that has had a hard life (read careless or incompetent owners) will know that the armrest mounting points can suffer. And all armrests in my spares collection had suffered! Luckily there was one item with only minor damage. But better safe than sorry. So I decided to fabricate a few small steel plates to go over the affected areas. The idea behind it being, that by spreading the load over a larger area, the mounting points will be more stable and further damage will be prevented.
This was than printed out in full size on paper, cut out and glued to some left over 1.30mm thick steel pieces (see picture above), to act as pattern for cutting and drilling. This gave me these three pieces (see pictures below). The first picture was taken after cutting the pieces from the steel left overs, with the remains of the pattern paper still in place. The bottom picture was taken after the paper and glue was burned away with a gas torch and the edges were finished with a grinding wheel.
Tuesday, 7 May 2024
FHC resto nr. 162; Facia switch panel finished
I left this part of the car’s restoration a few days ago with an illumination strip that needed some of the lettering filled in with paint. And after the enamel paint had hardened, the excess paint could be gently scraped off with a surgical knife. With the final job being polishing the visible transparent illumination strip. For this I used another proven method; gently rubbing toothpaste over the surface to give a smooth and clear finish.
And this brought me to the final part of this job; assembling the facia switch panel, using all previously prepared parts including the front panel refurbished well over a month ago. When it was changed from light grey to black.
The actual assembly was rather straightforward, with the most “difficult” part being the application of the black tape that is used to prevent light leaking from the bottom edge of the illumination strip. But within only a few minutes after starting the re-assembly the switch panel was finished. So to end this short post a few pictures of the finished switch panel:
Saturday, 4 May 2024
FHC resto nr. 161; Facia switch panel
Final job should have been fitting the illumination strip and the facia panel. But after cleaning the illumination strip, I noticed that the paint on some of the lettering had come of and needed filling in. Luckily I still have some fine paint brushes and white enamal paint. Now waiting for the paint dry, after which the excess paint can be polished off and the switch panel can be finished.


