Monday, 28 September 2009

DHC report nr. 50; Fuel tank check up

Slow but steady progress on preparing various parts, in preparation for the moment when I can start with reassembling the car. One of the jobs I tackled last week was the fuel tank. There are loads of horror stories about TR7’s with rusty and leaking fuel tanks, but this one clearly doesn’t belong to that group. As you can see the most vulnerable part, the underside, is completely free of the dreaded tin worm;


There's only some slight surface rust on top of the welding seam;


And this despite the fact that the factory protection is rather flimsy to say the least, just one thin layer of paint without any primer. Although it is possible that the tank has been replaced somewhere in the past, as the area above the tank had some rather non factory rust protection. So only thing I had to do was remove the fuel gauge sender and fuel pipe, sand the tank down;


And with a few rattle cans of matt black paint, give it a new and hopefully better coating;


With the coating done I turned my attention to the fuel pipe and fuel gauge sender.


As the last one had been working properly before I dismantled the car I presume it still does. So only thing I did to it was give it a good clean.

The fuel pipe was an interesting one as there was quite a lot of dirt between pipe and filter, but none inside the pipe or filter. Then there was some (very fine) dirt trapped in the filter gauze itself, but I couldn’t get that out completely without damaging the gauze, so some of it is still there. But an inline filter between tank and fuel pump should take care of any dirt slipping through.


And last but not least I inspected the inside of the tank before I put the fuel gauge sender and suction pipe back. Inside was rust free with no dirt worth mentioning, only what looked like chalk or crystal deposits. As this didn’t come of when I scraped it with a screw driver I didn’t waste any energy on it. This will also being taken care of by an inline filter!

As you can see from the pictures above the tank is from a PI (or TR8) which isn’t strange as the donor car started life as a PI. But this means the tank has something like a built in swirl pot, in which the fuel pipe is mounted. This of course is an added bonus as it helps with preventing fuel starvation while cornering with an almost empty tank.

Wednesday, 23 September 2009

DHC report nr. 49; Dashboard rejuvenation

Spent a good few hours on the dashboard assembly over the past few days. After a good clean it turned out that it indeed was in very good condition. But it wasn’t possible to get it cleaned completely, there remained some discolouration’s caused by dirt accumulated over more than 30 years. So time for a re-spray with black (RAL 9005) Vinylkote. Well pleased with the end result;


Being a very early dashboard also meant that I had to drill a few extra mounting holes in it, mainly for the centre console. Luckily there was enough material to accommodate these holes. Also having a few later dashboards as guidance made life a bit easier;


So with the measurements and drilling done it was time to reassemble the various parts, like fresh air vents, cubby box lid and cover.


Another item ready for assembling when the car comes back from the painter.

Sunday, 20 September 2009

DHC report nr. 48; Colourful thoughts

A few weeks ago I encountered a new VW Sirocco in a very bright green metallic colour, which I did like very much and which looked very much like Triton Green;


Some research learned that this green was also used on the Siroccos in the late 70’s. It seems that even the name remained the same, Vipern Grün.


As I wanted a good indication as to how this colour compares to Triton Green I had another colour sample made.


On the right is Leyland’s Triton green on the Left Volkswagen Vipern Grün. As you can see they look almost the same. Triton Green is slightly darker and greener. Also the metallic particles in Triton Green are finer, looking better overall in my opinion. Can’t wait to see the car when she’s painted.

Friday, 18 September 2009

DHC report nr. 47; Dashboard choice

More small jobs today I am afraid. Went over to the shed this afternoon to search for a decent dashboard. Thought it a nice idea to use the oldest one I have. It’s from a TR7 FHC that was broken by a friend a few years ago.


The chassis number of said car was ACG96L. So must be one of the earliest LH drive European spec cars I presume;


Production date of the dash is rather obvious;


The dash itself looks in very good condition with no visible scratches or other damage. As you can see only years of dust and muck on it. Will probably add a few thin layers of Vinylkote to make sure it has the same look as the other parts. Depends on how it looks like after a good clean.

Also started on repairing the “hungry- mouse” damage on the steering wheel rim. But that is a rather time consuming business, light sanding down, filling in with varnish, sanding down, filling in with varnish etc. But looks like I will get most of the damage repaired.

Thursday, 17 September 2009

DHC report nr. 46; Trim preparation

Today I busied myself with various small jobs, mainly cleaning and coating trim pieces. Started with assembling the quarter lights. I started with the rubber at the top so it should be easier to fit it, but it still took a fair bit of time to get them in. After that it was time for a good clean of the glass and rubber seal. Putting everything together was straightforward.


Next victim for refurbishing were the fuel filler cap, surround and filler pipe. But before I could start on them I first had to get them of one of my spares cars. Luckily everything came of rather easy so with these parts ready;


There was some time left to do the plastic mouldings that protect the carpet against wear from the seat runners. Got most of the scratches and damage out of them but not everything. But they’ll have to do as the car’s not supposed to be a concourse winner;


To finish the afternoon I started on the steering wheel I am going to use in the car. First I was thinking of buying a nice new Moto Lita wheel. But then I found out that the original steering wheel centre from a late TR7 steering wheel fitted perfectly in the wheel centre of the wooden Nardi wheel I had lying around. As this wheel has a bit of a personal history for me, I decided to tidy it up a bit. After trial fitting it in ‘t Kreng to see how it looks in a black interior, I decided that the spokes’ grey colour needed to be changed to match the interior. Picture before;


And after I painted the spokes black, polished the leather inserts and changed the Nardi centre for a Triumph one;


Looks very nice in black. Only thing left to do is remove the scars from a hungry mouse on top of the rim;


Wednesday, 16 September 2009

DHC report nr. 45; Nearly ready for painting

Underside of the body is finished. Bottom and wheel arches are painted in a non metallic 2-pack uni-colour bright green which comes close to the chosen Triton Green. Looks very bright indeed!


Did this as this paint has a much higher resistance against chipping then the (water based) metallic top coat. The wheel arches will also get the top coat, so when the top coat gets damaged it will still look green. Also the primer for the top coat has been applied.


Guy doing the work wasn’t really satisfied with this primer coat. So this needs another flatten down. Also on the inside the seams need yet to be sealed. Sadly he’s going on holiday next weekend so painting will be postponed for another two weeks. Gives me some time for a color experiment!

Today the body was transferred from the body spit to a simple horizontal stand which will be used for the actual painting.


Monday, 14 September 2009

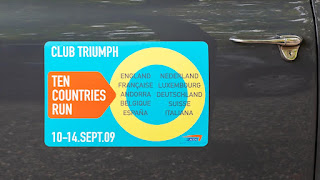
Club Triumph's 10CR 2009 – The Control Stops

We made it ‘round 10 European countries (at least I did, hopefully Barry arrives safely back home too). So as “proof” some photographs of the various control stops and a few pictures taken en route.

Waiting for the start of the event at The Plough in Crews Hill

The start at Crews Hill (Thursday 10/9 - 9:52 GMT): 0 km


More waiting, for the ferry in Dover this time

Control stop 1: Les 2 Caps Services (Thursday 10/9 - 15:22 CET): 244 km

Boulevard Lénin in Rouen, en route to the control stop in Le Mans

Control stop 2: Le Mans (Thursday 10/9 - 20:32 CET): 671 km


Hanging around at the entrance of the “Circuit des 24 Heures du Mans”

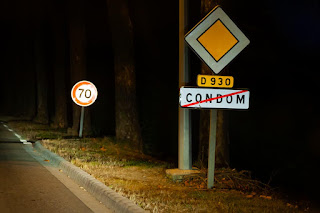
Control stop 3: Condom (Friday 11/9 - 4:27 CET): 1237 km

A short stop near the top of the Port de la Boneigua

Control stop 4: Trying to enter Andorra (Friday 11/9 - from 12:14 to 13:44 CET): 1584 km

Control stop 5:Beziers (Friday 11/9 - 17:48 CET): 1838 km


A rest for man and machine at the Ibis hotel in Beziers

On the A75 near Poujols (F)

Control stop 6: Millau Bridge (Saturday 12/9 - 10:29 CET): 1965 km

Lunch stop in the small village Le Béage on the D16 (F)

Barry trying to repair a sheared off exhaust downpipe,
on the roadside of the D578 near Nonières(F)

The sponsors of a pair of jubilee clips to repair the exhaust manifold.

And sourcing more repair materials for the broken exhaust downpipe (in the shape of a coke can).
With these three items we finally managed a repair that lasted. Along the N532 in Granges-Valence.

Heading for the mountains, at least that was the plan. On the A41 near Montmélian.

Entering the small town of Beaufort, well behind schedule and the start of a long night of driving

Control stop 7: Beaufort (Saturday 12/9 - 20:38 CET): 2436 km

Control stop 8: Nürburgring (Sunday 13/9 - 8:21 CET): 3273 km

Hanging around at the entrance to the Nürburgring’s famous Nordschleife (D)

The exhaust repair at the Nürburgring. Still going strong after well over 1000 kilometres.
It eventually brought car and driver home safely to England!

Control stop 9: Malmedy (Sunday 13/9 - 10:32 CET): 3367 km

Finish Rolduc (Sunday 13/9 - 15:17 CET): 3586 km

Statler and Waldorf at the Rolduc abbey (NL).

And finally a small selection of pictures shot in the courtyard of Rolduc Abbey:


Edited on the 10th of September 2024: Because it is nearly 15 years ago that we set of for the 4th edition of Club Triumph’s 10 Countries Run, it was time to freshen up the pictures of this “Continental Tour”. Also added some extra pictures and edited the limited text where necessary.