Wednesday, 8 April 2009

DHC report nr. 19; Removing under body protection

Slow progress this evening. Removed the remains of the under body protection from the left hand rear-wing area. Took me well over an hour to get everything of. Lots of nooks and corners to make life difficult.


The black patches are black paint were the paint stripper didn’t penetrate the under-body-protection.

Monday, 6 April 2009

DHC report nr. 18; Seam sealant removal from boot

Spent two tedious hours in the workshop this evening. Removed the seam sealant and sound insulation from the boot. Not the nicest of work, but it has to been done to get the best effect from the shot blasting. A few pictures of the result of this evenings work;

The spare wheel well after 30 minutes of scraping and chiselling.

Inside of the right-hand side of the boot.

One of the floor seams.

The (surface) rust that was hidden underneath the seam sealant at least proved that the work was necessary. A comforting thought indeed!

Sunday, 5 April 2009

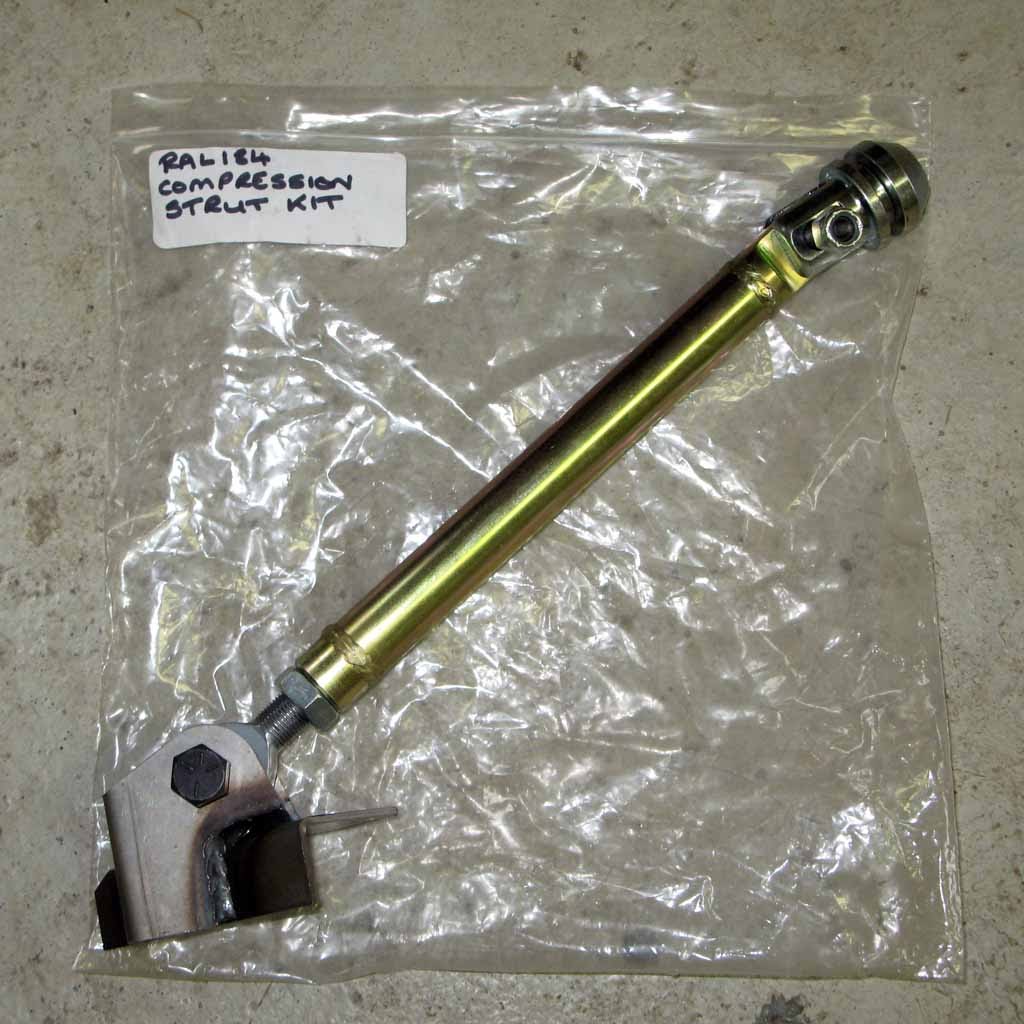
Trial fitting compression struts

While removing the temporary suspension from the DHC's body yesterday I used the opportunity and borrowed a compression strut kit, meant for a friend’s Mk2 Escort.


Needed them to trial fit under a TR7, as I still want to change ‘t Kreng’s front suspension to compression struts. Looks like a very straightforward upgrade for the front suspension. Only need to weld the two brackets to the front chassis legs and modify the joints for the TCA’s very slightly in the lath.


Some measurements showed that with my favoured ride-height for ‘t Kreng, the struts are still pointing slightly downward so should add some anti dive under braking.


Next challenge is to make some decent drop links for the anti-roll-bar!

DHC report nr. 17; Removing seam sealant


At last found some time to remove the temporary suspension and start on the worst job so far, removing what is left of the seam sealant and underbody protection. I started on the inside. Finished the engine bay and passenger compartment, which leaves the boot and the underside. Will see if I can remove the under-seal with the car on the lift. Hope to have everything of by the end of next week.


And an interesting picture how they used seam sealant at British Leyland;


You are looking at the seam between floor pan, RH inner sill and bulkhead. And yes those arrows are pointing at fairly large holes which were simply plugged with sealant!

And I will need a spit/rotisserie for the body to make life working on the underside a bit easier. This is prompted by the fact that I found someone to prepare the body for painting. And he only wants to do it if he can access the underside of the car properly. So I’ll be visiting a local steel vendor in the very near future.

And a few pictures of the finished result of the most difficult and time consuming repair, the fuel filler surround;

Repair panel in the rear bulkhead.

Fuel filler hole repairs.

Repairs to the inside of the fuel filler pipe surround in the boot.

Repairs to the outside of the fuel filler pipe surround in the boot.