Saturday, 26 June 2021

211 days unused

The title above this post says it all! It really has been a long time since I took ‘t Kreng for a spin. But over the past week I have been able to spend some quality time on her, giving her a thorough check-over in preparation of hopefully more regular use and her valuation in two weeks’ time!

And during this check I only found a very tiny leak from the infamous connecting tube (UKC2538) between water pump cover and inlet manifold. But from past experience I know that it usually seals itself ones the engine is on temperature. So early this morning I topped up the header tank (only a cup of coolant needed to get it back to its correct level), and took her for a visit to a friend’s workshop. And despite the long hibernation the engine fired almost immediately. Needless to say I didn’t take the direct route, as it was again a revelation how good the old girl still performs!


Another reason why I took her, instead of the DHC, was because I wanted to check this cars cooling system’s temperatures on a summers day, with the engine fully warmed up and running. And the infrared thermometer I purchased for this task had been lying idle way too long! It was nice to see that there were no strange readings.

Top of the header tank: 74,5°C

Thermostat cover: 71,5°C

Thermostat housing: 88,1°C

Next time I take her out I will check the radiator. Again I should say! Because I managed to get my notes mixed up 😳 But the temperatures ranged from 56°C to 95°C. But as they are written down they don’t seem logical. Probably mixed up left and right again …
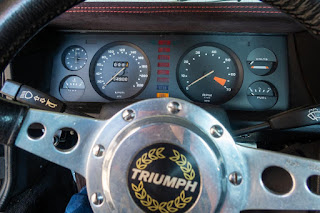
And not unimportant, while taking these readings the temperature gauge’s needle was in its normal position, just touching the halfway mark.

Sunday, 13 June 2021

FHC resto nr. 131; Radiator almost finished

I found a radiator under the towel rack in my bath room today 😳 And it had been hiding there for some time. In the first place because due to the Covid pandemic it was difficult to get the correct cleaning products for the depositions remaining on the inside. In the end I decided to try some household products from the local supermarket. First product to be used was drain unblocker. That removed quite a lot more of the deposit, but there was some room for improvement. I wanted to use caustic soda but that wasn’t available locally so I opted for a solution of cleaning vinegar, “normal” soda crystals and boiling water. That did the trick, as a lot of tiny black grit was removed, leaving a fairly clean inside. There’s still a tiny amount of deposit left, but that shouldn’t be a problem.


After which the radiator was put back underneath the already mentioned towel rack pending the stuff needed to tackle the outside: sanding pads and a rattle can of satin black paint. As the radiator didn’t, what you call, get in the way, this was not a priority job. But a few weeks ago I managed to get all materials to finish the job.
But while wondering what to do with a nice Sunday afternoon, I decided to install myself outside. Armed with sanding pads, de-greaser and rattle can. The fact that I spent a nice Saturday afternoon tinkering on ‘t Kreng certainly helped here! After sanding and de-greasing the radiator it was time for the final stage, painting. Another afternoon well spent! And interesting to see the liberal amounts of soldering tin that was used on this radiator. What looks like painting faults or rust patches under the paint, are actually tin blobs!


The last picture shows one more remaining job though: treating the inside of the mounting rails with a rust converter. As I need a good masking foil, in order to prevent the rust converter from getting all over the radiator, that job was postponed till I get to the shed to get the foil! For the actual rust converter I will use Rustox, from the German company Technolit GmbH. Yes, I have a few cans left from the cars body work!

P.s. for the anoraks! That is not the radiator of a ’76 car. But I am upgrading the cars cooling system to the later header tank system, because it is the better cooling set up for a TR7.

Monday, 7 June 2021

FHC resto nr. 130; Gear-lever-gaiter-finisher finished


At last I should say! As it has been a while since my last post on this subject. This was mainly caused by the fact that I couldn’t get the correct chemicals to finish and polish this 3D printed part. And work got in the way too from time to time!
Due to how the 3D printer works and the chosen filament material, the various printing layers are just visible. Which gives it a slightly rough finish. But the used ABS filament material (actually ASA) can be “polished” by hanging the printed part in acetone vapours for an hour or so (depending on ambient temperature).


The idea behind this is that the acetone vapours will soften the outside of the material and smooth the surface in the process. After which it needs a few hours to evaporate the acetone, leaving a nicely polished finish. But in my case that highlighted a flaw in my design: the gear-lever-knob-locknut’s recess! The remaining rim at the edges of the hexagonal recess turned out to be too thin and sharp, as a result of which they were partially dissolved by the acetone. And as you can see in the picture below that didn’t look too well.


Time to return to the drawing board and change the design a little. I decided to get rid of the hexagonal recess and to reduce the inside diameter. This way it’s a closer fit around the refurbished gear lever.


After which it took some time and a few attempts to get the printers output right. And it was safe to say that the raw output already looked much better compared to the first attempt.


And after another acetone vapour treatment it came out really nice.


Only the inside diameter turned out to be about 0,1mm too small for a smooth fit over the refurbished gear lever. But that was easily sorted with the correct diameter drill.

Saturday, 5 June 2021

FHC resto nr. 129; A few lesser jobs

In the past few weeks I haven’t been able to spent much time on this car. Though I managed to complete a few smaller jobs. The first one was a rather important one. But also a little messy! Wax oiling the inside of the doors, the bonnet and the boot. Why this is so important? Because I don’t want to be wax oiling these parts after I have fitted the wiring (or the screen washer tube in case of the bonnet). And with the help of some automotive spray foil and card board, I managed to limit the mess! Time to leave the wax oil to settle and the surplus to drip out.


I haven’t been to the shed since, but with the hot temperatures of the last week I think all surplus wax oil will have dripped out buy now. Hopefully I’ll be able to check the result within the next few days. And clean up any surplus wax oil that has found its way onto the paintwork.

Then there was an engine part that got some extra attention. The Sprint engine’s specific timing cover. When I shot blasted it last year (and I thought it was only a few months ago) I noticed that the threads of two of the mounting holes for the front pulley were badly damaged. Time to attack them with a thread repair kit. But not before I had cleaned out all four holes with a thread tap. And that was when I found out that only one of them was damaged. The other one came out fine after cleaning the thread.


And after drilling, tapping and fitting the repair coil the fourth one was also again fit for service.


The only remaining job on this part is the decision how to fit the fan pulley. With original specification UNC 5/16 bolts or use studs. It will probably be the last as that is in my opinion the better solution from a mechanical point of view. But it should also help attaching the fan pulley in position. As long as there is no radiator in the way that is. Choices!


And there is some unfinished business for the interior …