Thursday, 31 May 2018

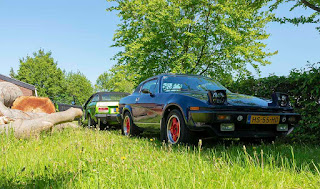
Another MOT for the DHC


Yesterday morning I drove the DHC to my friendly garage for its biennial inspection and a thorough check of the front suspensions alignment. As almost everything had been checked in the previous weeks I wasn't to worried about the inspection's outcome. And my gut feeling turned out to be correct. Nothing wrong and no advisories, though in my opinion the CO level (@ 4,22% within the limits) was slightly high. But that will be addressed soon when I am going to fit the refurbished carburettors.

Another smallish issue came to light on the brake test bed. Both front and rear brakes were OK (with the rears exactly the same left and right!), but the hand brake showed a 50% difference between left and right. As the combined retardation for the LH and RH side was well above the minimum figure that was also a pass. Again something to address when I returned home.


And the last item on the to do list was a thorough check of the alignment of the car's front suspension. Turned out to be slightly worse than expected. But easily corrected with the proper equipment! But when I wanted to set off for home (via some lovely country lanes of course) the owner of the workshop rushed out to tell me he forgot to refit the outer cable ties for the steering rack's gaiters. Not life threatening so something that could wait till I returned home.
After lunch and some housekeeping duties the tools were out. As the engine bay still was slightly hot I started at the back of the car, adjusting the handbrake. After disconnecting the handbrake cable and depressing the brake pedal a few times, a rasping sound from the left hand rear brake proved my suspicion. The self-adjusting mechanism hadn't adjusted properly due to the hand brake cable's tension. Should have disconnected it in the first place. But glad it was an easy fix!
Time for the last and even more easy job, fit two cable ties to the steering rack gaiters. But while working on the LH side I noted a slight fuel smell, which was stronger on the RH side. And while finishing the cable tie on that side I thought I saw a small drop falling to the ground. Time to get he light out. Turned out the fuel hose between the fuel pipe and filter had become porous. And my attempts to find the exact location of the leak (hose or clips or cracked filter) had made it worse. So something that had to be dealt with immediately. Luckily I always have some lengths of spare hose lying around. Sadly searching for a correct piece of hose actually took longer than fitting it!


As can be seen in the picture above, this one was well and truly fit for the bin. At least it showed me again that current quality hoses really have become a regular service item! And while working on the hose, I found out that the front pulley's oil seal, which was replaced last summer together with a new front pulley was leaking badly. How I hate this disposable society!

Sunday, 20 May 2018

Replacing dustcovers on the DHC


A week ago I had to conclude that the DHC needed a few minor repairs before I could have the car in for her biennial (APK) inspection. Nothing very alarming or difficult, as all repairs were dust cover related. But as replacing the lower ball joint covers is definitely a two man job, I asked my friendly garage and APK station (garage Moorthaemer in Susteren) if it would be possible to change the bad covers during the inspection. As the workshop is rather busy at the moment he suggested me to come over on Saturday and do the job myself,  with some coffee,  vlaai and assistance where needed thrown in as a bonus! Needless to say I accepted the offer. And glad I did for more than one reason!


With the coffee and vlaai consumed and the car on one of the lifts, I started with the steering rack gaiters. Removal was rather straight forward after the steering arms and ball joints had been removed. Turned out both the old gaiters were in worse shape than expected, and as they were very greasy on the inside they went straight into the bin. Fitting the new gaiters turned out to be a bit of a challenge. First thoughts were that the new gaiters were too small. This in combination with some grease from the inside of the rack made it impossible for me to get the gaiters on. But after some tactical tips from the pro they were on in a few minutes time! What those tips were? Fold the end of the gaiter back a little, push it against the steering rack and fold the end over the tubular end of the rack. It might take a few attempts to get the hang of it. After which it is easy! And make sure all grease is cleaned off carefully, as it makes everything slippery and difficult to handle.


Next challenge were the dust covers from the lower ball joints. Loosening the ball joint from the suspension upright was the easy bit with the correct tool. And with the correct tools (especially a long bar) and an extra hand, separating the TCA from the upright was also fairly straightforward. After which replacing the ball joints dust covers was again done in a few minutes time.


Sadly I forgot to mark the position of the steering rod ends. So after everything had been re-assembled we used the brake test plateau in the workshop to check and adjust the front tracking. Not perfect, but time was running out to clear the alignment lift and do a proper detailed adjustment. But as the alignment is now, it will be safe for the tyres till the MOT, when the alignment will be set up properly. This was confirmed by the drive home. Only thing that felt (or looked!) wrong is the steering wheel that stands rather awry.


And as there was still a fair amount of daylight left and the weather was fine, I decided to replace the dust covers for  the handbrake mechanism as well. This could have been a 15 minute job but I decided to use the opportunity to check the self-adjusting mechanism for the brake shoes as well. As I recently found out that the top springs were fitted incorrectly I thought it a good idea to check this mechanism as well. Turned out these were also fitted incorrectly. But as some of the springs were putting on a fight I forgot some future reference pictures!
And the initial reason for the task, the dust covers for the hand brake levers. Again (as most of my brake parts) purchased from local brake specialist C&C parts.


And as this shot of the old dust covers clearly shows, they were well past their prime!


So another job done in preparations for the car's  MOT, which is now scheduled for the 30th of May. But still not decided whether I will fit the newly refurbished carburettors before or after the inspection. I think I'll let the weather decide ...

Saturday, 12 May 2018

Pre MOT check for the DHC


With the biennial inspection for the DHC in less than two months' time, I thought it would be a good idea to go over the car to see if I could find anything wrong. As most things that can go wrong are situated at the front of the car that is where I started. With the first items to check being the front wheel bearings and brakes. The bearings turned out to be fine, no play and no funny noises. Quite pleased with that as they were fitted to the car a few years before its restoration. Going for proper quality bearings certainly pays! After that it was time to take the wheels of for an inspection of the brakes and the suspension components and a much needed clean up:


The biggest issues I found were the dust covers from the lower ball joints and the steering rack gaiters. These are all in need of a replacement. But that was hardly a surprise as they were advisories during the previous inspection! As you can see below the inside of both the steering rack gaiters is showing signs of degradation caused by oil contamination.


Also the outside of the LH gaiter has a small tear in it. And both lower ball joint dust covers are showing a similar degradation, though here the cause looks more time and deformation related:


The gaiters I have in stock but the dust covers needed ordering. And as I see no point in taking the front suspension apart twice I cleaned everything and put the wheels back under the car, just in case I have time within the next few days to use the car 😎 So after cleaning everything the brake pads and wheels were refitted.


With the inspection of the front finished I switched my attention to the back of the car. As I had replaced the rear brake cylinders last year, I didn't expect much wrong. And there wasn't, save for one small item. When I changed the cylinders last year I had taken some pictures to memorise how everything should be fitted. Which was actually how I bought the car from which this axle originates. And of course I didn't bother to look in the workshop manual! Spot the mistake:


But while searching through my pictures some time ago, I found this one which triggered me. It was taken while dismantling some back brakes to prepare them for the '76 FHC early last year. It is the back axle from a rather low mileage and unmolested TR7, showing the correct placing for the various springs that keep the brake shoes in check (yes I did consult the work shop manual this time 😏).


Comparing the two pictures clearly shows what is wrong. Luckily it was far easier to rectify than I had expected. I had mentally prepared that I had to remove the brake shoes to reposition the top spring, to the back of the shoes. But luckily that wasn't necessary, as the job was done in a few minutes with the help of some bent nose pliers. For the rest so far nothing visibly wrong at the back of the car.


Saturday, 5 May 2018

Topless driving at last!


After a month, the work on the Defender was completed at last yesterday, and as already mentioned that meant that 't Kreng would return to the shed to make room for the DHC. But not before one final check for any leaks around the water pump area. And I am pleased to report that it looks like the frequent use over the past month has cured the problem. A month ago, before I started to use the car for daily duties I topped up the coolant system, and the level has remained unchanged since then. Also no more signs of any leaks from the infamous connecting tube (UKC2538) nor the slot underneath the water pump!


At least no reason to get the spanners out for that! Which meant it was time for a final trip through the region, and some well deserved German 102RON fuel for the car before she was tucked away in the shed! Here she was reunited with the DHC for a few minutes.


The DHC had been stored there since the end of November last year, as a result of which she was rather reluctant to start. As usual after a long period of not being used I should say. But after a substantial squirt of start help she fired up immediately, and after she had been running for a few minutes she even settled to a half decent idle. Time to carry over the tools etcetera from the boot of 't Kreng to the one from the DHC. With everything moved over 't Kreng was covered up in the shed, and the DHC's top went down to enjoy the first few miles of top less motoring of the year. The fact that the weather was rather nice certainly helped here! And I was glad that I carried out a quick general check of the car last week, so lost no time there!


Plan is to check over the car properly and bring her in for her biannual safety and environmental check, or APK as that is called here, within the next few weeks.


Thursday, 3 May 2018

More Defender repairs + last of 't Kreng's daily duties


I am pleased to be able to report that the Defender's gearbox is back where it belongs underneath the car, together with a completely new clutch assembly, and a partial new exhaust. But as mentioned in one of my previous posts, there were some other issues with the car. The first one to address was a by now rather major oil leak from the steering box:


This should have been repaired during its annual service last August. But the repair consisted of sealant that was applied over original seal. I wouldn't have worried to much if that had done the job. But it hadn't, actually the opposite happened. Since this repair the leak had worsened! Luckily I noticed it just in time before the reservoir had emptied itself completely on the parking space opposite the house!

Another item that should have been addressed was a tendency of the car to pull to the right under braking. But judging by the state of the brake callipers they were not touched during the service:


On one of the rear callipers the dust cover from one of the pistons even had come of completely! Luckily all pistons still moved, or could be made to move again without damage to the seals. So as there were no leaks and the pads and discs are still in good working condition we decided on a thorough clean and leave the brakes as they are for the time being. By the time the pads are worn I'll either have all callipers reconditioned or put new ones on ...

And finally one of the universal joints from one of the prop shafts needed renewal. One wonders why they fit grease nipples!


But if everything goes to plan the Defender will be ready to roll again this weekend! Time to end 't Kreng's daily duties, and tuck her away in the shed. But before that I'll bore you with some final pictures!

To start with 't Kreng patiently waiting in an empty street for me to return from an appointment in Venlo:

In front of one of our sewage water pumping stations, in this case RG Horn Oude Maas:

At a sand pit beside the river Maas between Neer and Buggenum:


And finally alongside the river Maas, close to the river ferry between Beesel and Kessel:

And as you can see I have removed the stickers from the 2013 AutoEcosse at last. At the time the plan was to start on some major work on this car (solid roof, panhard rear suspension, welded in cage and new paint) so I decided to leave them on till the new paint would be applied. But as life and other projects intervened these jobs were postponed. To be continued one day ...