Sunday, 15 March 2015

FHC resto nr. 31; Final paint preparations

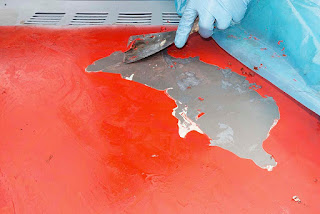
After a short pause last week saw the start of the last stage of the paint preparations. That means the bonnet, boot lid and doors will be prepared in readiness for their final colour coat. But before the primer can be applied the old paint, filler and primer need to be removed from the bonnet and boot lid first. Because with these two panels the frames are glued to the outer skin. This means that pyrolysis can't be used here, as this method will also remove the glue. And it is pretty difficult to get the glue back in place without removing the outer skin. Time for a formic acid based cleaner and some elbow grease to remove the paint from the outside ...


A messy job indeed where decent protective clothing and decent ventilation is an absolute must. But on a positive note, this method enabled us a good insight in the cars paint history. It was obvious that the original colour of the car indeed was Pimento Red (CAB). The original paint and primer layers were still there, together with another set of layers of primer and paint to cover it up. Those eagle eyed among you will see the various layers in the fourth picture above.
But this method does give a very nice clean finish. Removing the paint on the outside of the boot lid showed us that this had been a good choice as there were several rust "threads" hidden underneath.


This method of paint removal is only used on the outside of the panels though, to prevent the acid penetrating in the seams or being soaked up by the glue. The inside of the bonnet and boot-lid will be sanded down only, to give a smooth finish. I have seen enough paint discolouring due to chemicals that remained left behind in seams ...

Refitting the Webers


Last week I received another box containing various parts for my three TR7's. And among these parts there were also two rather vital small bags, which contained a pair of Weber DCOE stud kits. When I wanted to fit the carburettors a few weeks ago, I noticed that several of the original studs were badly worn. So not fit to reuse ...


But I did use them to trial fit the carburettors with the new sealing plates. This showed me that the original studs that came with carburettors were too long. With the ends of the two top studs touching the carburettor body, the seal was still lose between carburettor and manifold flanges. Clearly needed some shorter studs, which among other things I ordered through Demon Tweeks ...


In the picture above the difference in length between the old and new stud is quite clear. Even though the previous sealing plates were slightly thicker, due to the studs being too long it was impossible to tighten them up fully.  And this also for me explains how it was possible for the mounting holes on the carburettors to wear out as they did.
After removing all of the old studs and inserting the new ones (using the proven two-nuts-locked-together-method)  it was time for the carburettors to be fitted. This is a rather straight forward job, except for the fact that for the top nuts there is hardly room for decent spanner access. So rather time consuming to get the top nuts tightened.


The short spanner throw also prevented decent feel as to how tight the nuts were. So to get all nuts torqued down more or less the same I used a set of feeler gauges to measure the gap between the cup washers that retain the rubber grommets.


And to show the problem, the amount of room in front of the top studs. In this case there is about 5 millimetre room between the end of the stud and the carburettor's body. With the old set up is wasn't possible to get a 1 millimetre feeler gauge in the gap.


Now waiting for the last bits to get the car ready for the road. I also ordered new seat belts but clearly something went wrong with the lap straps when they packed them at the factory ...