Saturday, 31 January 2015

Weber Repairs

In October of last year I found out that the mounting holes of the front flange of the rear carburettor on 't Kreng were worn out pretty badly ...


At the time I used a little bodge to keep the car on the road for the 26th edition of our Nachtrit. But after the event I thought it would be better to address to problem properly. So I started another of my little winter projects. I first wanted to pull the cylinder head or the complete engine, but a friend talked me out if it. Not only that he managed to convince me that it would be better to refurbish the Webers first and see how the engine would behave after that.

First thing to do was remove most of the parts and clean all the grime of from the carburettors which they had collected over the past 18 years. Glad I was able to use a friends ultrasonic cleaner, makes life a lot easier.


After which it was time to address the worn holes. As ever with the proper tools it was a piece of cake. Enlarging the two worn holes and machining bronze inserts to get them back to the original diameter took less than an hour ...


Still on the to do list is refitting all parts including fitting a pair of service kits to the carburettors, and fit the carburettors ...


Oh ... and the FHC is off to the paint shop for its first layers of paint. The underside, interior, engine bay end boot area will be painted this week. Rather curious how the colour looks when applied to larger areas!

Wednesday, 21 January 2015

FHC resto nr. 28; Ready for the first bit of colour


The final stage of the bodywork is about to start, painting! Hopefully this Saturday the body will be transported to the body shop for its first bit of paint. Although only the underside, interior, engine bay end boot area will be painted to start with. After which the loose panels will be prepared for painting. This way it is possible to paint all visible parts in one go. This is to eliminate the chance of paint differences due to the paints reaction over time. This is a problem caused by the paint we are using this time, but a small price to pay.

In preparation for this the body was taken out of the body spit and mounted to the transport frame. A few pictures of where we stand now ...


Seam sealing of the engine bay ...


... and the interior ...


Those eagle eyed looking at the pictures might find some imperfections on the outside of the body, which is correct. Final sanding down will be done prior to painting the outside.

Saturday, 17 January 2015

Re-covering the Sparco's

Another winter project finished. When I ordered the Tartan cloth for renovating the seats of the 1976 FHC I am currently restoring, I had to order a minimum weave of 10 m¹. Which means I do have a few meters left in stock. This came in handy as the rather cheap cloth on the Sparco seats in 't Kreng was showing clear signs of wear and tear after 15 years of use. So I decided to have them recovered using a bit of the remaining cloth.  As recovering them completely in Tartan was a bit over the top I decided to go for this slightly unusual combination, using the red/black Tartan, black Alcantara and red stitching ...


I didn't make friends with my local car upholsterer with this job! Contrary to normal cloth Alcantara doesn't stretch much, which is a bit of a problem with all the curves of the seats GRP shells. But despite these problems the end result looks rather lovely and bright. But maybe next time I'd better order new seats in black and just pull Tartan covers over the centre seat cushions ...

Sunday, 11 January 2015

FHC resto nr. 27; Under body sealant

With the festive period well behind us, it is time to return to the paint preparations of the DHC. As work on the outside panels was ready by now, we could switch our attention to the under body protection. But before the protective sealant could be applied all seams were washed in with a slightly thicker conventional sealant, to act as seal but more importantly to act as filler for the deep or open seams.
Another necessity before the sealant could be sprayed on, was lots of masking tape and foil was necessary to avoid overspray ...

After which the under body sealant could be applied ...


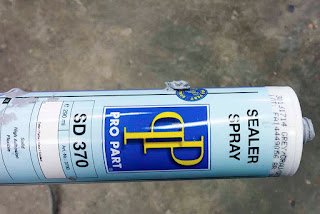
The sealant used is again sourced locally, originating from Germany. But it needs temperatures above 15ºC to cure. But it is still winter and the workshop has no central heating. Luckily it isn't to cold yet, but still cold enough to slow down the curing process of the sealant. Which means it needs a few extra days for the curing process to be completed. But that is a small price to pay.

And when sprayed on it gives a nice under body texture.

Taking all into account we hope to have the body in the spay booth in two to three weeks, for its first bit of colour. We'll first spray the inside , and the underside, before switching attention to the paint preparation of the "loose" panels like doors, boot, bonnet etc. After which all "outside" panels will be painted in one go using the two spray booths simultaneously to ensure an optimum colour match.