Wednesday 31 May 2017

FHC resto nr. 55; The shape of things to come ...


I spend some time on the exterior of the car today. With the boot lid fitted and the bonnet transported to the shed, I thought it a good idea to have a go at applying some of the striping and decals. I designed and fabricated these for the car almost two years ago. Time to see how some of them look in reality when applied to the fresh paint job. To start with the slightly adapted "Triumph TR7" boot lid decal. Was a bit fiddly to apply due to the various tiny sharp edges and very small "loose" parts. But after 15 minutes of carefully fiddling about it was in place. And it looks rather nice in my humble opinion. Spot the difference with the original decal ...


Next were the TR7 decals that are below the black grill-like inserts in the rear wings. Rather straight forward, though getting their alignment right wasn't ...


And to finish the day I had a go at fitting two parts of the actual striping, to the bonnet. I thought these would be the easy ones, sadly not. The adhesive backing foil, meant to keep all parts in the correct position had a bit a mind of its own. So it was all a bit of a challenge to keep the lines parallel while removing the backing foil. Yes I used soapy water to aid positioning, but the backing foil was slightly more sticky than anticipated. So rather difficult to keep the parallel alignment of the three stripes correct while removing the backing foil. But I got them positioned more or less in the correct position in the end (yes not 100% satisfied) ...  

Wednesday 24 May 2017

FHC resto nr. 54; More pedals & boot-lid

Two weeks ago I fitted the throttle pedal to the car. And over the past few days I prepared, assembled and fitted the pedal box and the footrest to the car. All rather straight forward, so nothing much to tell about. Time for a few pictures, the various loose parts ...


The assembled parts ...


And the assembly fitted to the car together with the footrest ...


Together with the pedal box I also reassembled the bootlid's hinges. The two parts they consist of are held together with soft metal rivets. And these rivets have a tendency to wear out after more than 30 years! So I adapted them in the same way as I did when I restored the DHC. Which meant replacing the rivets with bolts, nylon washers and nyloc nuts. And with the hinges fitted to the car I was able to fit the first major part: the boot lid. Though the alignment might need a little adjustment after the seal and lock / striker plate have been fitted ...


Last job of the day was cleaning the original bulkhead insulation pads. Was rather pleased to see that they were totally undamaged. But more on them later. Although the pad for the driver's side can be seen in the picture above. Loosely fitted to car, awaiting newly coated spring clips to hold them in place.

Saturday 20 May 2017

Engine bay DHC finished

With the freshly coated cam cover fitted last week, there was one item remaining to finish the under bonnet area of the DHC. As with the cam cover the car's header tank had also been coated using VHT wrinkle paint. And on the header tank it had faired the same as on the cam cover, it had started to peel off. As it looked after removal from the car ... 


So a spare from the shed had been prepared a few weeks ago. And this weekend I had some spare time to fit it. I rather dreaded this job as it means draining part of the coolant from the engine, which is always messy. But I managed to keep the coolant spillage to a minimum. To start with the coolant level in the system was a bit low. And by slightly undoing the clips from the hose between the header tank and the radiator, I was able to move the header tank to the other side of the bonnet stay, while still being connected to the radiator. This way it was above a drip tray, strategically placed on the chassis beam This enabled me to remove the header tank from the hose and turn the hose upwards without any spills, thus creating a high point. This very effectively prevented the remaining coolant from draining away. Only a few drops of coolant escaped from the radiator side of the hose, while I performed the next stage of the job, fitting the refurbished header tank.


Which was very straightforward. The only (small) issue I encountered was when I wanted to take out the drip tray. Turned out there wasn't enough room to manoeuvre to get it out without spilling the coolant it contained. Luckily easily solved by scoping out the coolant with a small cup.


With the engine bay more or less finished I went for a little experiment, bleeding the brakes by gravity! While replacing the rear brake cylinders I found out that the brake fluid drained very easily from the system when I undid the first pipe. So would it be possible to bleed the system in the same way? Well after undoing the bleed nipple on the back axle nothing happened. Which wasn't much of a surprise. Due to the air in the (narrow) system the resistance is too big for gravity to overcome. But pressing the brake pedal a few times to start the fluid flow did the trick. After a few minutes the first fluid emerged from the bleed nipple. And soon after that there were no more air bubbles coming out. Looks like it is working. But as I don't trust blindly on experiments with the brakes, a traditional bleeding session will be carried out to verify that all the air is out of the system. To be continued.


Sunday 14 May 2017

FHC resto nr. 53; Nearly there ...

No not the restoration, far from that, but from a coating point of view! I have finished sorting through my spare parts and made a selection of the parts that I want to use for this car, and as such need a new coating.
The last items missing were the various parts from the back axle. Since last week that omission has been rectified. It was time to pull two of my spare back axles out of hiding to strip them of all necessary parts.


Only one brake drum put up something resembling a feeble fight. The last one of course! But that was quickly sorted with some penetrating oil and a hammer. But despite that slight set back all parts I needed from these axles were removed and boxed within 30 minutes ...


Only thing left before sending the parts off for coating is one final check to make a stock list and tie the small parts together as much as possible. Always good to have at hand when the parts return in one big heap. The big disadvantage of zinc plating/galvanising, as it is a bulk process.

And as I did have the hang of the rear brakes I used this weekend's fine weather to renew the rear brake cylinders on the DHC. A few weeks ago a check over of the back axle turned up a starting leak on one the cylinders. As they were fitted to the car well before I started its restoration in 2008 I decided to order two new ones. And with Club Triumph's 10 Countries Run just 16 weeks away I thought it better not to take any chances with repair kits.

For the rest it was all pretty straightforward. Safe for a small plug, meant to stop the brake fluid from running out with the brake line disconnected, not fitting! Luckily I had a drip tray at hand, otherwise it would have become rather messy on the drive. And it was the first time I could try this rather handy little tool. Makes fitting the spring clips that hold the cylinders to the back plate the proverbial piece of cake ...


Just need to bleed them, so waiting for brake fluid and an assistant. 

Saturday 13 May 2017

Cam cover DHC finished

Finally got round to fit the reconditioned cam cover to the DHC's engine today. I can hear you ask why it has taken so long. Well simple the sealant I got from a local supplier was incorrect! Usually sealant needs time to cure, but this variant also needs some heat from the engine to cure. Not very useful with a cam cover that is removed from the car. Clearly an alternate heat source was needed, which I found in the shape of the bathroom's central heating radiator. And to be safe I left it there for well over a week. But today it was time to take all the clothes-pegs off and see if the gasket was properly fixed and positioned. It was!


After that it was simply a matter of removing the old cover and cleaning all mating faces, before the new cam cover could be fitted. And to finish the work I fitted two newly covered lifting eyes and a few more rusty bolts were replaced  by stainless ones. And I found a chrome plated oil filler cap between my spare parts. Although I am no fan of chrome plated parts I have to admit that it contrasts nicely with the black finish of the cam cover. So I'll probably stick to it.


After everything had been fitted I turned my attention to the old cam cover I had just removed from the car. It is quite clear that the wrinkle coat finish has seen better days. The coating has come loose from the surface in several places. With a large area on top peeling off.


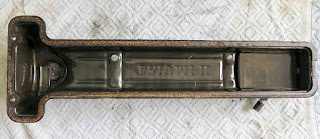
The inside of the old cover didn't reveal any hidden horrors. The gasket was still positioned correctly. But it was interesting to see that along the top the gasket is only touching over half its width ...


Wednesday 10 May 2017

FHC resto nr. 52; The loud pedal

A few weeks ago I was able to pick up the first batch of parts from the coaters. And as I had a few unexpected idle hours today I decided to start with reassembling some of these parts. I choose the easiest part to work on, and the most important one on any car; the throttle pedal. As it looked over two years ago when I started selecting the various parts.


For those not familiar with TR7's throttle pedals; the one for this car is on the left in the picture above. As can be seen it is slightly angled inward. This angle was deleted on later cars together with a redesign of the bulkhead around the throttle pedals mounting point. Will see how it operates ones the cars back on the road!

After cleaning out the threads on the mounting bracket together with the holes for the pivot pin, reassembling everything, including an alloy extension was very straightforward. But the only thing that could go "wrong" did! I managed to fit the small spring washer on the wrong side. But that didn't take more than a few minutes to rectify.


And fitting it to car was even more straightforward. But there was a slight moment, as compared to my other two TR7's the throttle pedal sits much closer to the transmission tunnel. And it looked very much like the alloy extension would touch the tunnel when depressed. But I needn't have worried. Due to the fact that the bulkhead area where the pedal is mounted is angled, it moves away from the transmission tunnel. Well designed!


Wednesday 3 May 2017

More tinkering to the DHC


This was a job I carried out because I am currently cleaning up the engine bay of the DHC. When I restored the car I used VHT wrinkle paint to finish the cam cover, header tank and air filters. And at the time it looked very nice indeed. But time and some hard miles hadn't been kind to it. So when I was sorting the parts that needed coating for the DHC, I added a few items for the DHC. Including a cam cover.


That was how it looked before and this is how it returned from powder coating the previous week .


And with another day of from work I had planned to fit it to the car. But as I don't take much for granted I thought it a good a idea to first check that the cam cover gasket was a proper fit. It wasn't!


As you can see the gasket is too long and the shape behind the sprocket wheel cover is incorrect. So the plan to fit it quickly went out of the window. But not before the gasket was glued to the cam cover with the help of some sticky sealant and a lot of clothespegs. After which it was put aside for the sealant to cure. To be continued!


As the weather was rather quiet (with little wind) I used the remaining time to get same paint to a set of header tanks. These were also sent of for coating, one for the FHC and the other to match the freshly coated cam cover for the DHC. But due to the fact that these are soldered they didn't dare powder coat them. As they were afraid that the heat needed or the coating (±180°C) would melt the soft solder. But they were lightly shot blasted though ...


Which should give a good base for a more traditional treatment with some rattle cans!