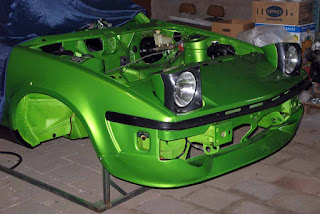
Sunday 28 February 2010

DHC report nr. 76; Fitting sub frame

Over the weekend I have been working on the car’s front suspension. Last week I fitted the front struts, so the natural thing to do was to fit the sub frame next. Which I did. Despite it not being particularly difficult to assemble, it put up a fight right from the start. Every imaginable thing to go wrong, did go wrong. Very frustrating, but probably most frustrating was the fact that I had to drive home twice to collect parts which I forgot to take with me. But after a few fairly frustrating hours the sub frame assembly was ready for mounting under the car.


I had hoped that this would be easy, which it was ... in the end. Plan was to put the sub frame on the trolley jack;


And position it underneath the car, raise it so I could connect the TCA’s to the struts, raise it a little further to fit the sub frame’s front bolts. And after that raise it even further to fit the rear bolts. And that’s where it went wrong again. Normally this should have worked, but as there’s no engine and interior in the car yet, it is still rather light weight. As a result of this instead of raising the sub frame to the car I raised the whole car, not good. I did try various option but in the end the only solution was slacken the front sub frame bolts as far as they go, and disconnect the TCA’s from the struts. After this fitting the sub frame was easy!


Remained the TCA’s; with a second pair of hands (thx Herbert), a very long and sturdy bar plus some brute force, they were rather quickly re-fitted to the struts.


As it was now well into the Sunday afternoon, I tidied up a bit, switched of the lights and went home ...

Wednesday 24 February 2010

DHC report nr. 75; Refitting rear bumper

When I fitted the rear bumper at the end of last year I found out that, while the left hand side aligned perfectly;


But the right hand side didn’t;


It’s clearly visible that this side was hanging down. This was caused by the fact that the bumpers’ RH mounting holes were placed slightly lower than the ones on the other side (Leylands tolerances ...). The lower edge of the bumper on the LH side was sitting snugly against the underside of the rear chassis beam. But on the RH side there was a gap of a few millimetres, so there should be room for some improvement. At the time (last day of the year) I couldn’t be bothered to refit it. I just made a mental note that I had to take it off in the not too far future, and see if I could get the alignment any better.
And this evening I gave it a try. With the bumper removed I enlarged the holes upwards a bit. With the correct tools (thx Rob) that only took a few minutes!


Looks a bit of a mess, as the grinding tool was rather efficient. But with a fair amount of wax-oil the tin worm will be kept at bay. With the holes enlarged the bumper could be refitted. Looks much better now with the top of the bumpers on both sides aligning pretty nicely with the top of the rear valances.


RH side is still not perfect but getting it any better means cutting away part of the lower lip of the mounting face on the chassis beam. Which I won’t as it is now much better as it left the factory.

Sunday 21 February 2010

DHC report nr. 74; More messing about


Looking back over the past week it seems to me that progress, despite having a week’s holiday, has been slack. This is mainly caused by the fact that I had to change my plans. As a result of the cold weather I can’t continue with the interior, so to keep some progress I have decide to switch to the suspension. First job to do was put the axle on some stands outside the workshop and strip it of its coating.


For this I used a trusty old angle grinder with a steel wire brush;


And because it is a rather dirty and noisy job some personal protection was needed.


Needless to say that when I was trying to get the old paint and road grime of the axle, outside the workshop, the sun was shining happily, raising the temperature to nearly 10ºC. Which is rather warm when you are fully wrapped up in protective gear. But got most of it of in the end. As can be seen some small patches of the original coating remain, but most of these were also removed, just took the pictures in between a change of brushes. The old one was at that stage so worn that it didn’t reach into the nooks and crannies.


It is obvious that this axle casing is in pretty good condition. No corrosion anywhere or visible damage to the welding. This combined with the fact that the innards are also pretty sound, prompted me to only coat it, and not touch the inside, just new gaskets and new oil.

After the noisy stuff it was time for a few relaxing hours with the paint brush. For the coating I used smooth black Hammerite, mainly because I have had pretty good experience with it over the years. Have heard some negative reports, but I think that has probably more to do with the fact that it wasn’t applied properly. At least it looks good at the moment. Not completely ready, still need to do the inside of the lower brackets  and the alloy nose cover. These were partially inaccessible due to the supports.


With the axle almost sorted I wax-oiled the inside of the doors in preparation for their reassembly. Despite the still coldish weather, even after a few days there’s still wax-oil dripping out!


Same will probably be the case with the sub frame, which also got a liberal dose of the greasy stuff.


And with the messy stuff done it was time for some cleaner jobs. First with the help of René and a hydraulic lift I removed the frame, on which the car was resting, and put it on axle stands. Had to do this because the frame was fixed to the lower suspension points at the rear and two of the sub frame mounting points at the front. Not very helpful if you want to fit the suspension!

With the car on axle stands it was time to start on the suspension parts. Most of these were done last year so I only had to go through the various boxes to get all the suspension related parts together. After which I spent a few hours on the front TCA’s. These had also been powder coated, as a result of which the ball joints wouldn’t go in without some extreme force. But after an hour with some coarse sand paper this was solved. So they could join the rest of the suspension parts in the cupboard;


To make room in the cupboard the front struts needed another storage place, so I fitted them to the car;


It slowly but surely starts to look more like a car again 😎


Wednesday 17 February 2010

DHC report nr. 73; Tidying up loose ends

With the headlights fitted, the carnival over and still freezing, I really didn’t much fancy going over to the shed today. But not going means no progress so I put on some warm clothes again and spent a few hours on several smaller jobs.

I started with the headlights, these had to be connected to the cars wiring loom. As I hadn’t fitted the connectors for the light units yet, getting the wiring in place turned out fairly straightforward. Due to the cold the wiring is rather stiff but this actually helped with putting them through the various openings. So with all the wires inside the engine bay, it was time to fit the missing connector blocks. Should have been easy as I had all the bits properly marked. But while putting the second wire in (blue/white) it slipped out of my hand. I “followed” it while it flipped away, picking up the end immediately and putting it in the connector block. Shouldn’t have done it ... got the wrong wire and of course I noticed it too late! To cut a long story short, I had to pull it out using brute force. Hopefully nothing is damaged inside the cable, at least no visible damage. After that all the rest went in without problems, forewarned is forearmed!


To finish the work in the nose area I fitted a pair of new horns, which I purchased locally. Just to be safe I made two extra earth wires which I connected to the earth points behind the headlight panel. Wonder how they’ll sound as they should be fairly loud!


As it was still fairly early in the afternoon I decided to fit a new hose between the screen washer bottle and pump and drop the wiper mechanism in place. This decision was prompted by the fact that the blanking plate for the cavity above the brake cylinder was still lying around on the car. Thought it would be rather easy to drop the mechanism in place, but it turned out to have a mind of its own. And just when I was getting rather fed up with it, Robbie walked into the shed to see how I got on! We agreed that it would be best for me to call it a day and go home. But when I picked up the mechanism to put it back in the cupboard I thought it a good idea to give it one last try. Guess what, it just slipped in place without any problem.


This enabled me to fit the blanking plate at last.


As I have a week off from work will probably go over to the shed tomorrow to clean the back axle in preparation for painting. I already dismantled it a few days ago;


Saturday 13 February 2010

DHC report nr. 72; Fitting headlights

Usually I don’t mind a bit of winter conditions but I am slowly getting fed up with the weather. It’s been freezing for some 2 months by now, as a result of which progress on the car has been slow to say the least. But as sitting at home doesn’t help much with progress, I went over to the shed this afternoon to brave the cold for a few hours.

As it is still far too cold to use glue (for carpets and certain trim pieces) I decided to fit the headlights instead. Last time I fitted these to a car (actually ‘t Kreng way back in 1996) I fitted these as complete assemblies, so with the pods and light units fitted. This didn’t work to well, making it rather difficult to align the pods properly. So this time I choose to fit the bare mechanism first, followed by the empty headlamp pods;


With all mounting nuts and bolts tightened by hand it was possible to move all parts about, till a more or less decent fit of the lamp pods inside the front panel was achieved;


And after tightening up the various nuts and bolts it was only a matter of fitting the light units and finish them off with the black rubber bezels. Slowly starting to look like a TR7 again;


Next job will probably be connecting up the headlight units’ wiring and fit the wiper motor. Or maybe start on the suspension bits? It all depends on how the weather is going to develop the coming week.


Monday 8 February 2010

DHC report nr. 71; wiring and piping

The title of my last update on the DHC ‘s progress was a bit premature, it’s still rather wintery over here although the snow has vanished now. But it is freezing again, and if I have to believe the weather forecast, we are getting another spell of frost the next days. As a result of this work on the car has been rather slack to say the least. But last week we had a few rather nice days. Even got the opportunity to work in the shed with the gate open to the sun this Saturday. Although it still was fairly cold I managed to get a few important items sorted on the car. Started with fitting the main wiring loom to the front of the car, and I came fully prepared, mentally that is! Fitting the rear loom had been rather difficult due to the low temperatures, so I expected the front loom to put up a fight too. Luckily it turned out to be rather straightforward, only need a few lengths of string, some tape and two long cable ties;


I had to be a little bit extra careful because the loom was pretty stiff, but it went in without too many problems. Only had to pull it back partially once before I had the loom in position inside the front wing;


After which I needed to pull the remaining part of the loom across the front panel of the car to the LH light position. Although there isn’t much room for a cold loom with connectors fitted it didn’t take more than a few minutes to get it in place;


And connect up the first item at the front of the car;


Just to be on the safe side I haven’t tightened the cable ties fully so I can reshuffle the loom a bit if necessary and temperatures allow! And I found out that this may be necessary as the cables/connectors for the screen washer pump seem to be a little bit on the short side;


Something to sort next week when, due to the carnival, I have a week off from work.

Last Saturday I went over to get the brake lines etc. fitted. As mentioned earlier I made up some new brake pipes to replace those that had dubious fittings. The ones that are being re-used were cleaned and polished over the past week. So with new clips in place I could fit the brake lines;


After which it was time to fit a new brake proportioning valve;


And the clutch and brake cylinder;


The brake cylinder was fitted new to ‘t Kreng quite a few years ago, but was removed after approximately 10.000 miles, when I uprated the front brakes. It has been stored (well wrapped up) ever since. The clutch cylinder was rebuilt just under three years ago, so both should be alright for the time being.


To finish of a good afternoons work I refitted the braided brake hoses;